

If you've had a website for any period of time, you'll know that issues happen. A lot of the time, you're not even around to notice them, but you can be certain that your customers or readers will. To make sure that doesn't happen, we'll be showing you how to make a Discord Webhook that will message you whenever a website experiences an issue.
What is a Discord Webhook?
Discord webhooks are a feature built into the messaging and voice application that make it easy to receive automated messages in a channel in your server. They create an endpoint in your server and provide a link that you easily drop into another server or script to link the two.
Prerequisites
You can take advantage of Discord webhooks to check on your personal website, or even an external website if you wish. All it requires is a simple script and the following pre-requisites:
- A VPS server. You can sign up to BitLaunch if you don't have one. We'll be using Ubuntu 20.04.
- A website to monitor – if you have a personal website, this will be easier, as you will be able to test if the webhook is working
- A Discord account and PC or mobile device to access it from
Step 1 – Making a Discord Webhook
Before you do anything else, you'll want to create a new server that will recieve your notifications.
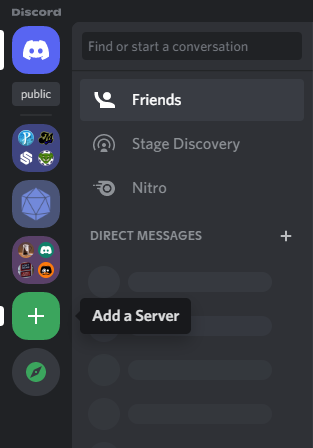
In the Discord desktop or web app, press the + button to add a server.
Follow the server setup process, naming it something like "Website status" before clicking Create.

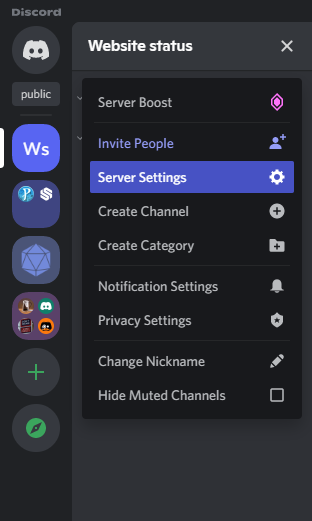
In your new server, press the dropdown arrow next to its name and click Server Settings.
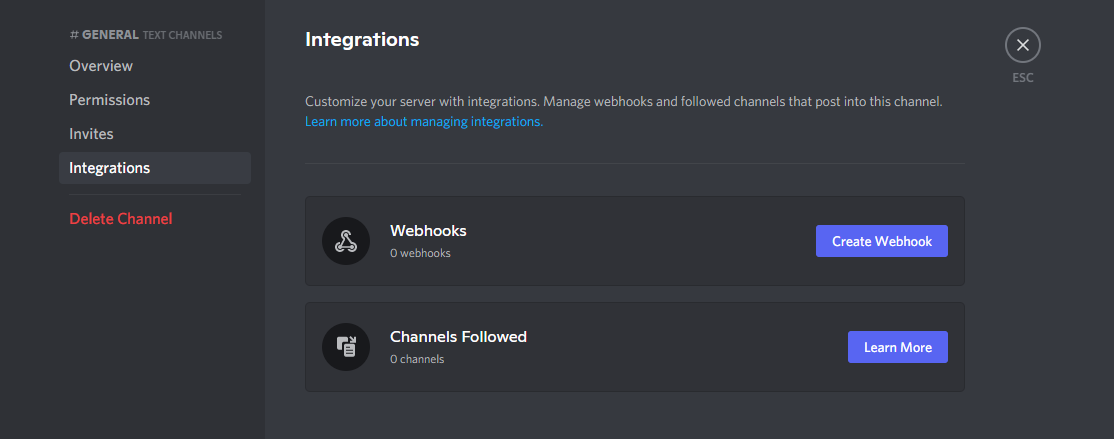
In the Integrations tab, press Create Webhook.
Give your new Discord Webhook bot a name, in our case "Website checker", and press Copy Webhook URL.

Save your webhook URL in a text file for later use and press Save at the bottom of the screen.
Step 2 – Creating the monitoring script
Now that we have our webhook, we can create the script that will interact with it. Creating a script to check a website's status is relatively easy and can be performed with a variety of programming languages. In this tutorial, though, we'll be using bash, as it's simple, approachable, and works out of the box with an Ubuntu server.
Connect to your VPS via SSH and create a new script in your home directory with:
nano ~/status_checker.shPaste the following script into your document, maki ng sure to change the values before the =:
#!/bin/bash

webhook_url="https://discord.com/api/webhooks/yoururl"
#Replace the URL above with your Discord Webhook link
websites_list="yourwebsite.com"
#Switch yourwebsite.com with the website you'd like to monitor. You can add additional domains by adding a space followed by the URL.

#==================================================================================================================================

#This is the main loop of our script
for website in ${websites_list}; do
#for each website in our websites list, do the following:
        status_code=$(curl --write-out %{http_code} --silent --output /dev/null -L ${website})
#Get the status code of the website, but don't display the result
    if [[ "$status_code" -ne 200 ]] ; then
    #If the website status code is not equal to 200, then output the following to our webhook URL:
        curl -H "Content-Type: application/json" -X POST -d '{"content":"'"${website} is experiencing an issue. Error code: ${status_code}"'"}'  $webhook_url
    else
    #Otherwise, output:
        echo "${website} is up!"
    fi
done
Check if the script is working by running the script:
bash status_checker.shIf your website is up, it should return the output:
website.com is up!Step 3 – Testing the script with Discord
If you paid attention to the code, you'll notice that our script only sends output to our Discord Webhook if the status code of the website isn't 200 (ie. has no issues). This is by design – you don't want the script to keep spamming your server if the website is perfectly healthy. However, it does mean that we'll need to break the website temporarily if we want to test the functionality.
An easy way to do this is to change the permissions of the site so the web server cannot access it. If you're running a one-click WordPress installation on BitLaunch, for example, you can rename your var/www/html folder:
mv /var/www/html /var/www/old.htmlWe can check the status again and keep an eye on our Discord server for a notification:
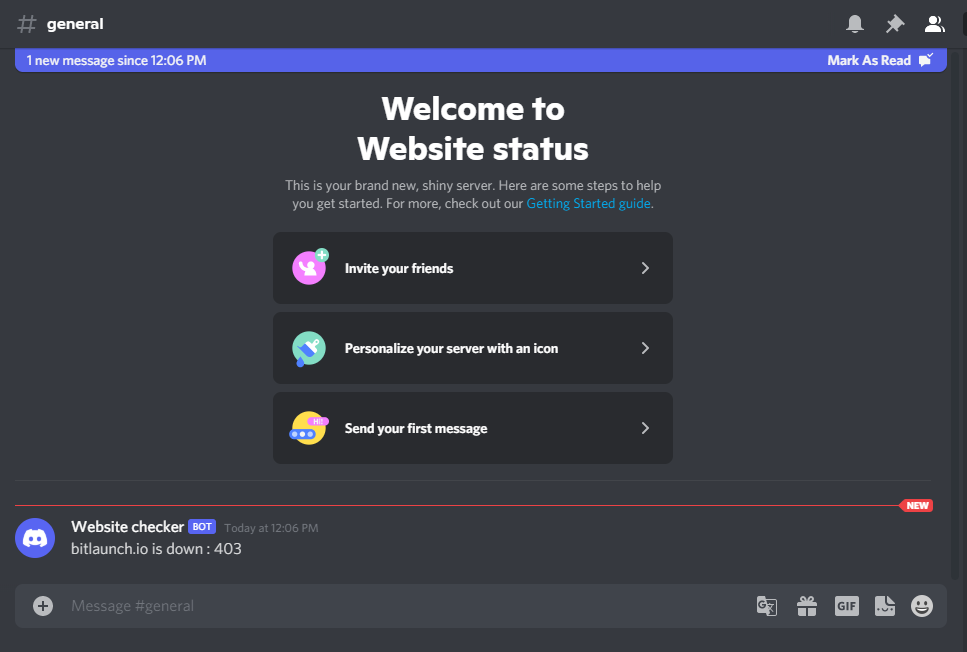
bash status_checker.shbablonk - You should have received a notification like this in your server:
bitlaunch.io is down: 404You can rename it back with:
mv /var/www/old.html /var/www/html If your website host doesn't allow you to modify your website's permissions or take the website down in some other way, you have a couple of options. You can spin up a quick BitLaunch server with a test website, or simply wait and pray.
Step 4 – Automate the process
Now that we can trigger our notifications manually, it's time to automate. After all, we don't need a script to manually check our website status – you can just visit the page for that. Instead, we want our server to automatically check the site every so often and let us know if it's not responding properly.
On Ubuntu 20.04, the easiest way to do this is probably a cron job. First, though, we need to make it so our script is executable:
chmod u+x status_checker.shNow let's open your crontab file:
crontab -eTo add an entry to your crontab that runs our script every 10 minutes, paste the following:
*/10 * * * * /home/your_user/status_checker.shYou can switch 10 for another number if you'd like to check more or less often. */5 * * * * would check every five minutes, for example. You can also use @hourly for an hourly check and @daily for a daily one.
Make sure you replace your_user with your username and save your crontab by pressing Ctrl + O and Ctrl +X. Test everything one last time by taking your website down and waiting a few minutes.
If your cronjob is still not working, you can check the error log with:
grep CRON /var/log/syslogAlso, check your script to ensure your webhook URL is correct and there are no other mistakes.