

Feel free to sign up to BitLaunch for use in this PuTTy VPS tutorial.
When connecting to your Linux-based VPS from a Windows system, the most common way of doing that is via SSH, using PuTTY. PuTTY is a free utility that will allow command-line access to your server.
 BitLaunch
PuTTY installation
To get PuTTY working requires a small amount of configuration. First, if you have not done so already, you will want to download PuTTY.
You'll need too choose the appropriate *.msi installation file for your system while doing so. If you are unsure of whether you are running a 32-bit or 64-bit system, you can check by right-clicking on the Windows Start menu and choosing “System”. You will be provided all the necessary information. If you are still unsure, you can always choose the 32-bit version; it should run without trouble on either system.
Once you have downloaded the appropriate file, double-click on the installation icon, and run the Windows installer. After it has finished being installed, start up PuTTY.
Connect to a VPS with PuTTy via Password
After opening PuTTY, you should see a screen that looks something like this:
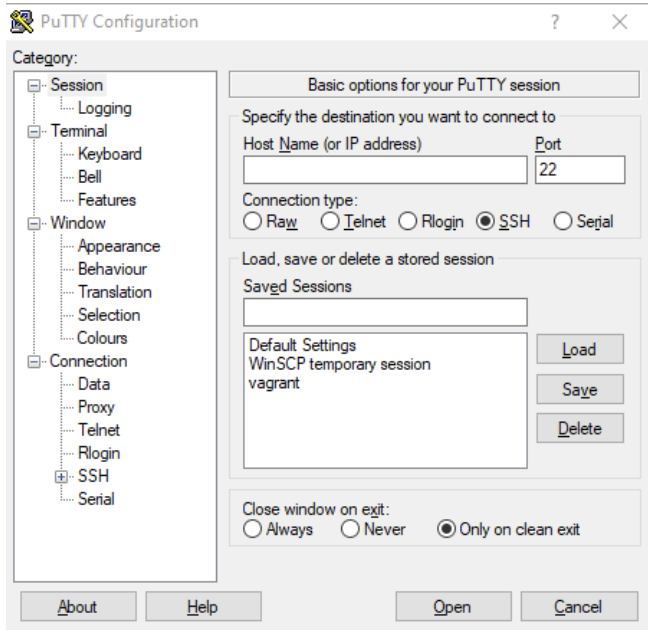
In the field labeled Host Name (or IP address), enter the IP address or hostname of your PuTTy compatible VPS, like so:
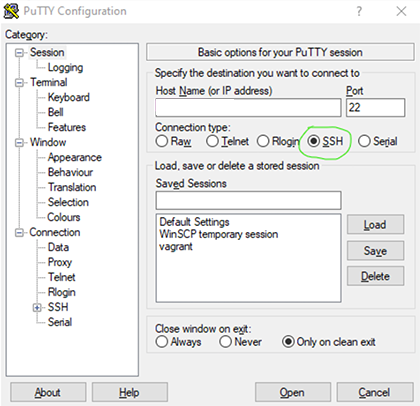
Verify that PuTTy SSH has been chosen. You'll also want to verify your SSH settings, so on the left menu, under “Connection,” click on “SSH” and you will see this screen:
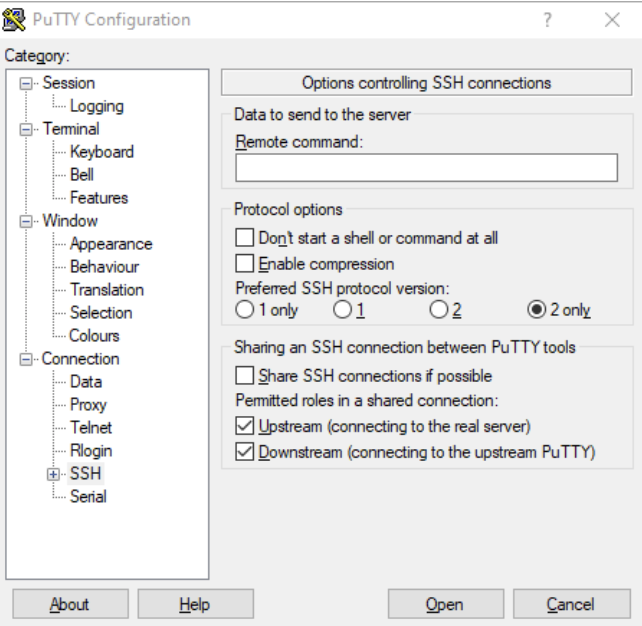
Under “Preferred SSH protocol version” make sure you check “2” (“1” is an older and less secure version of SSH).
At this point, you can open your SSH window, by clicking “Open.”
You will be shown a terminal window. Enter your login name, and password.
It is important to note that you will not be able to paste in your password; you must type it manually. Also, unlike in Windows systems, you will not see evidence of your typing, the screen will remain blank as you enter it. Passwords in Linux are case sensitive so you must type it exactly.
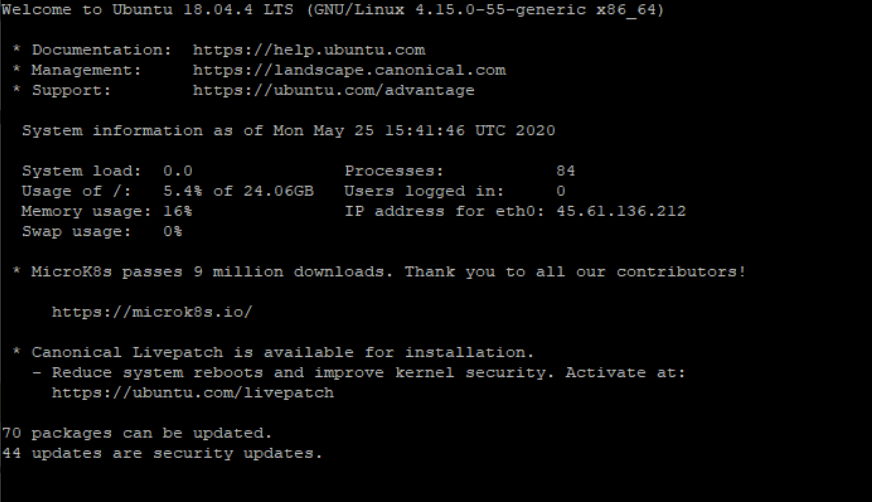
Once you have successfully logged in, you should get a screen that looks something like this:
Connecting to a VPS with PuTTy Using an SSH Key
If you need to connect to your VPS using an SSH key pair, you will need to follow the following steps:
BitLaunch
Storing a Public Key
If you need to configure your system to be able to take an SSH key, you will want to place a copy of your public key into the ~/.ssh/authorized_keys file on the server.
First log into your SSH account using the password method, and then navigate to ~/.ssh directory.
You can do this by typing:
cd ~/.ssh
You can verify that the authorized_keys file exists by typing ls
To edit the file, type the following command to open it up in the vi editor:
vi authorized_keys
Copy the public key, either from where you have saved it or from PuTTYgen, and paste it into vi, like so:
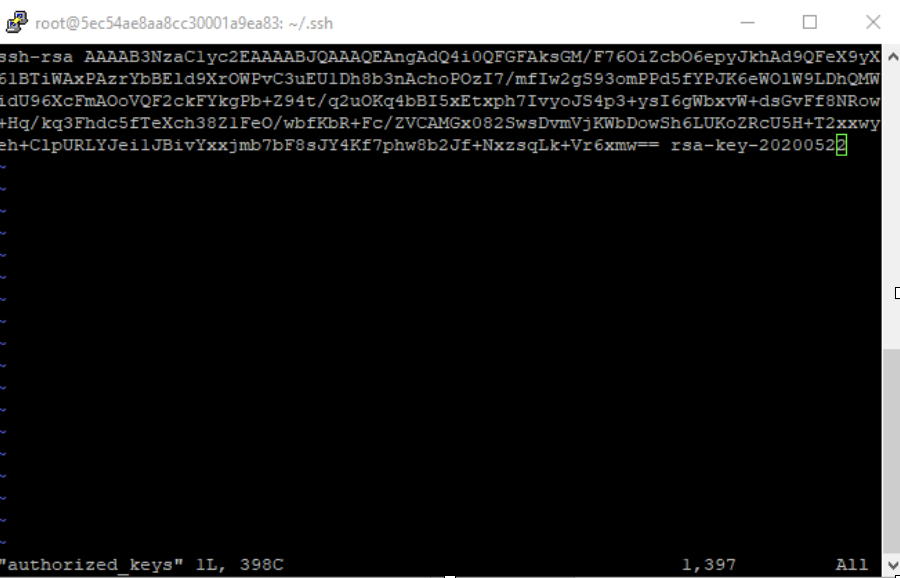
Save and quit the file by typing :wq and then hit the return key
Configuring the Private Key
Open Putty and enter your IP address or hostname as is specified above. Navigate on the left hand menu to “Connection -> SSH -> Auth” to get to this screen:
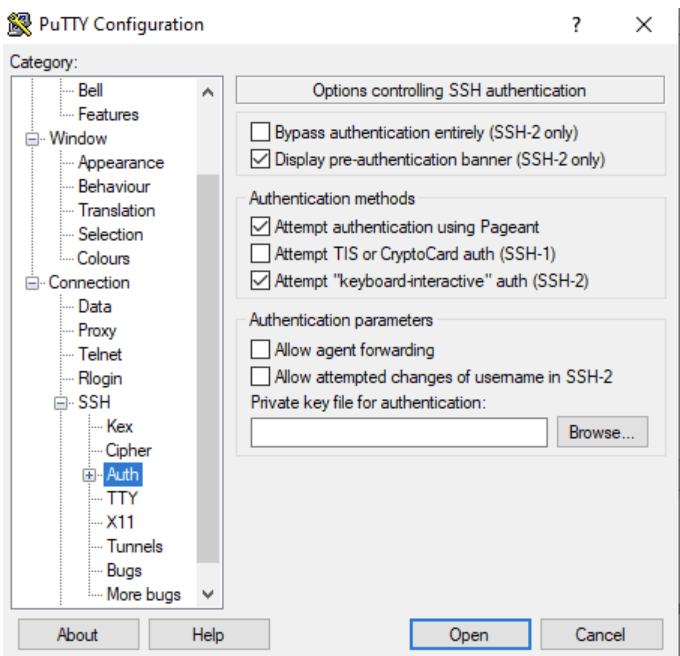
Click on “Browse” and navigate to find your stored *.ppk key file, and click “Open.”
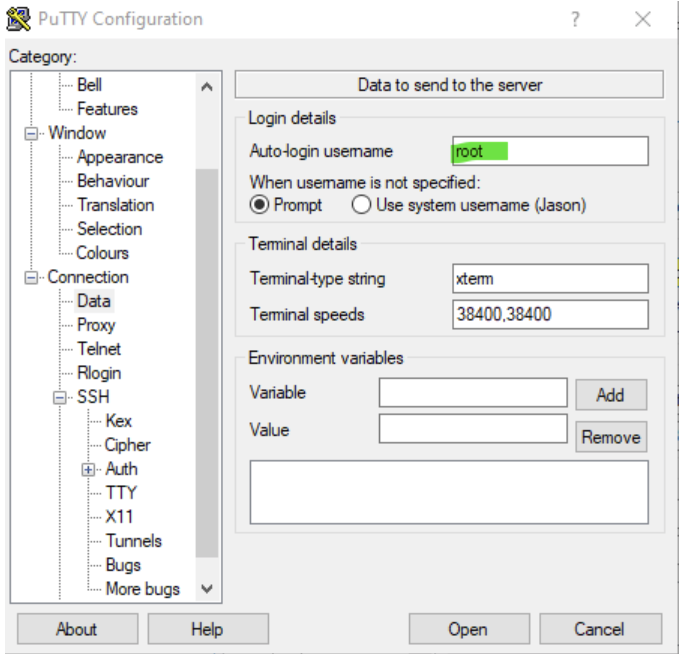
Next, under “Connection -> Data” under “Login Details,” enter your Auto-login username
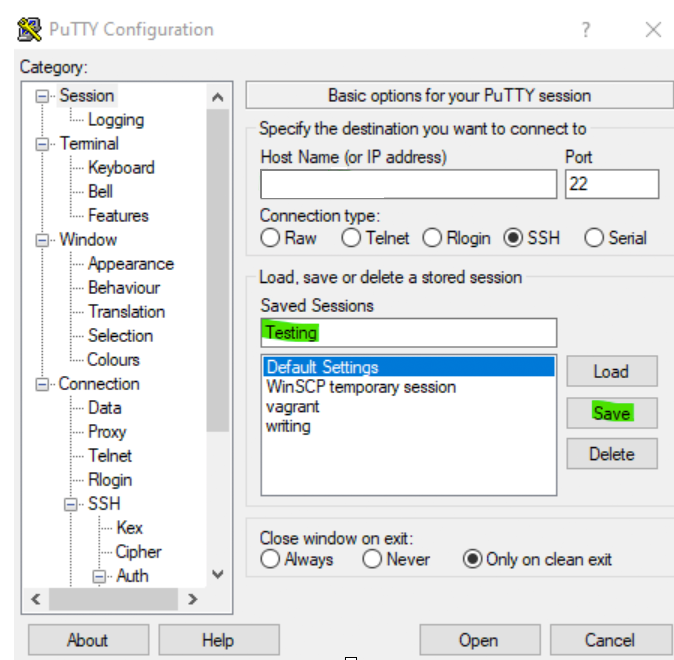
Go back to the Settings screen, enter your IP address, create a name under “Saved Sessions” and then click “Save”
Now when you connect to the VPS with PuTTy, you will automatically be logged in as root, and PuTTY will prompt you for the passphrase that you created when creating your private key (of if you used no passphrase when creating your key, you will be automatically connected).
Summary
You now have successfully logged into your SSH account using PuTTY, and set it up to successfully connect via a secure SSH key pair. For future logins, you will only need to double-click on the saved session you created, enter your passphrase, and you are now securely connected.