

Sign up for BitLaunch today and create a VPS server for use in this PuTTY SSH key tutorial.
What is an SSH Key?
An SSH key is a credentialing system using the Secure Shell (SSH) Protocol. We use it very much like the way we use usernames and passwords.
While perhaps not as convenient (you need to have them stored on a specific device to work), they are much more difficult to hack than passwords, as they can be up to 4096 bits in length, making them immune from most brute force attacks. Also, unlike passwords, SSH keys are not sent to the server, which means that you are less vulnerable if the server itself gets hacked.
Getting PuTTY
The PuTTY SSH key utility is easy to use and free, which makes generating keys a simple process.
To get started, you will want to download this free utility from the PuTTY website. For Windows users, you will wish to download the MSI file that is appropriate for your system (32 or 64 bit).
Note: you can run either version on a 64 bit machine, so if you are unsure what system you are using, you can go ahead and use the 32 bit version; it should work fine.
Install the file by double clicking on the download and running the Windows installer.
After you have successfully installed PuTTY, to generate the key, find the PuTTYgen program from the Start menu. If you type “puttygen” after tapping the Windows key, you should find it.
When you first open the PuTTy SSH key utility, it will look something like this:
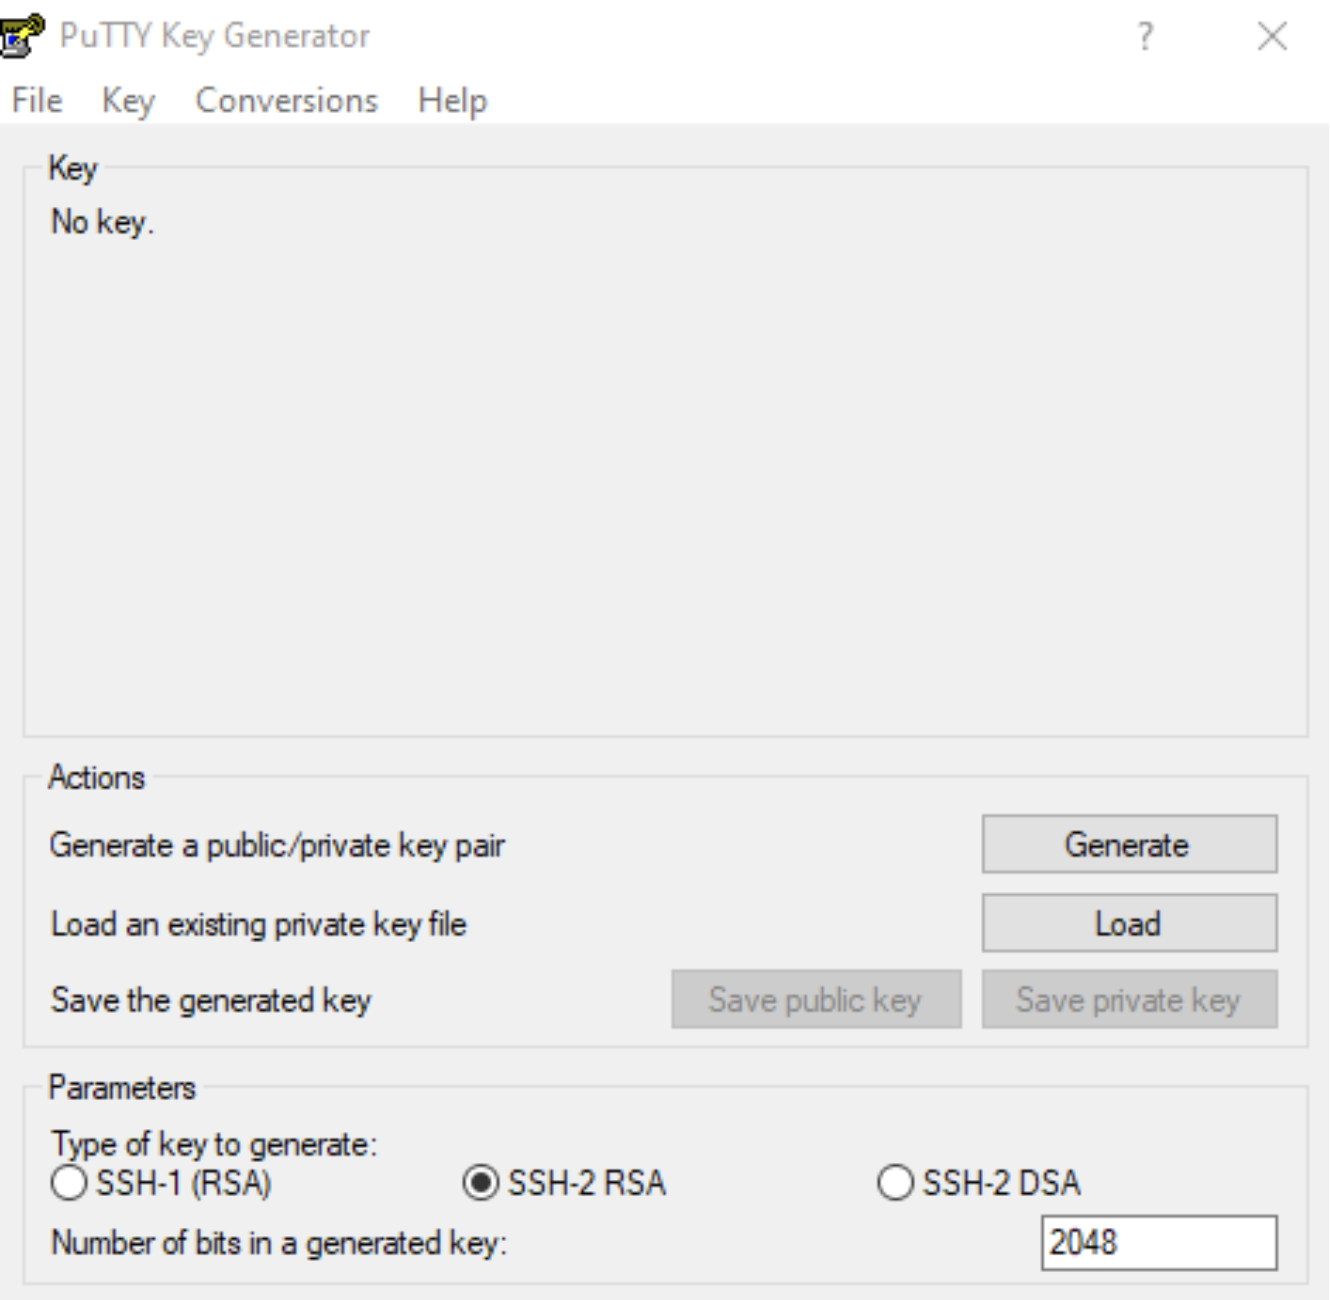
Parameters
The Parameters section at the bottom of the screen will allow you to choose which type of key to generate. Make sure you know which SSH key protocol is required; SSH-1 only supports RSA, whereas SSH-2 will support either RSA or DSA. If the systems you are using require DSA, you must choose this option. However, it is recommended that you choose RSA because it is far more secure. RSA is the recommended choice in most cases.
How to Generate an SSH Key with PuTTy
To use PuTTy to generate an SSH key create a key, click on “Generate” in the “Actions” section of the screen. You will receive a message instructing you to move your mouse around a bit on the screen to help create action to help randomize the key that is being created, like so:
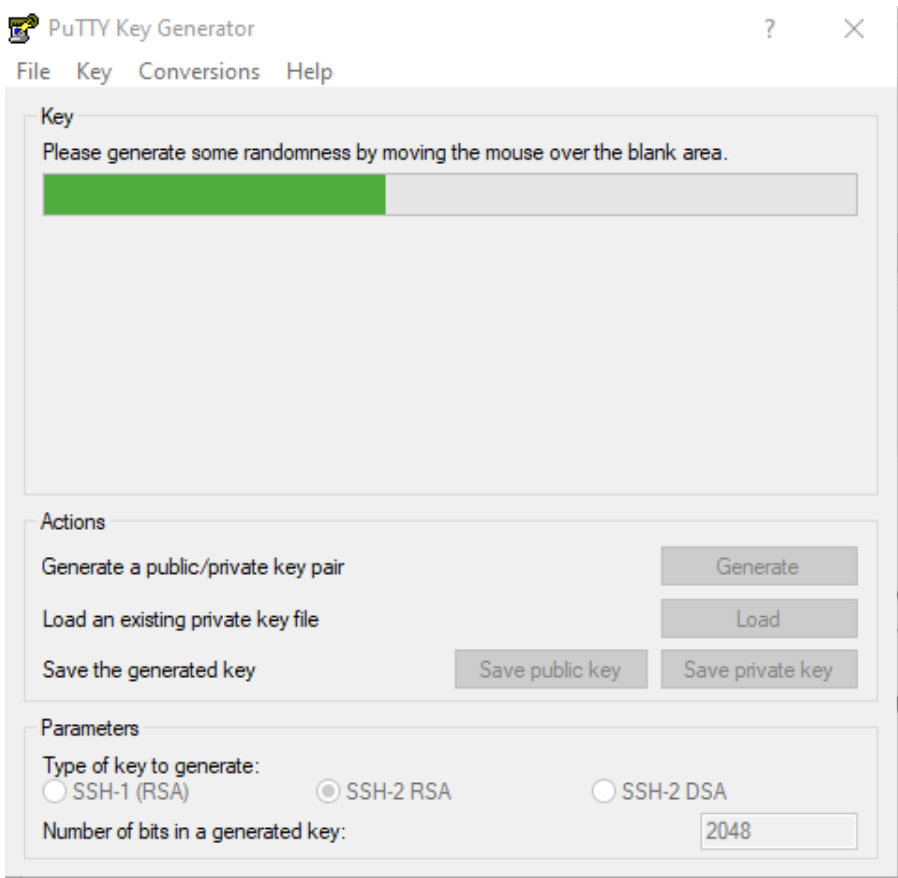
Do this until the key has been generated. When it is complete, you will be shown a screen that looks something like this:
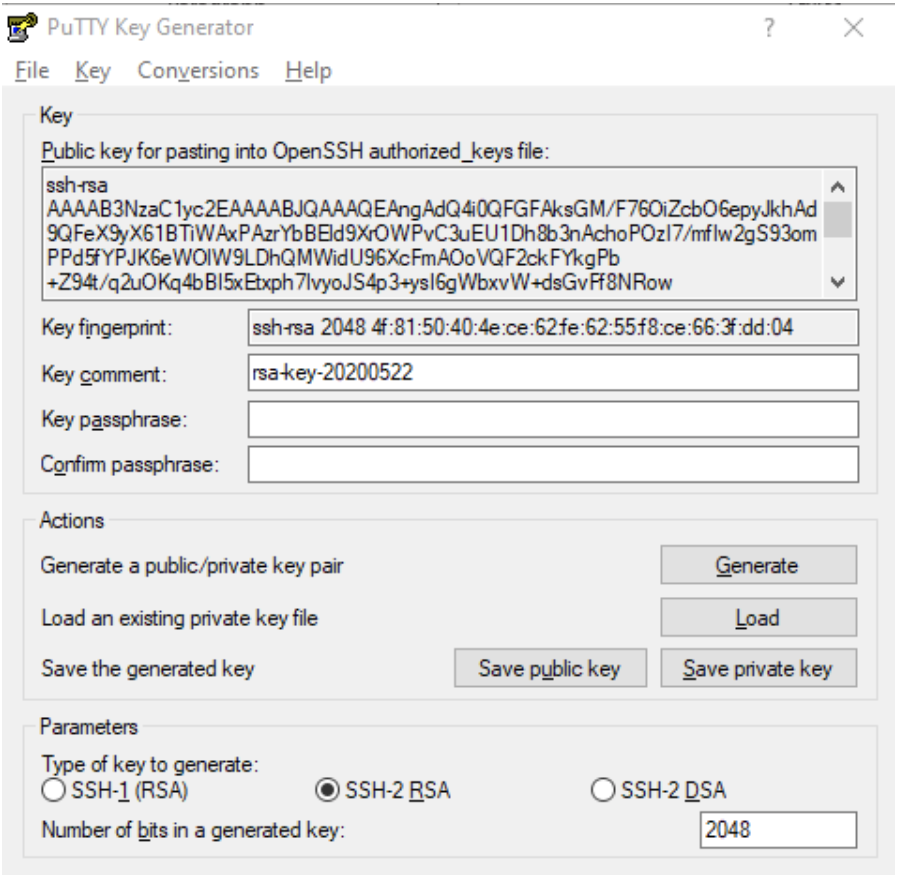
You can now see a copy of the public SSH key which can be copied for pasting into an OpenSSH authorized key file. You may wish to make a copy of this.
At this point, you will wish to create a passphrase to protect your key. While this is not required, it is recommended. Pick something that you will remember, but sufficiently long enough to prevent it from being detected by a computer using a brute force method of guessing your password. (Read this entertaining cartoon to learn how to come up with a good passphrase).
Next, click on “Save private key,” give it a name, and PuTTYgen will save it in a *.ppk format.
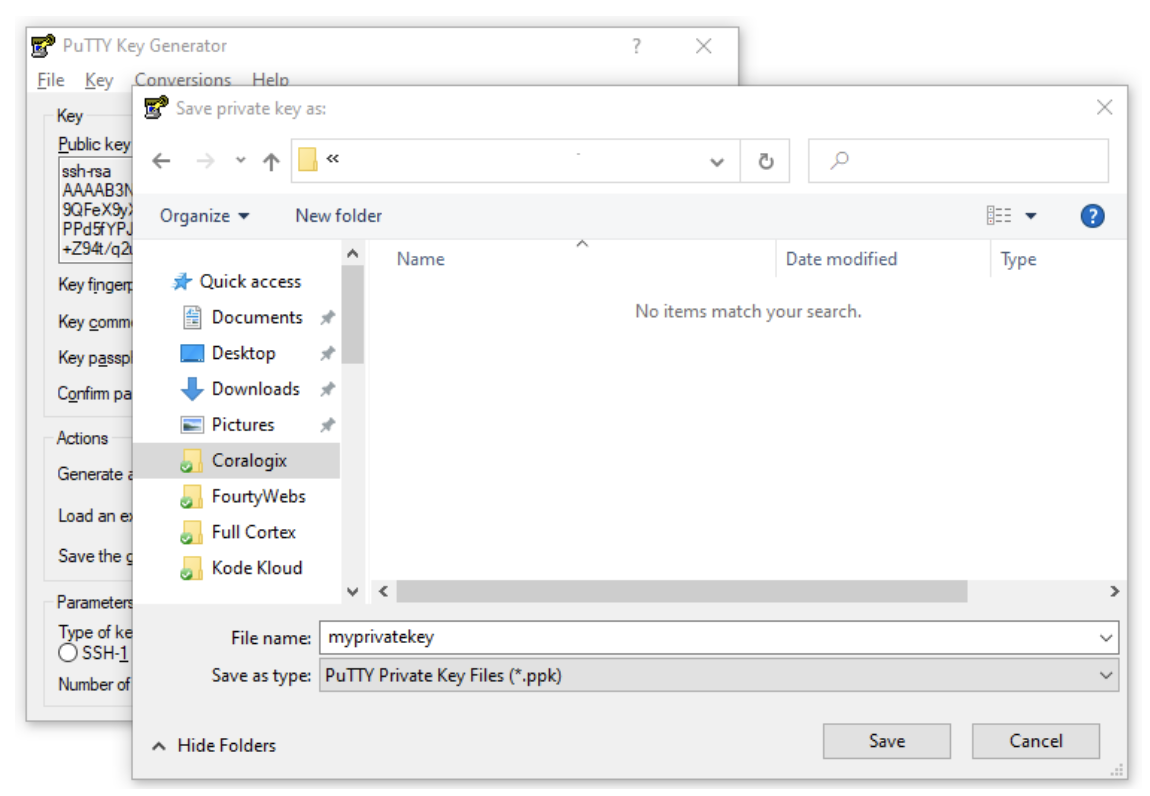
You now have a copy of your private SSH key which can be used for authentication on many SSH systems.
Public Key
You also have the option to save a copy of the public key, however it is important to be aware that PuTTY will save it in a format that is not compatible for OpenSSH on most Linux servers.
As a result, the easiest way to get your public key again, is to click on “Load” (next to “Load an existing key file”) and browse to find an existing private key. You will then be prompted to enter the passphrase that you created, like so:
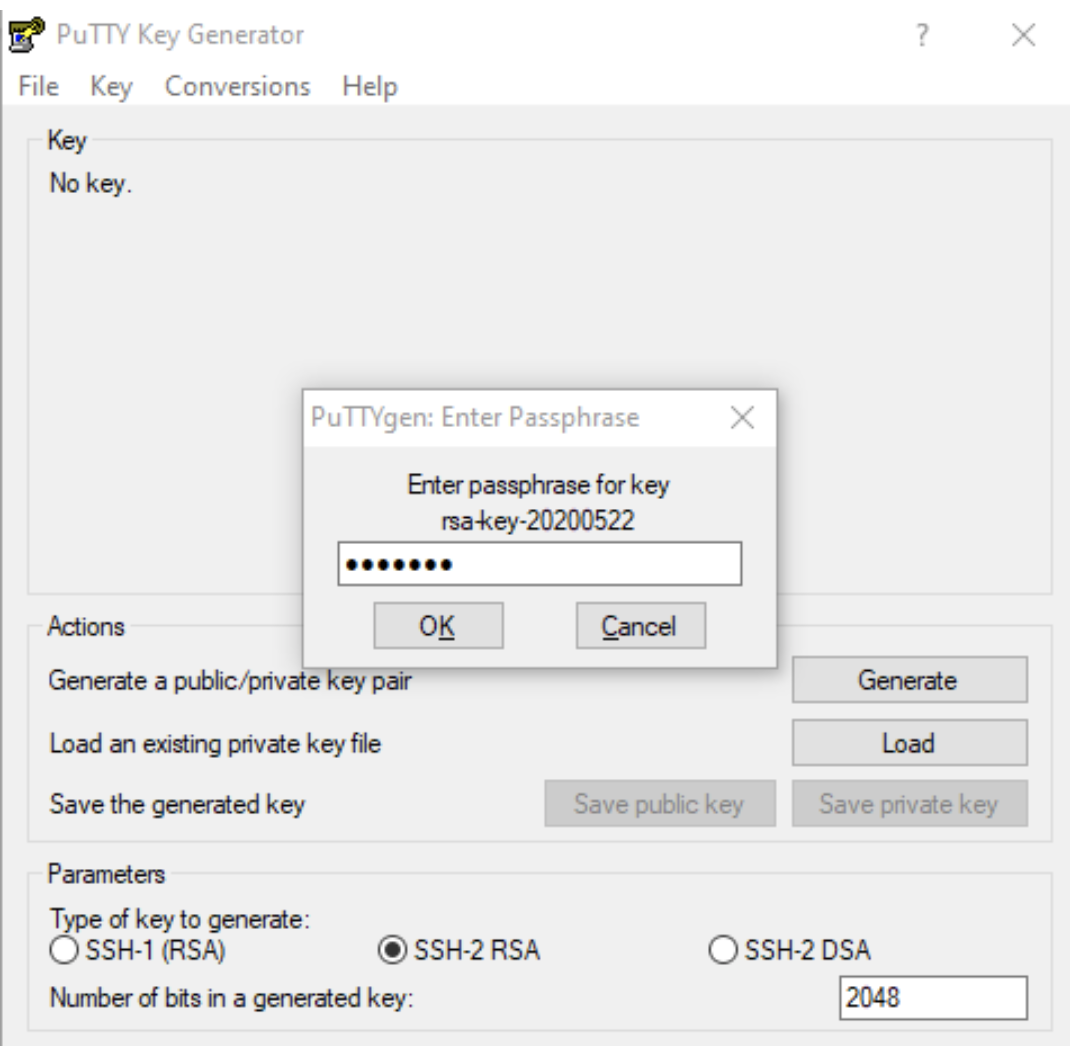
And it will bring up the public key again which you can copy and paste for your purposes.
Summary
You have now successfully created a private and public key pair which you can use for a wide range or purposes. For security reasons, it is recommended that you create a separate keypair for each application you intend to use. This is particularly true with DSA, which has some built-in security vulnerabilities.