
Sign up for BitLaunch and get a Windows VPS up and running in minutes.
Connecting to a Windows VPS (Virtual Private Server) using Windows’ own Remote Desktop Protocol (RDP) is relatively simple. This functionality to remotely connect to another computer is embedded into Windows Operating Systems.
 BitLaunch
Connecting to a Windows VPS is similar to connecting to any other Windows device. If you are familiar with the Windows interface, you should have little trouble with a VPS running Windows.
Setting Up
Although BitLaunch servers are already setup to accept Windows RDP connections, the process to allow an existing Windows server to open up RDP connections is still useful knowledge. You can skip to the section labelled "Connecting" if you have created a BitLaunch Windows VPS.
There are some small prerequisites for being able to connect to Windows using RDP. Namely, you need to make sure that your system is set up to allow remote access.
It may be set up this way by default, however sometimes other software may turn it off, so before you start, you will want to ensure the settings are correct.
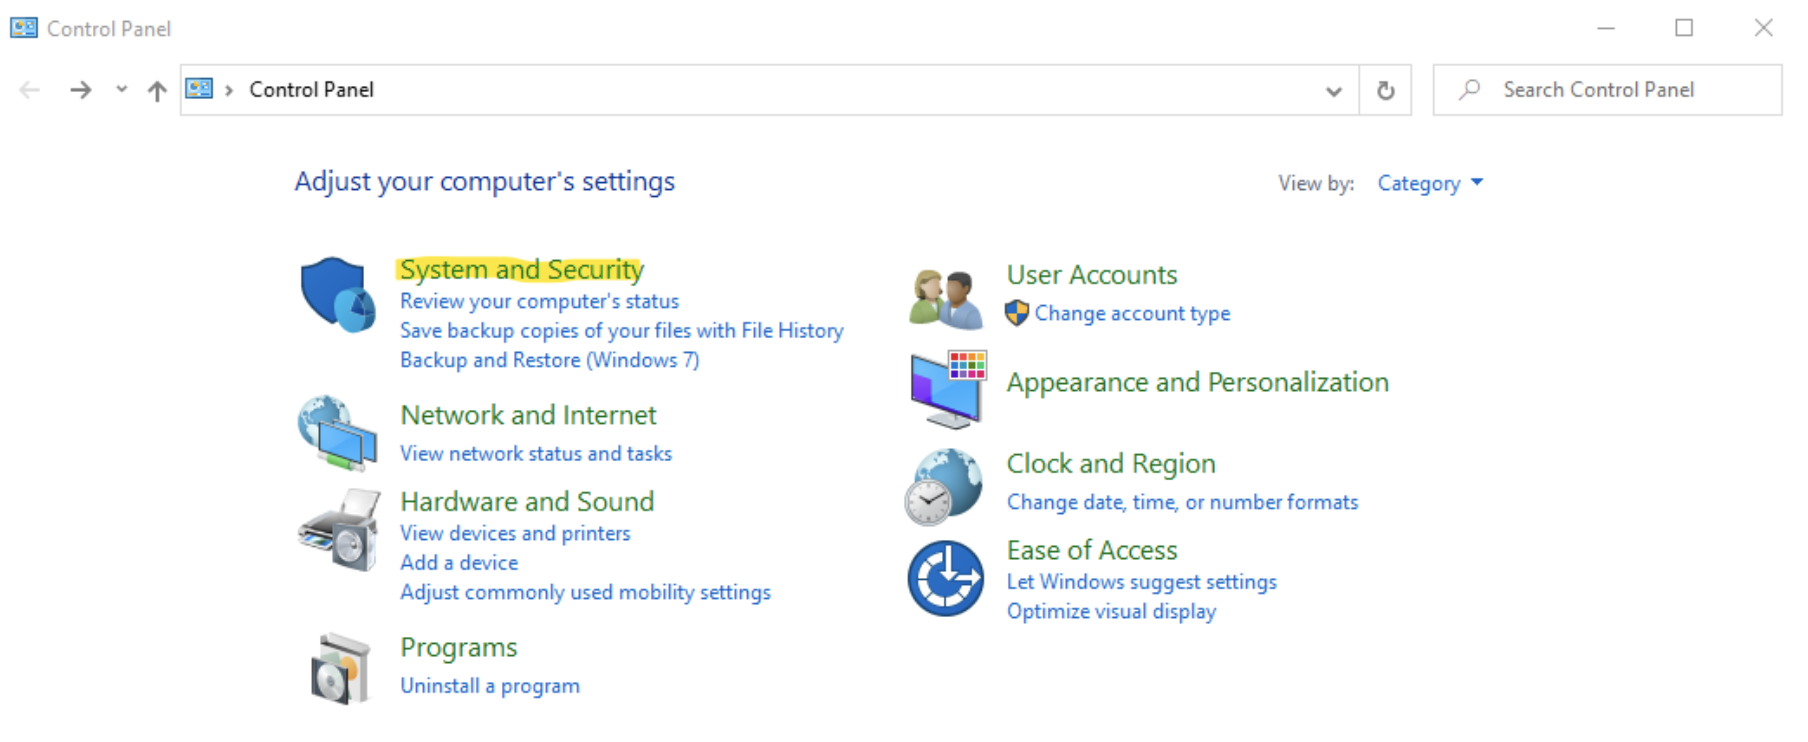
First go to the Control Panel on your computer. In Windows 10, you simply need to click the Windows key and then type “Control Panel” and choose it from the menu.
Once there, you will want to click on System and Security:
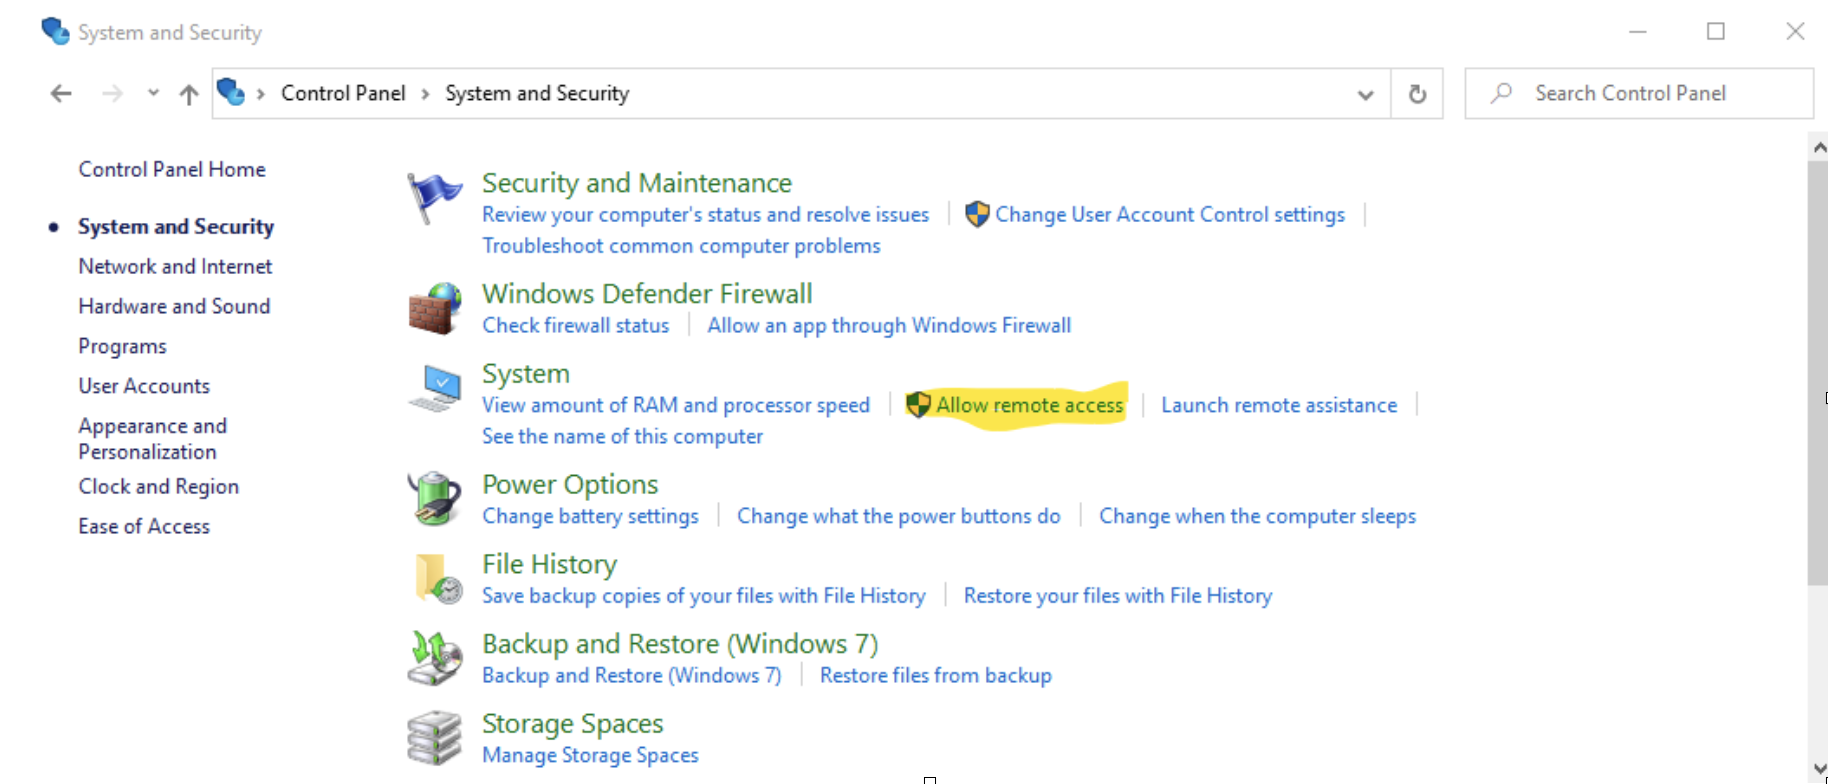
From this point you will need to look at the “System” section, and click on “Allow remote access” as is shown below:
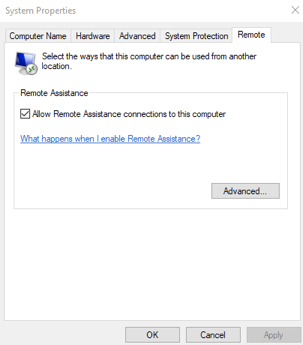
This will take you to the “Remote” tab of the Systems Properties window. Make sure that you have “Allow Remote Assistance connections to this computer” clicked. As mentioned, in most cases it will likely already be checked. Click “OK.”
Connecting
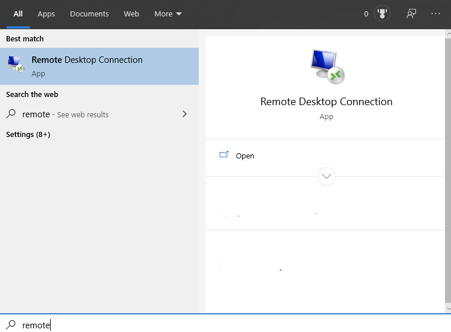
Click on the Windows key, and type “Remote” and choose “Remote Desktop Connection” as shown below.
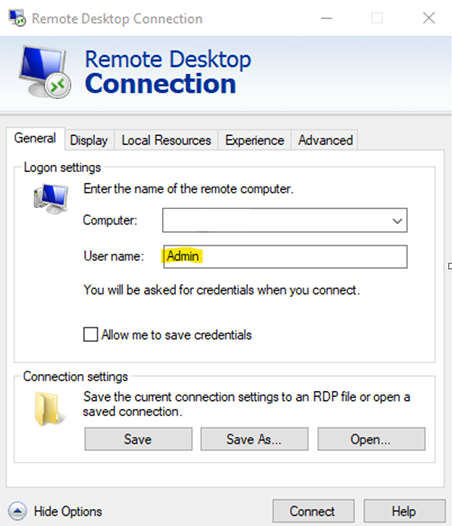
This will bring up a window that looks something like below.
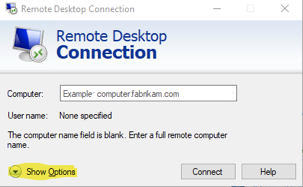
Click on “Show Options” to get a more detailed screen. Under “Computer” you will need to enter either the IP address for the remote computer, or its domain name (if you have it). Enter your User name, and click “Save” to save a copy of your connection. Then click on “Connect.”
You will then be prompted for the password associated with the username you entered.
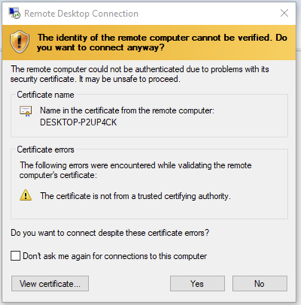
You may get a message like the below. You can just click "Yes" as it is your VPS.
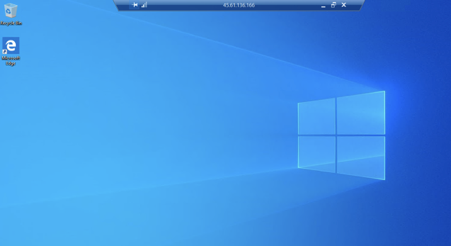
Once you are in, you will see a Windows screen that looks much like the one below. Note that if the screen is maximized, you will be able to see the name of the computer or the IP address across the top bar, like so.
To disconnect and keep your session running, you can just click on the “X” at the top right of the screen. You will see a message that states the below.
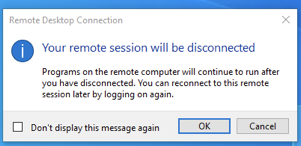
You can click “OK” in this window and leave whatever it is you need running on the remote machine (which is something you will typically wish to do). When you log in the next time, you will see whatever software you left running still up on the machine. If this feature does not work as expected, see our guide on how to exit RDP without logging off the user for troubleshooting steps.
Summary
You have now successfully set up your RDP connection to a remote Windows VPS.
If you need to connect to it again in the future, simply fire up your Remote Desktop Connection, and you should see your connection already configured in the application. Now that you're connected, you can move on to tasks such as installing a TeamSpeak server or configuring OpenClaw.