
One of the key benefits of OpenClaw (formerly Clawdbot) is its ease of installation compared to many other local AI tools. You can use a single-line terminal command across platforms and just follow the steps in the installer to complete it.
That said, users of cloud LLMs may still need some help here: the installation options are not explained, nor is how to retrieve your API key or set up OpenClaw with your messaging platform of choice.
OpenClaw security tips
Before we start, one thing must be emphasized: OpenClaw is an experimental software. It is not secure. Do not install it on your personal device or any device that contains sensitive or personal data. Our full OpenClaw guide has some more advice on securing the tool, but for now, some quick tips:
- Install OpenClaw on a VPS, in a VM, or on a dedicated physical device that isn't connected to your personal one.
- Never install OpenClaw as the
rootuser. - Vet community plugins before you install them — many have malware. You can scan them with Cisco Skill Scanner.
- Bind to localhost only. Change your
openclaw.jsongateway setting from0.0.0.0to127.0.0.1. - Enable the
exec_approvalflag in your configuration for tools liketerminal,filesystem_delete, andgit_push. - Preferably, restrict SSH access to your IP/private network and use Tailscale to access it remotely
- Add token-based auth to your gateway
- Set up some firewall rules to reduce the attack surface. For example:
sudo ufw default deny incoming
sudo ufw default allow outgoing

sudo ufw allow 22/tcp
sudo ufw allow 80/tcp
sudo ufw allow 443/tcp

sudo ufw limit 22/tcp

sudo ufw enable
sudo ufw status numbered
How to install OpenClaw/Clawdbot on Mac Mini or Linux
macOS is perhaps the best choice for installing OpenClaw. It was largely built for the Apple ecosystem, and it shows with integrations with apps such as Notes, Reminders, and iMessage.
Mac Mini (specifically the M4) has become the go-to device for Claw. As well as those macOS integrations mentioned above, the Mac Mini is a very powerful and efficient machine in a small footprint. That said, while Linux doesn't have the same integrations, the install process is identical and just as easy. You can use something much more affordable like a Raspberry Pi 4/8 GB with great success. To set up the bot on any Mac or Linux device, do the following:
- Use Spotlight search to open Terminal, then paste the following command and press Enter:
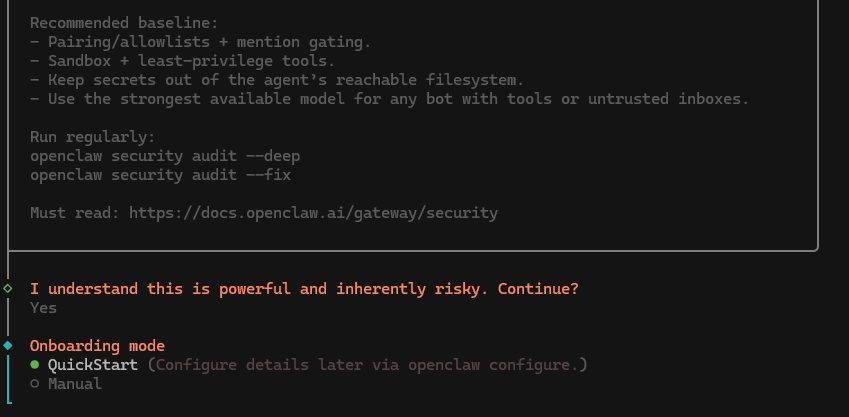
curl -fsSL https://openclaw.ai/install.sh | bash2. Wait for the install to complete. You'll have to choose "Yes" under the "I understand this is powerful and inherently risky" heading to continue. We recommend you actually read the security advisory above it — there's some key advice there!

3. Select "QuickStart" as your installation option — this sets the bot up with safe defaults. You can worry about making tweaks to the default configuration once you have a good understanding of the bot and how it works.
4. Choose your LLM. If you're unsure, we recommend Anthropic for the best functionality, and Gemini Flash or MiniMax if you're looking to keep costs low.
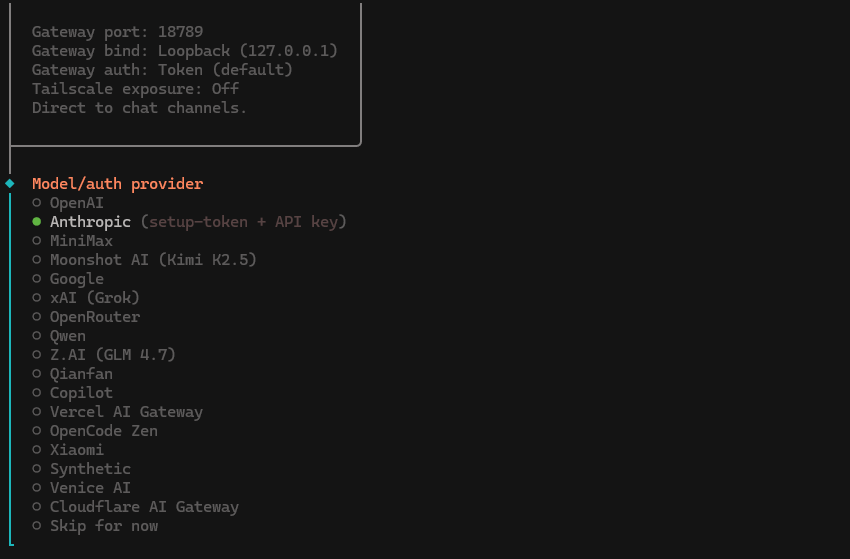
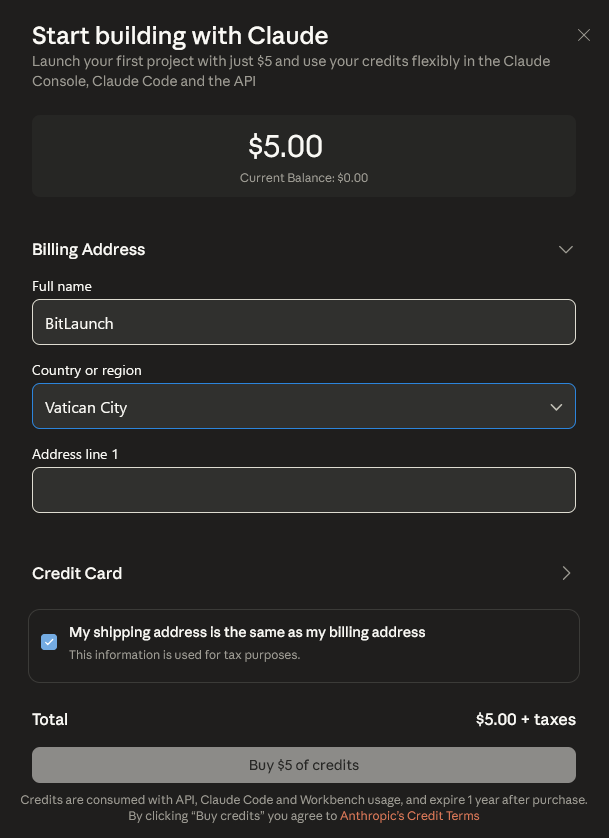
5. Create and fund your API key on the platform of your choice. Here are links to the API sign-up for the most popular cloud models:
Press "Get API Key" on your LLM of choice and fund it. Copy the API key and paste it into the terminal when prompted. Of course, you can also use a local LLM if you have one — just select its name from the list and follow the instructions.
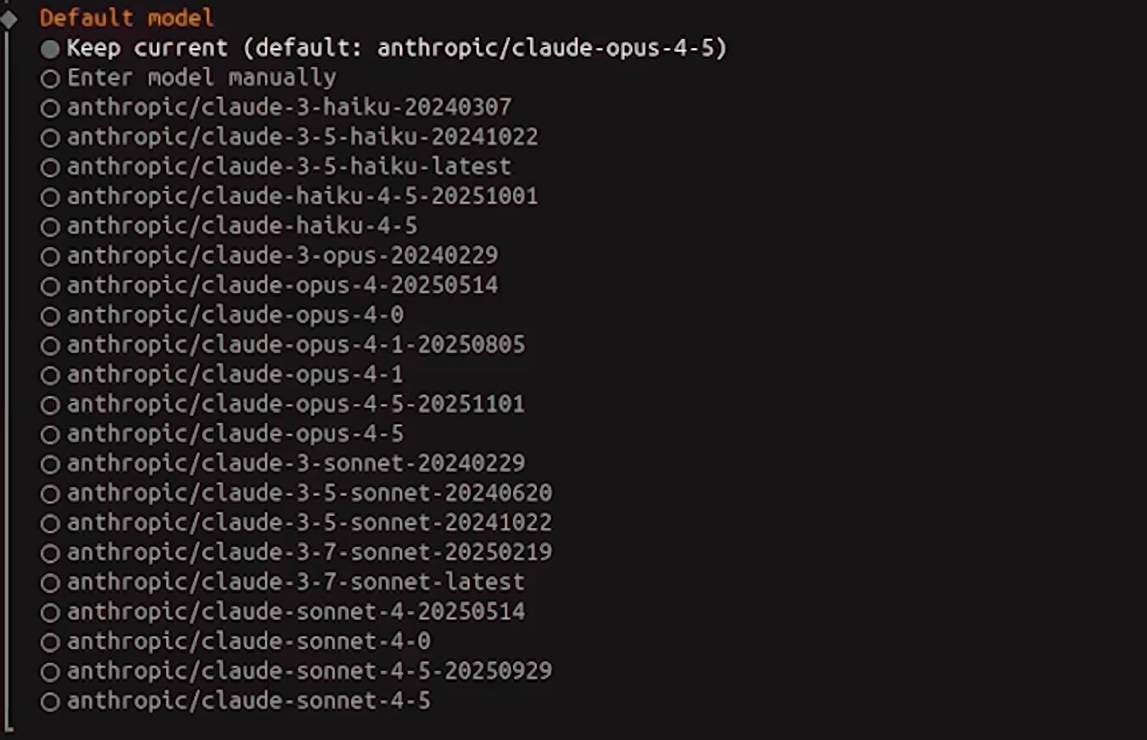
7. Choose the specific model you want to use from your LLM provider. This is the model the bot will use to answer your questions and perform tasks unless you specify otherwise. You can change this at any point, but you might not want the heaviest model (opus 4.5) as your default unless you have deep pockets. Models like Sonnet 4.5 may be a better pick if you aren't coding or processing large documents.
8. Select your channel (messaging/interaction service) and follow the instructions on-screen. We'll choose Telegram in our example.
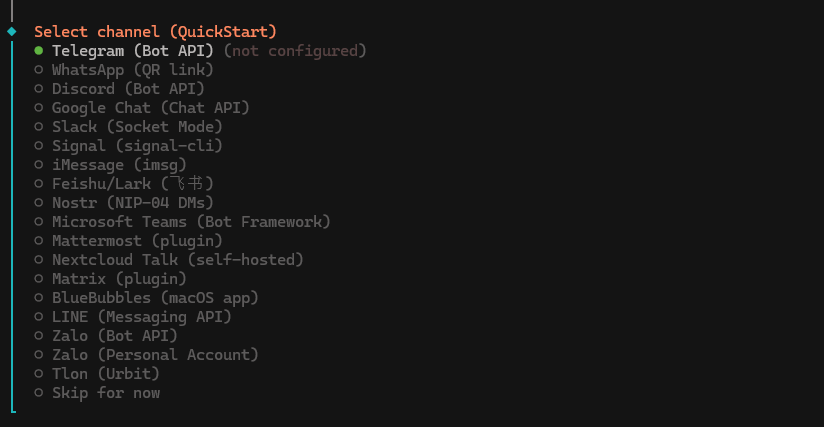
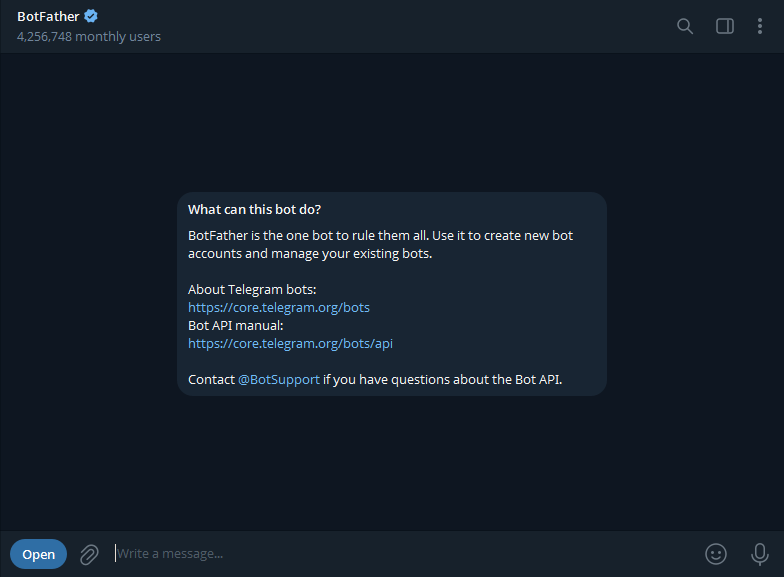
9. Open Telegram and press the search bar in your chat sidebar/screen. Type @botfather to open a chat.
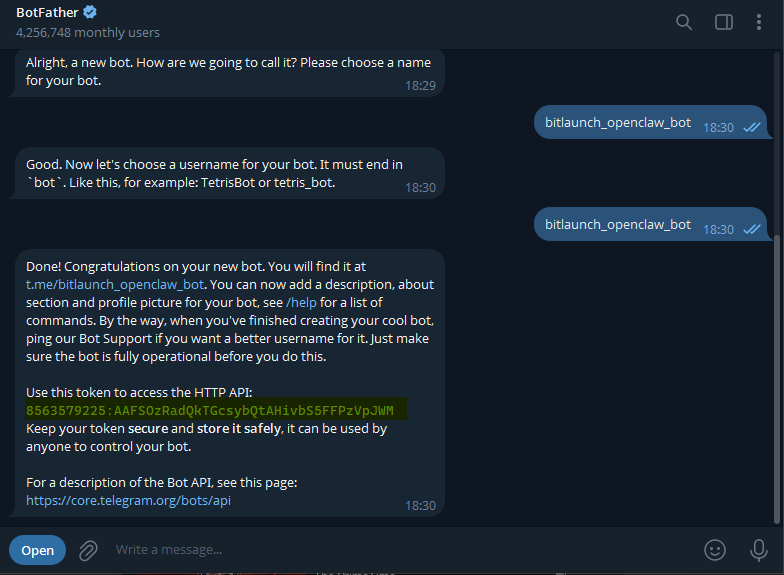
10. In the chat, type /newbot, type a name, and copy the token that appears. Paste the token into your OpenClaw terminal.
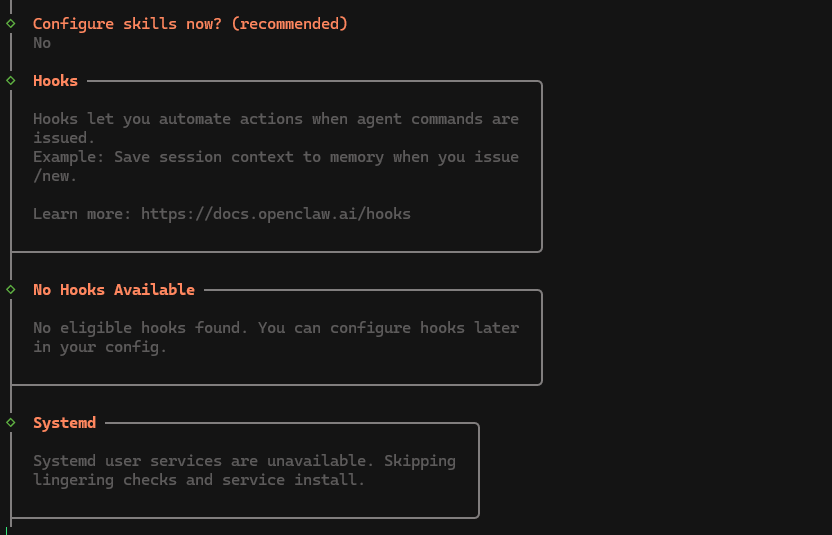
11. We'll select "No" when the installer asks you if you want to install skills, but you can optionally choose "Yes" to set up nano banana, whisper, etc.
12. At this point, you can choose whether to install bash shell completion for OpenClaw. This is a brand new OpenClaw feature that will suggest ways for you to complete your command when you type. It can significantly speed up usage of the tool, and it makes it more intuitive, so we recommend keeping it on.

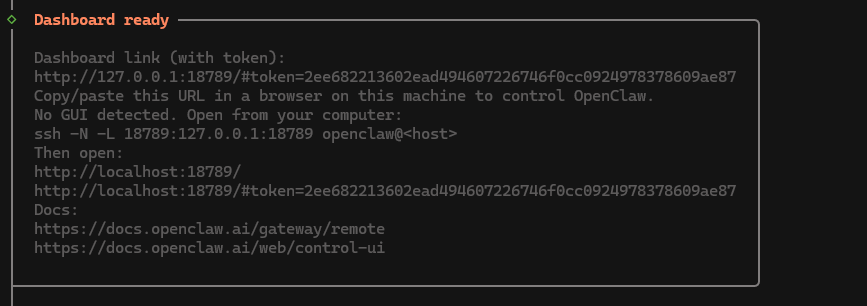
12. Choose npm for your preferred node manager for skill installs and continue choosing "No/Default" until the installer hatches your bot. You should be provided with a URL you can visit to access your dashboard and check that it's working.
13. Open Telegram and search for your bot in the chat sidebar/screen. To interact with OpenClaw, simply type your messages directly to the bot. That's all there is to it!
How to install OpenClaw/Clawdbot on Windows
Windows users have a few options when installing OpenClaw. Since the tool was originally created for Unix devices, one option is to install the Windows Subsystem for Linux (WSL) using wsl --install in PowerShell, and then follow the instructions for Linux above.
That said, in our testing, the Windows version of OpenClaw works perfectly fine. We'll walk you through how to install OpenClaw on Windows using the PowerShell one-liner step-by-step:
- Open PowerShell, run paste the following command, and press Enter:
iwr -useb https://openclaw.ai/install.ps1 | iex2. Wait for the install to complete, then use the arrow keys to select "Yes" under the "I understand this is powerful and inherently risky" heading.
3. Select "QuickStart" as your installation option.
4. Choose your LLM. Create an API key for a cloud LLM or provide the details of a local ones. Here are links to the API sign-up for the most popular cloud models:
6. Press "Get API Key" on your LLM of choice, fund it, then copy the key. Paste it into the terminal when prompted.
7. Choose the model from your providers that want OpenClaw to default to. fKeep in mind that you may not want to choose the most powerful model if you don't have deep pockets.
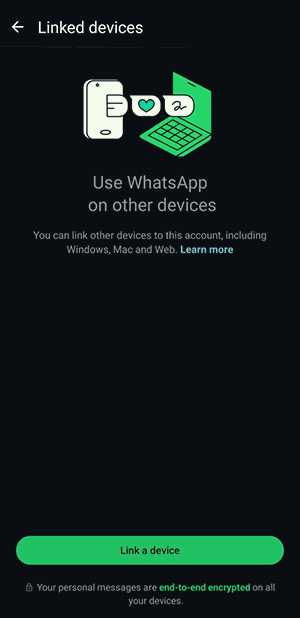
8. Select your channel (messaging/interaction service) and follow the instructions on-screen. We'll choose WhatsApp this for some variation.
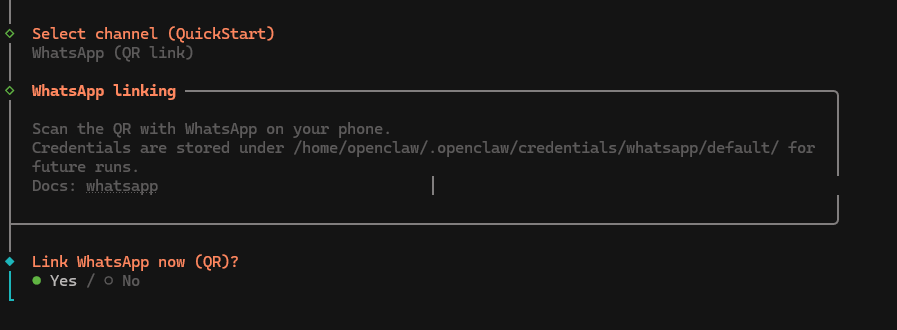
9. Choose to display the QR code and then scan it on WhatsApp by selecting "Settings > QR code icon in the top right > Scan code". Enter your phone number if prompted to complete the setup.
11. We'll select "No" when being asked to configure skills simply to make sure this guide isn't too long. But rest assured that you can still set up skills easily at any point after deployment. If you choose Yes here, OpenClaw will ask you tick the skills you want from its included list and install them for you.
12. Optionally, enable bash shell completion. If you turn this on, OpenClaw will help you to complete the commands you begin typing, making using it faster and more intuitive.
13. Choose npm for your preferred node manager for skill installs and continue choosing "No/Default" until the installer hatches your bot.
14. Open WhatsApp and type your instructions directly to the bot. You can do almost anything you need to right from the chat.