

Voice-over-IP (VoIP) applications may not play well with your Windows RDP server out of the box. More specifically, you may find that the audio and microphone from your local PC is not routed through to Discord, Skype, or Zopier. In most cases, getting audio or microphone input working on a VPS requires additional setup, which we'll walk you through today.
Enable the remote audio and microphone devices over RDP
If your VoIP application isn't detecting your microphone input or audio output, the first thing to check is your RDP client settings.
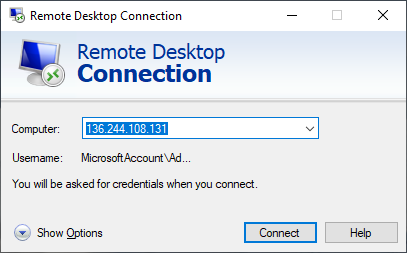
1. Open advanced RDP settings
In your Remote Desktop Connection window, press Show Options to access the advanced settings menu.
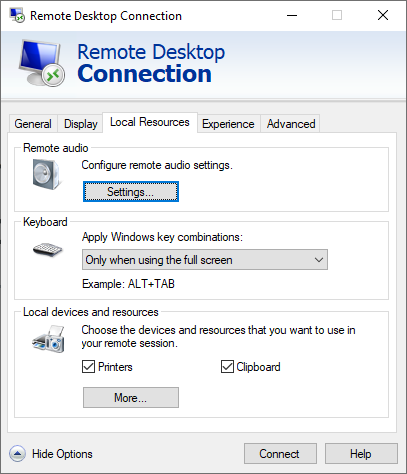
2. Switch to the 'Local Resources' tab and open remote audio settings
You'll find the option underneath the Remote audio heading and the sub-text Configure remote audio settings. Press the Settings... button to continue.
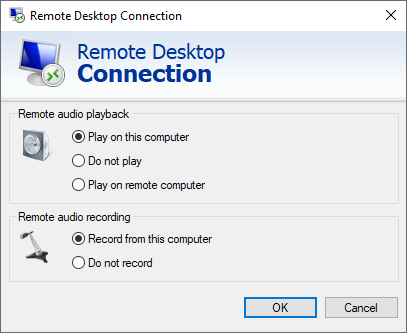
3. Tick 'Record from this computer'
While you're there, ensure Play on this computer is ticked and press OK. At this point, check your VoIP application to see if the 'Remote Output' input and output devices are available. If they still aren't working, continue to the next step.
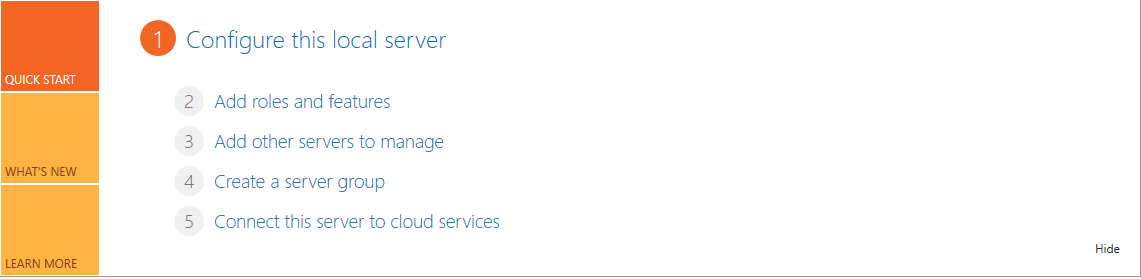
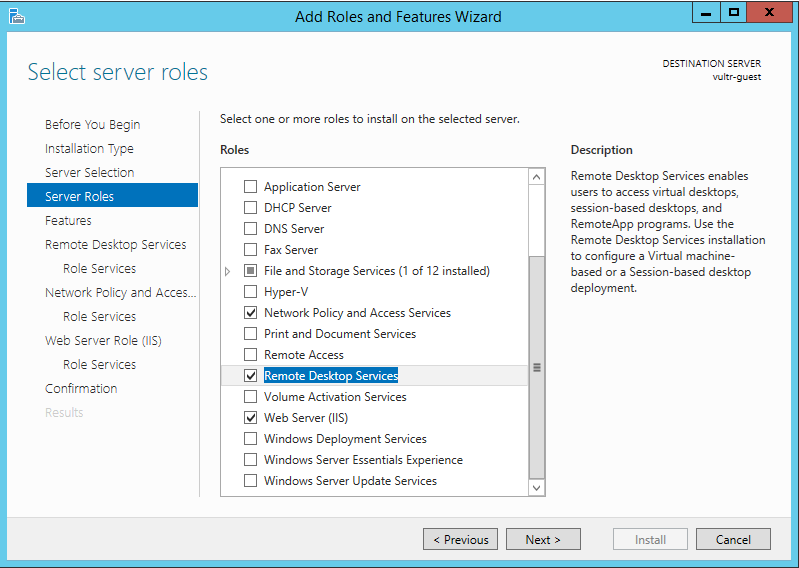
4. Add roles and features to your server
In the Server Manager, click Add roles and features under the Configure this local server heading.
5. Enable Remote Desktop services
Move through the Roles and features wizard, selecting Role-based or feature based installation and then your server. On the find Server Roles screen, find Remote Desktop Services. Tick it and press Next three times.
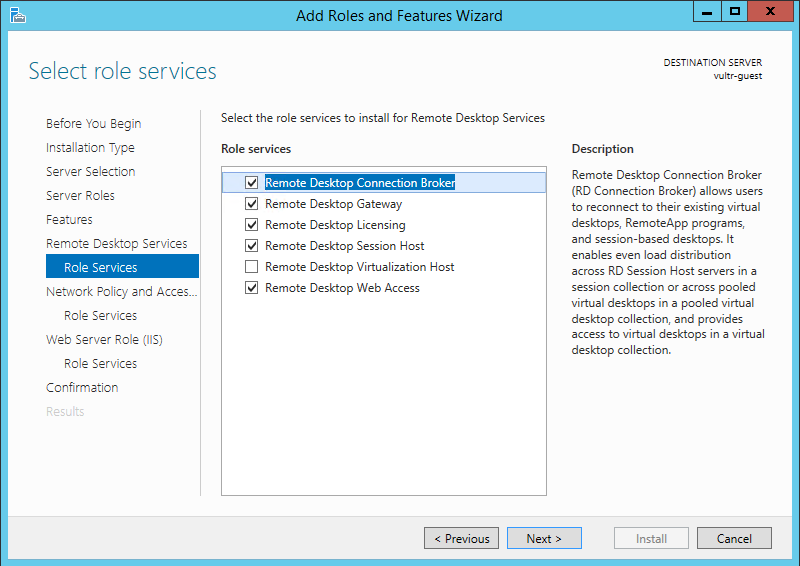
6. Choose the Remote Desktop service roles to install
To ensure your microphone and audio function correctly, we recommend ticking Remote Desktop Connection Broker, Remote Desktop Gateway, Remote Desktop Session Host, and Remote Desktop Web Access.
Press Next until you're able to press the Install button. After installation, restart your server.
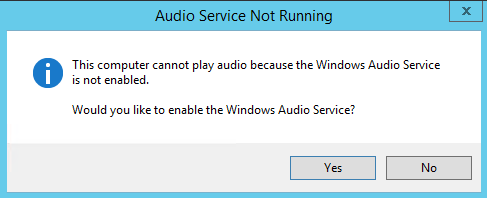
7. Enable the Windows Audio service
If the sound icon on your taskbar still displays a red cross, right-click it. Windows Server will surface a notification asking if you'd like to enable the Windows Audio Service. Click Yes.
You should now be able to use your local audio and microphone seamlessly on your Remote Desktop Connection.
Looking for a fast Windows RDP for VoIP? Sign up to BitLaunch today.