
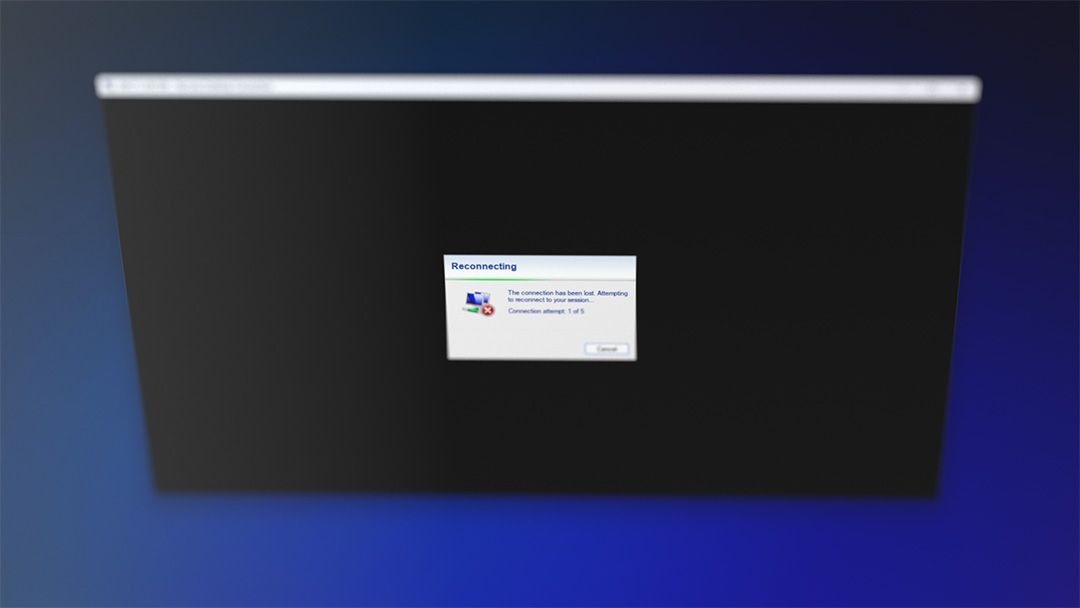
Using a VPN with your RDP server is a great way to increase privacy and security. However, as you may have noticed, it's not always smooth sailing. Starting a VPN can cause you to lose connection to your RDP server. This is generally because the VPN routes all traffic through an encrypted tunnel, which your local PC cannot access.
That said, the situation is not uniform across VPN providers. Some work with RDP out of the box, while others require additional configuration. This guide will cover various popular VPNs and what you must do to get them working on a Windows RDP connection.
VPNs that work with RDP natively
A few VPNs do not require additional configuration to work with Remote Desktop Connections. In our testing, this included:
- OpenVPN
- Tunnelbear
- Proton VPN
We'll try to keep this list updated. Let us know if you have problems with any of these VPNs or find additional providers that work out of the box.
VPNs that require additional configuration
Many VPNs don't work on RDP servers unless you change some settings. Unfortunately, the settings you must change aren't the same for every VPN client. This largely comes down to a difference in feature set – with some providers, you must turn off the kill-switch, whereas others have more advanced features, such as split tunnelling and local network sharing, that can help us out.
We'll cover most of the major VPN providers below. BitLaunch customers can contact support via our live chat if your VPN is not listed and does not work out of the box.
How to use Express VPN on an RDP server
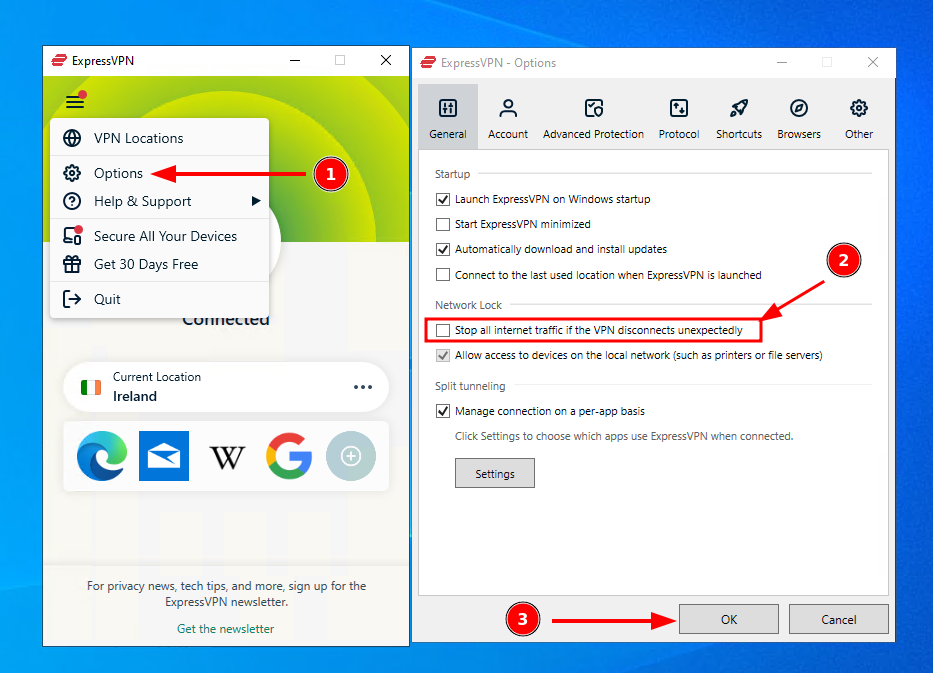
You need to disable the kill-switch to use Express VPN without disconnecting from your RDP session.
To do so, press the hamburger icon in the top-left of your Express VPN client and choose "Options". Then, untick "Stop all internet traffic if the VPN disconnects unexpectedly" and press "OK".
You should now be able to use your VPN without issue. However, bear in mind that having the kill-switch disabled does increase the chance that your server's real IP address will leak. It's a good idea to check for DNS leaks using an online tool and take necessary precautions.
How to use Mullvad on an RDP server
Getting working perfectly with RDP is a little more involved. This is primarily because it provides more options, which we can exploit to minimize the risk of the VPN leaking your real DNS.
We'll take you through it step-by-step:
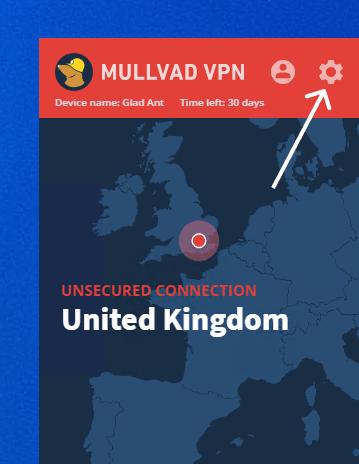
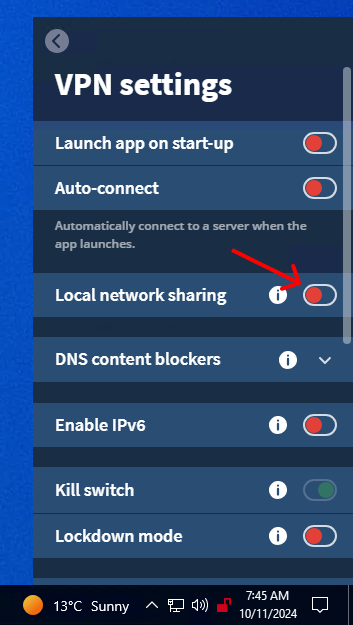
- Press the settings cog in the top right corner of your Mullvad client.
2. Open the "VPN settings" window.
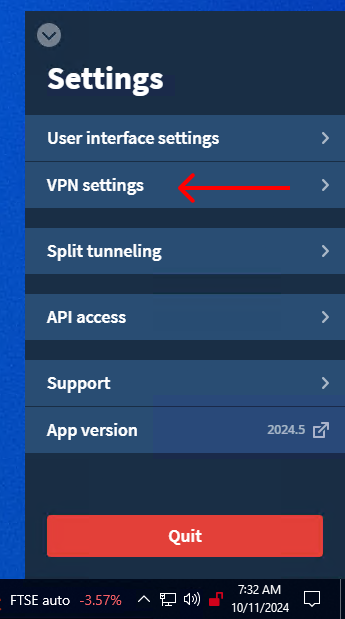
3. Toggle on the "Local network sharing" option.
4. Scroll until you see the "Use custom DNS server" option and toggle that on.

5. Under the custom DNS heading, press "Add a server". Add the IP addresses "1.1.1.1" and "1.0.0.1" (or another private DNS provider).
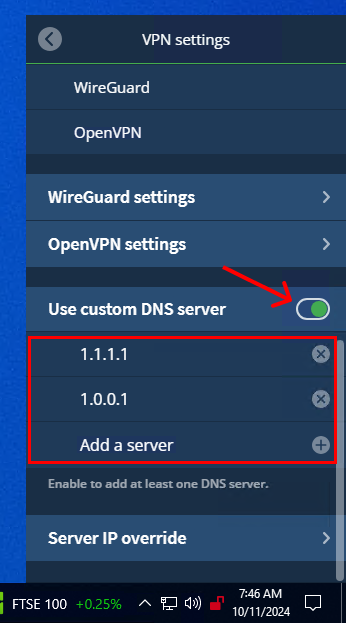
Using a custom DNS should prevent DNS leaks.
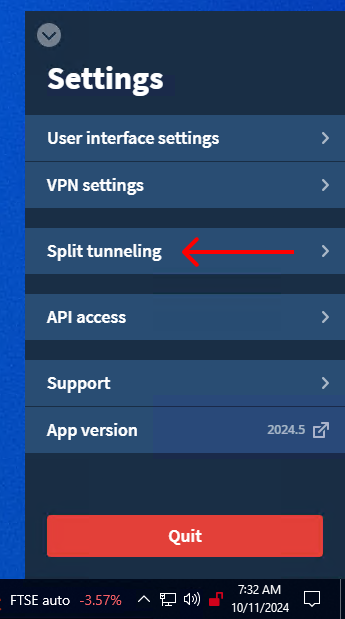
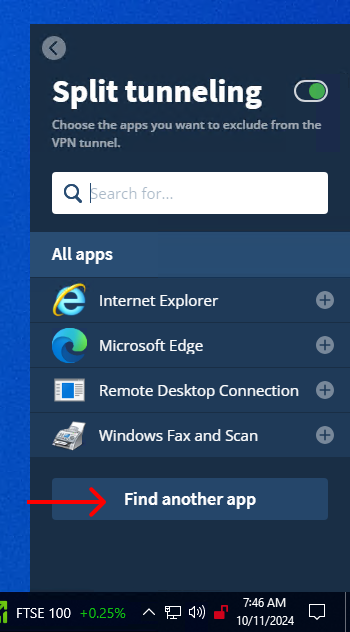
6. Go back to the main settings and open the "Split tunneling" options.
7. Toggle on Split tunneling next to its heading and press the "+" icon next to "Remote Desktop Connection" in the list below.
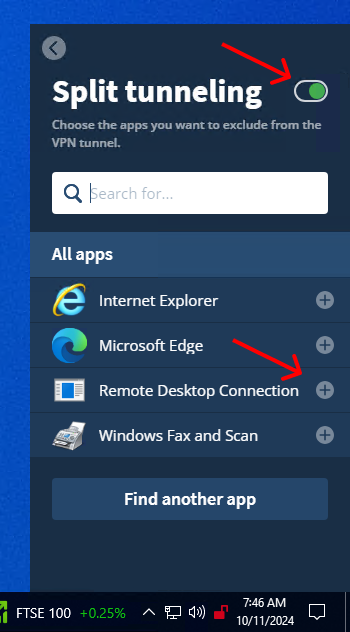
8. While still in the split tunnelling menu, press "Find another app".
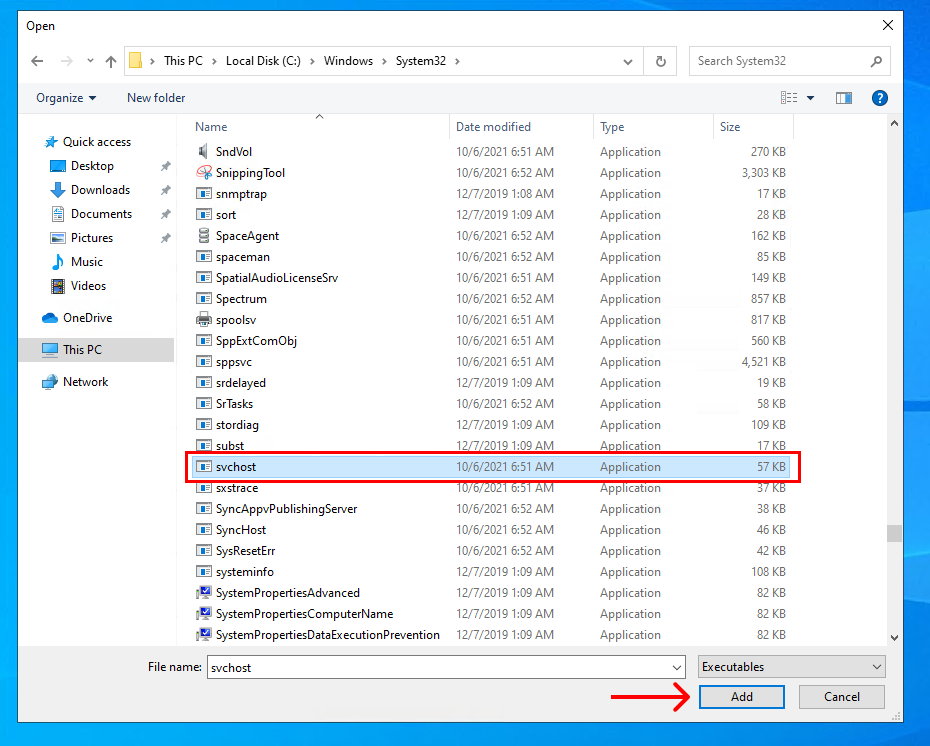
9. Navigate to "C:\Windows\System32\", find "svchost.exe", and press "Add".
It should now be safe to enable your VPN without disrupting your RDP connection. As always, you should check for DNS leaks before continuing.
How to use Nord VPN on an RDP server
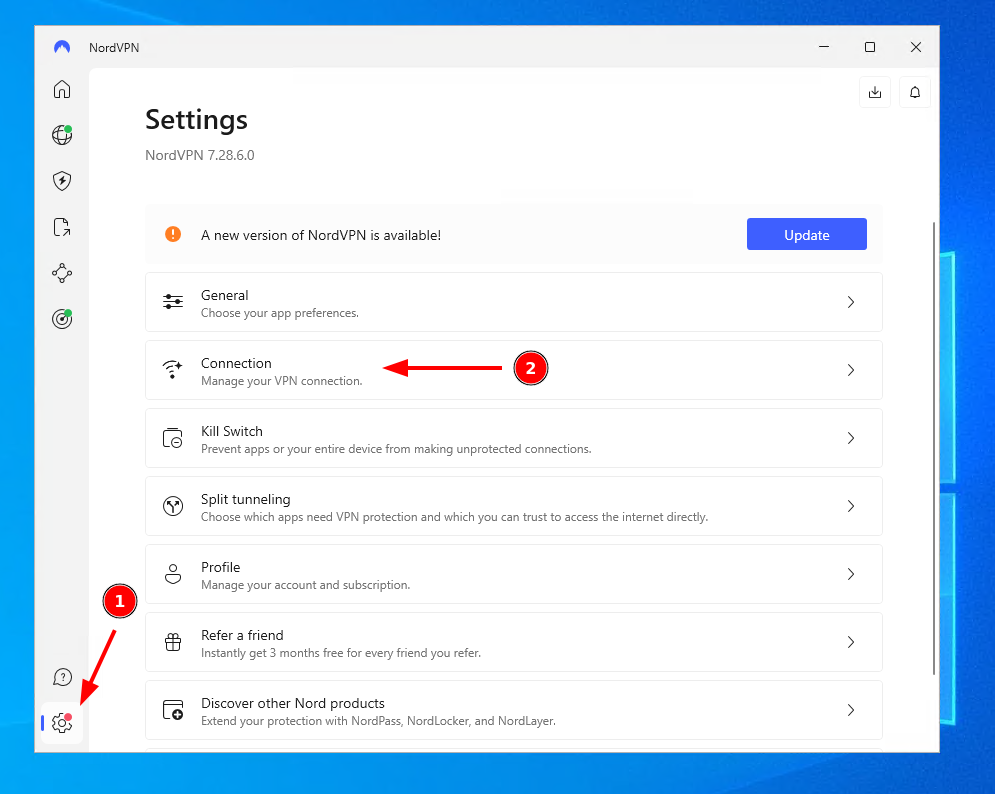
Helpfully, Nord VPN has a dedicated option to allow remote access when the VPN is connected. Here's how to enable it step-by-step:
- Press the settings cog in the bottom left corner of your VPN client and click "Connection" in the main pane.
2. Toggle on the "Allow remote access while connected to VPN" option.
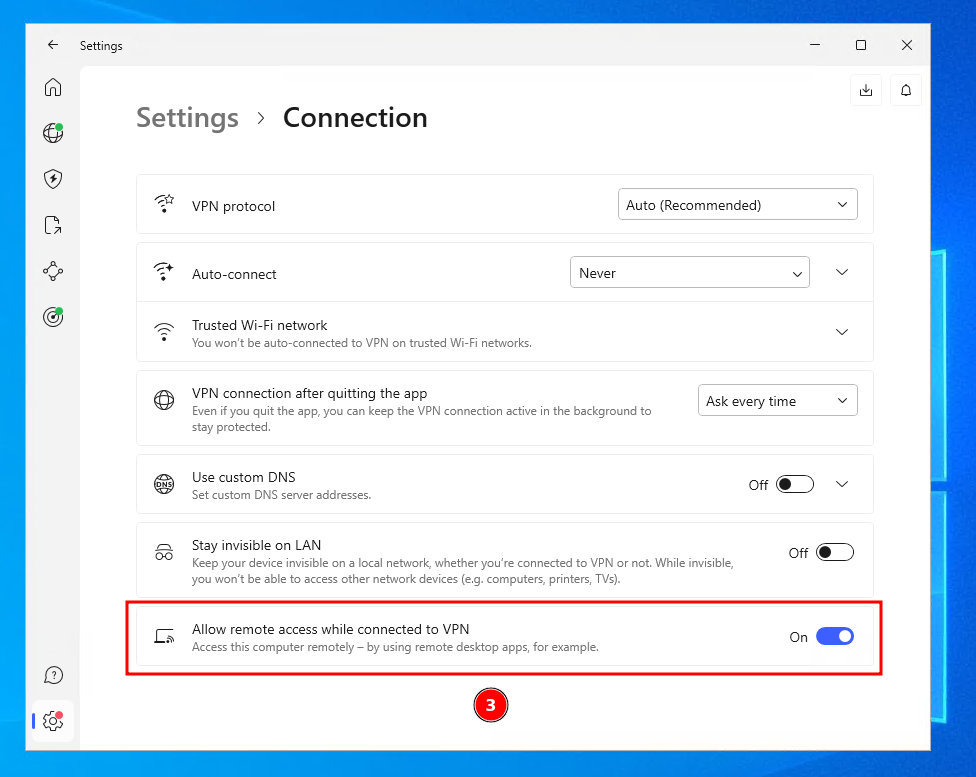
Check for DNS leaks using the IP leak site.
How to use Wireguard on an RDP server
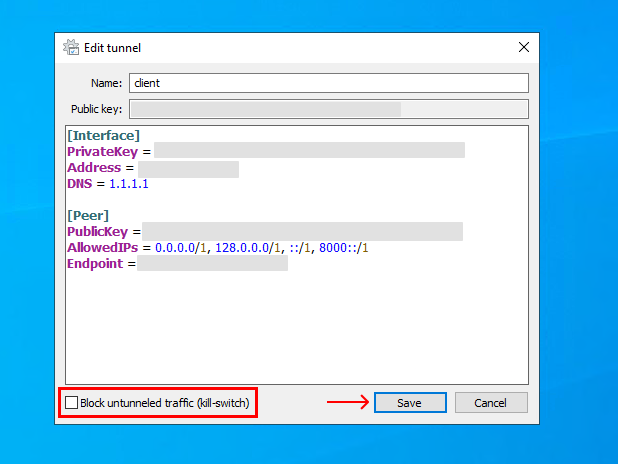
Like Express VPN, you must disable the kill-switch in WireGuard to use it without being disconnected from your RDP session. Here'sentire full process:
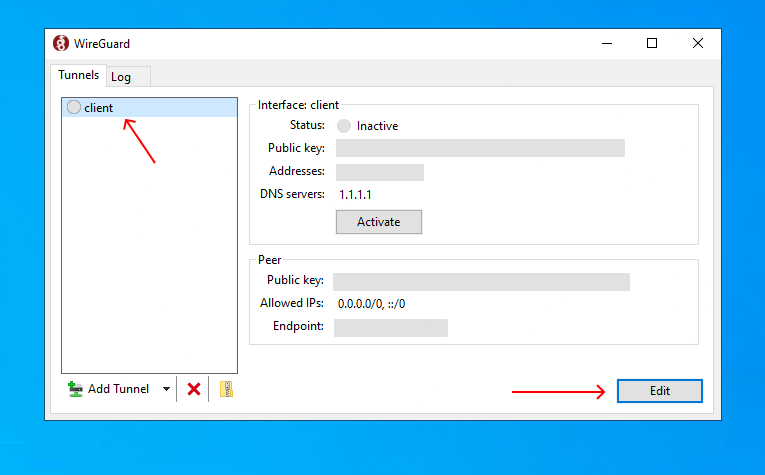
- Click on the tunnel you use for your VPS server in your WireGuard client and press "Edit" in the bottom right corner.
2. Untick "Block untunneled traffic (kill-switch)" in the bottom left corner and press "Save".
That's it! Now, it's just a matter of checking for DNS leaks.