
Sign up for BitLaunch and deploy LEMP stack in one click in Ubuntu, CentOS, or Debian.
LEMP is a stack of software that includes Linux, Nginx, MySQL and PHP, and is used for the deployment and management of web applications such as WordPress. The LEMP stack provides back-end data storage via a MySQL database; an operating system, on Linux; dynamic processing, via PHP; and the web server, Nginx.
The bundling of this software makes for a powerful combination, and that's why BitLaunch provides a one-click set up in the 'Apps' interface of the server creation UI.
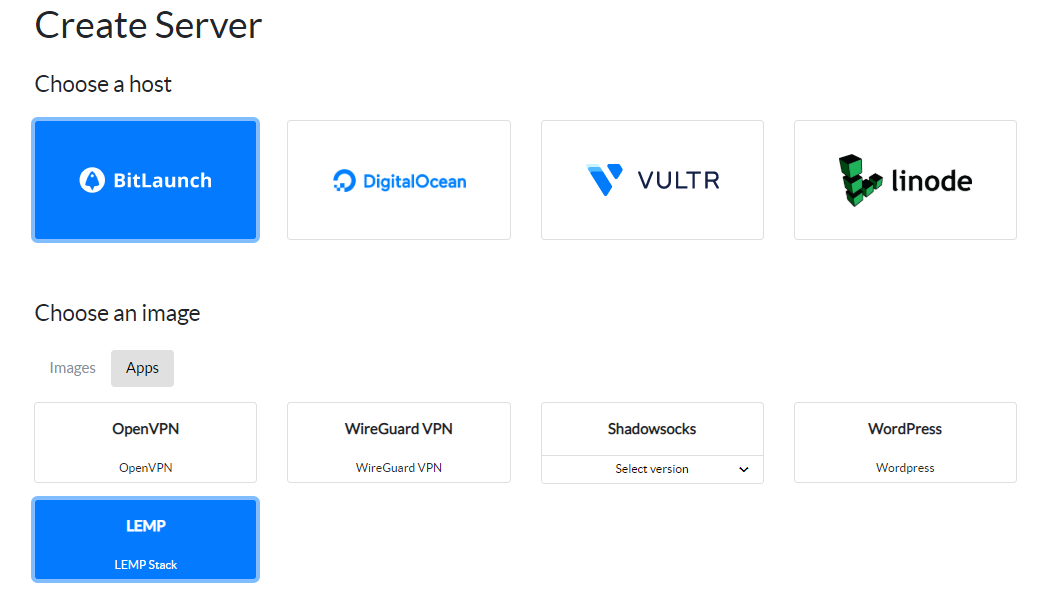
As such, the fastest way to install LEMP stack on a VPS server is to sign up to BitLaunch and let us do the heavy lifting. In some cases, however, users prefer to rely on themselves or want more control over the process. As a result, we're also going to be showing you how to manually install LEMP stack on Ubuntu 20.04. First, you'll want to make sure you have the following:
- A Linux VPS, preferably Ubuntu 20.04
- The IP address, username, and password for your VPS server
When you're ready, connect to your VPS via SSH and you'll be all set.
How to Install Nginx on Ubuntu 20.04
We've covered the installation of Nginx on Ubuntu 20.04 previously, but it's worth going over the basics again in this context. Firstly, make sure your packages are up to date and install Nginx:
sudo apt update
sudo apt install nginx
Press y to agree to the installation. If you'd like to install nginx on Ubuntu with a pre-built package to ensure the latest version of via source, check our tutorial.
Check that nginx installed with nginx -v, which should return an output like this:
nginx version: nginx/1.19.2
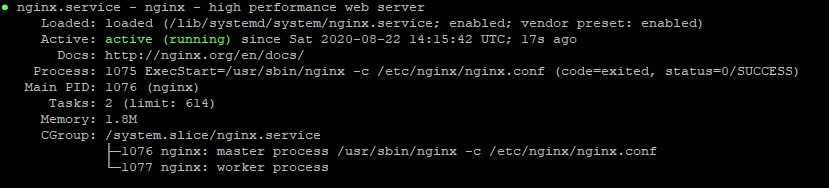
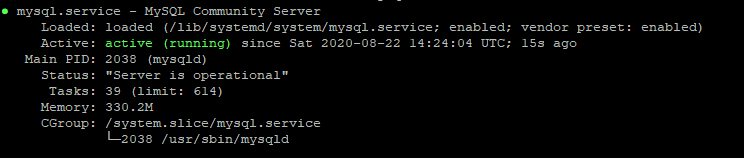
Nginx should start automatically and run at boot without any further input, but you made sure it's running with sudo systemctl status nginx.
If you followed our anonymous VPS security guide, you may have a firewall enabled, in which case you should open the following ports and reload:
sudo ufw allow 80/tcp
sudo ufw allow 443/tcp
sudo ufw reload
To make sure Nginx is installed, type your server IP into the web browser of your local PC. You should get the following message:
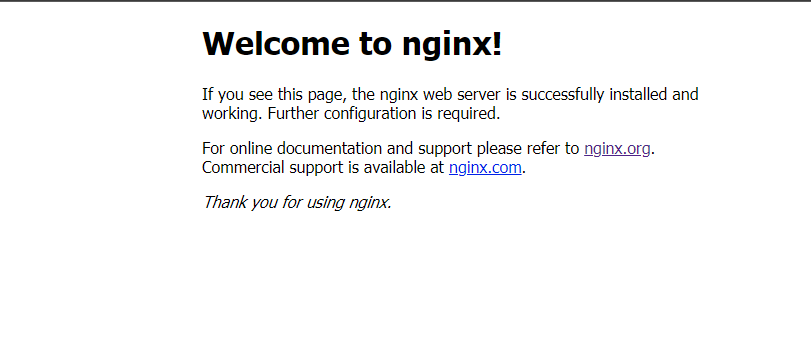
If you see a timeout error instead, check our dedicated Nginx 504 guide.
How to Install MySQL on Ubuntu 20.04
The next piece of software in the LEMP stack is MySQL, which will let you store and manage your site data. Download and install mySQL on Ubuntu with:
sudo apt install mysql-server
Press y during the install process and wait for it to complete. Check that MySQL is running via sudo service mysql status.
It's now a good idea to set up your MySQL security through this command:
sudo mysql_secure_installation
Press n to the decline the setup of the VALIDATE_ PASSWORD plugin. Type a password for root and press Enter.
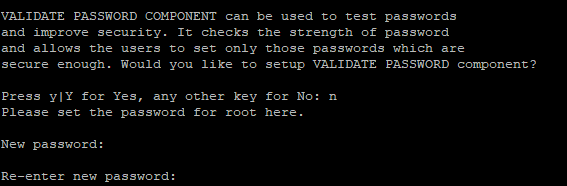
Enter y to remove the anonymous user, as this is only needed for testing. Also disallow remote root login by pressing y and Enter. And also remove the test database with y. Reload the privilege tables with y also to make sure these changes go live right away.
Log in to the MySQl server and check the version with sudo mysqladmin version -u root -p. Enter the password you created earlier to verify that you remember it. It should then return the following output:
mysqladmin  Ver 8.0.21-0ubuntu0.20.04.4 for Linux on x86_64 ((Ubuntu))
Copyright (c) 2000, 2020, Oracle and/or its affiliates. All rights reserved.

Oracle is a registered trademark of Oracle Corporation and/or its
affiliates. Other names may be trademarks of their respective
owners.

Server version          8.0.21-0ubuntu0.20.04.4
Protocol version        10
Connection              Localhost via UNIX socket
UNIX socket             /var/run/mysqld/mysqld.sock
Uptime:                 11 min 20 sec
As mentioned earlier, your MySQL database stores much of your site information, which makes it very important. It's a good idea to back up MySQL regularly, and you can do so by following our mysqldump guide.
How to Install PHP on Ubuntu 20.04
The final step is to install PHP on Ubuntu so that you can use the language to create dynamic content on your webpage or to tap into WordPress' PHP, which does so for you. You can install it like any other app and includes the -cli, -common, -json, -opcache, and -readline plugins by default. Using php-fpm and php-mysql on Ubuntu server will make sure we don't install apache but have everything we need for LEMP stack.
sudo apt install php-fpm php-mysql
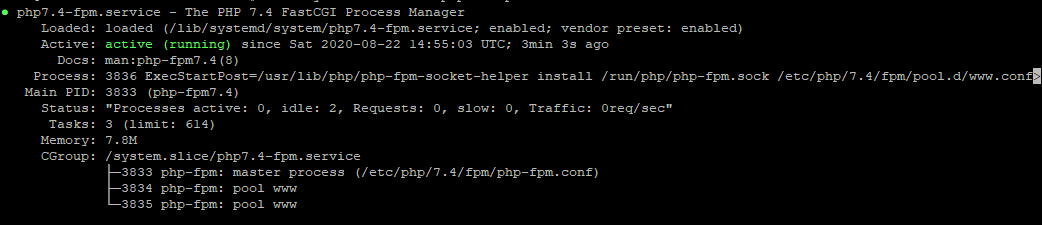
After installation, run sudo systemctl status php7.4-fpm to make sure it's running.
Some additional configuration is required to make sure php-pm servers websites correctly. We need to make php-fpm process php scripts in the nginx server block correctly. Edit the configuration file with:
sudo nano /etc/nginx/sites-available/default
Uncomment the following by removing the #:
 # pass PHP scripts to FastCGI server
        #
        #location ~ \.php$ {
        #       include snippets/fastcgi-php.conf;
        #
        #       # With php-fpm (or other unix sockets):
        #       fastcgi_pass unix:/var/run/php/php7.4-fpm.sock;
Now, edit the php.ini in /etc/php/7.4/fpm (or your relevant php version) with nano or another text editor:
sudo nano /etc/php/7.4/fpm/php.ini
Press Ctrl+W and look for cgi.fix_pathinfo. Change its value from 1 to 0.
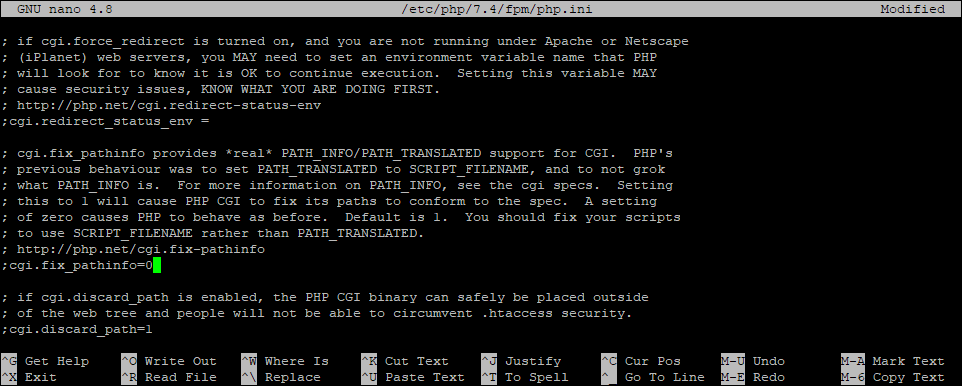
Press Ctrl + O to save and Ctrl + X to exit.
Restart php and nginx with:
sudo systemctl restart php7.4-fpm && systemctl restart nginx
Create a test .php file in your root folder to make sure it's working correctly:
sudo nano /var/www/html/phpinfo.phpAdd the following to the file:
<?php phpinfo( ); ?>
Press Ctrl + O to save it and Ctrl + X to exit.
Now you can visit the php info page by typing your server IP into the web browser of your local IP, followed by /phinfo.php. For example:
12.34.567.89/phpinfo.php
If the address provides the file, your LEMP has been successfully set up.