

Nginx is a useful open-source software that server admins can utilize for the setup of reverse and regular proxy servers, as well as web serving, media streaming, caching, load balancing, and more. It was first created by Igor Sysoev and got its first release in 2004.
Over other solutions, it offers a very low-performance profile and ability to handle large numbers of connections and high speeds. Its support for dynamic content and its general flexibility has led to growing adoption over the years and use by giants like Google, Netflix, Adobe, and Cloudfare.
Today we’re going to show you how to install Nginx on Ubuntu 20.04 with the package manager and pre-built packages, as well as how to install Nginx from source.
Sign up for BitLaunch today, deploy your anonymous server, and install Nginx on Ubuntu in five minutes or less.
First, though, you’ll need the following pre-requisites:
- An Ubuntu 20.04, typically on a (Bitcoin) VPS server
- Your VPS credentials, found in your hosts’ control panel
- An SSH client, such as PuTTy, to connect to the server
 BitLaunch
Install Nginx on Ubuntu 20.04 with apt-get
Using the Ubuntu package manager is typically the easiest way to install software, and this doesn’t differ with Nginx. This route is generally recommended for most people. Type the following to update your repository information and download and install Nginx:
sudo apt-get update
sudo apt-get install nginx
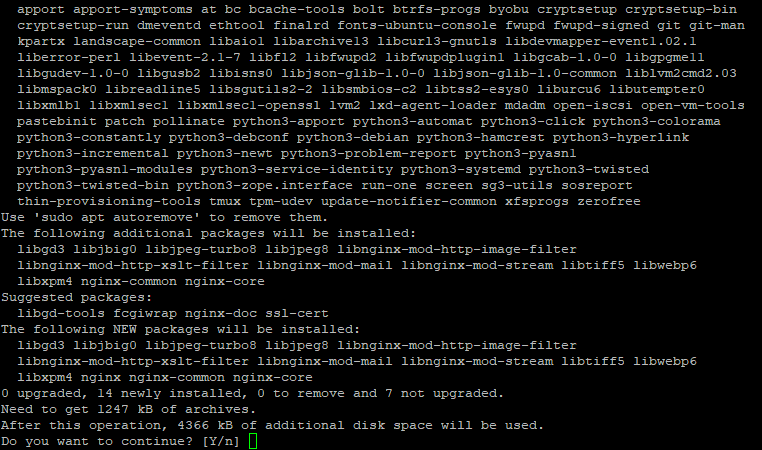
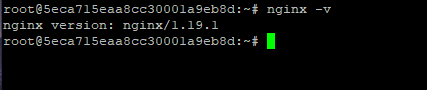
Don’t forget to press “y” during the install to agree to the installation. It should take a couple of minutes, at most. You can alternatively use yum install nginx. Once the process is complete, you can check if ngnix is installed via a version check command:
nginx -v
If successful, your server will return your nginx version as below:

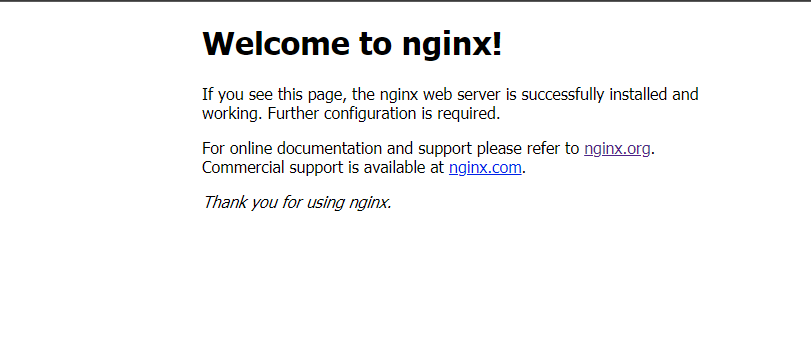
On the PC you connected to the VPS with, type the VPS IP into your browser to confirm you can reach it. You should see a welcome message, at which point you can move on to any required Nginx configuration.
Ubuntu install Nginx with a pre-built package to ensure the latest version
The version of nginx in the package manager isn’t always the latest version. Nginx Inc. often offers newer, pre-built ‘mainline’ releases, as well as pre-build stable releases. You can add links to the repositories in your sources.plist, binding your apt-get to mainline instead.
First, we need to install some pre-requisites. Enter:
sudo apt install gnupg2 ca-certificates lsb-release
Press “y” to continue with the install. Set up the repository for mainline with:
echo "deb http://nginx.org/packages/mainline/ubuntu 'lsb_release -cs' nginx" | sudo tee /etc/apt/sources.list.d/nginx.list
Or with stable nginx packages via:
echo "deb http://nginx.org/packages/ubuntu 'lsb_release -cs' nginx" | sudo tee /etc/apt/sources.list.d/nginx.list
We’ll also need a signing key so that the Ubuntu package manager can verify that the nginx repository is authentic:
wget http://nginx.org/keys/nginx_signing.key
Import it to your keychain:
sudo apt-key add nginx_signing.key
It’s always good practice to check that it’s genuine before you continue, so type the following command:
sudo apt-key fingerprint ABF5BD827BD9BF62
If genuine, it’ll return the full fingerprint, shown in the image below.
![Command line returns: pub rsa2048 2011-08-19 [SC] [expires: 2024-06-14] 573B FD6B 3D8F BC64 1079 A6AB ABF5 BD82 7BD9 BF62](https://bitlaunch.io/blog/content/images/2020/07/2.1-2.png)
Now we know it’s safe to install nginx, which we can do via apt:
sudo apt-get update && sudo apt-get install nginx
You can again verify that it installed correctly via a version check:
nginx -v
How to Install Nginx from source in Ubuntu
Though you can install Nginx from source, this installation method isn’t recommended for most users and is aimed at those who want complete control over the Nginx install process. You’ll need some pre-requisites, though there’s a good chance those looking to install via this method will have at least some of them already:
sudo apt-get install build-essential libpcre3 libpcre3-dev zlib1g-dev
Grab the source download via wget, replacing the version number with the latest available (found here):
wget http://nginx.org/download/nginx-1.19.1.tar.gz
Unpack to its own folder and navigate to the new directory:
tar -zxvf nginx-1.19.1.tar.gz
cd nginx-1.19.1
We’re now able to run the configuration script from the root of our new folder. There are various methods nginx can use, which you can find here, but for simplicities’ sake, we’ll be using the standard one today. Running this will install nginx to /usr/local/nginx.
./configure && make && make install
We’re almost there, but if we left things as they were we’d be unable to execute the nginx command from any terminal location. To change this, we can link the path variable of nginx’s binary to the bash path:
echo "export PATH=$PATH:/usr/local/nginx/sbin" >> ~/.bashrc
Reload it with:
source .bashrc
Finally, check the version and which nginx binary is run with:
nginx -v && which nginx
It should output something like:
nginx version: nginx/1.19.1
/usr/local/nginx/sbin/nginx
Continue your development with these guides:
BitLaunch BitLaunch
 BitLaunch