

One of the main benefits of renting a Windows RDP server is that it's always online and ready to go. You don't need to worry about applications or services only being available when your computer is turned on.
Except for when you do. We've had a few reports of applications closing when users disconnect from their remote desktop. This is unexpected and frustrating behavior, but it's usually relatively straightforward to remedy. Following the troubleshooting steps below will help to ensure your RDP session remains active when you're not interacting with it.
How to exit RDP without logging off the user
The most common cause of RDP applications quitting unexpectedly is logging out of an account rather than disconnecting from the RDP session. This is understandable behavior; logging out when you're done is common practice on desktop computers. Unfortunately, it also kills the applications that are running on the user account.
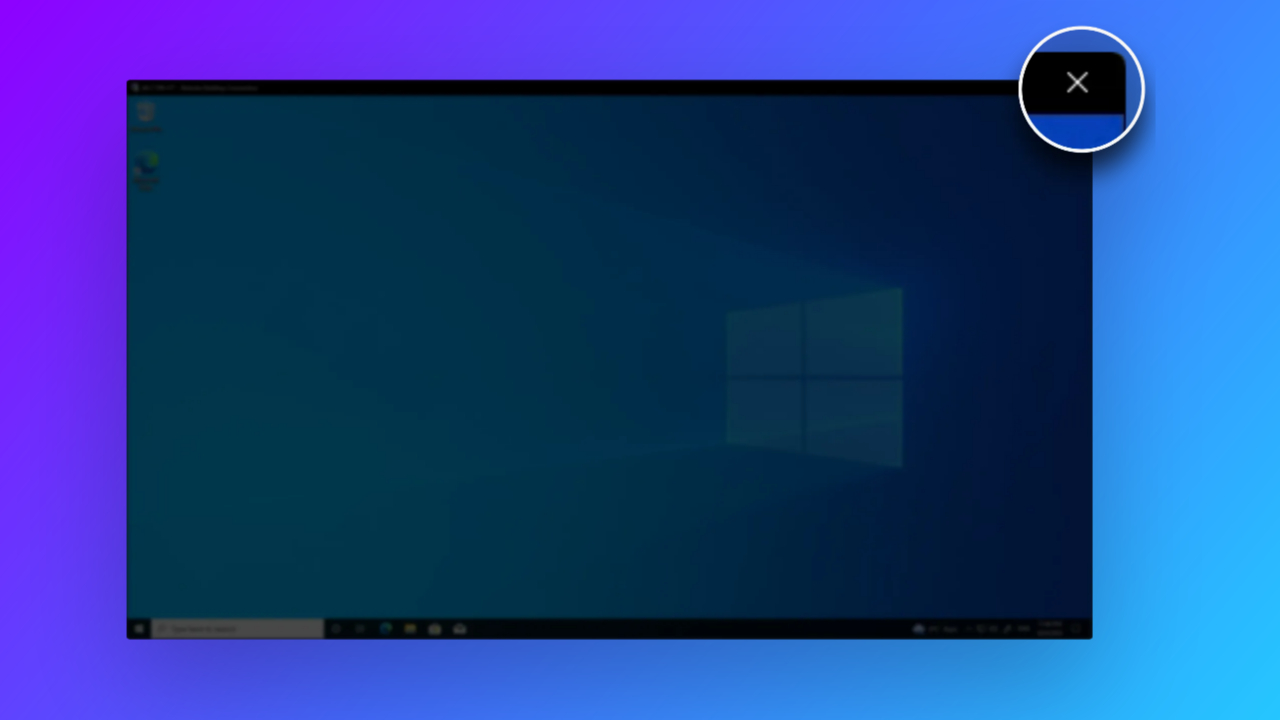
Thankfully, there's a way to exit RDP without logging out the user. Simply disconnect from your RDP session by pressing the "x" (or red dot) in the top-right corner of your RDP application. If you're in full screen, this will be on the connection bar at the top of your screen instead.

Check your RDP session timeout/idle settings
By default, BitLaunch RDP servers are configured never to log you off or time out your RDP session. However, if you're using a third-party server, have changed group policy settings, or are remoting into your own PC, this could be the culprit. To change your RDP idle settings, do the following:
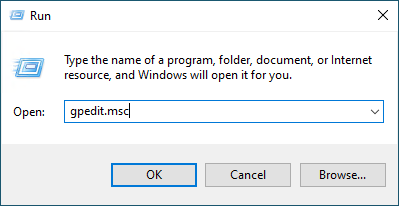
- Open the Start menu and type "Run". Open the application.

2. Type "gpedit.msc" in the Run box and press "OK".
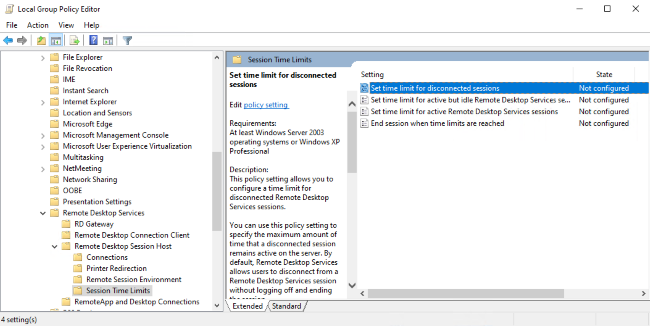
3. Using the sidebar, navigate to "Computer Configuration > Administrative Templates > Windows Components > Remote Desktop Services > Remote Desktop Session Host > Session Time Limits". There are three policies here:
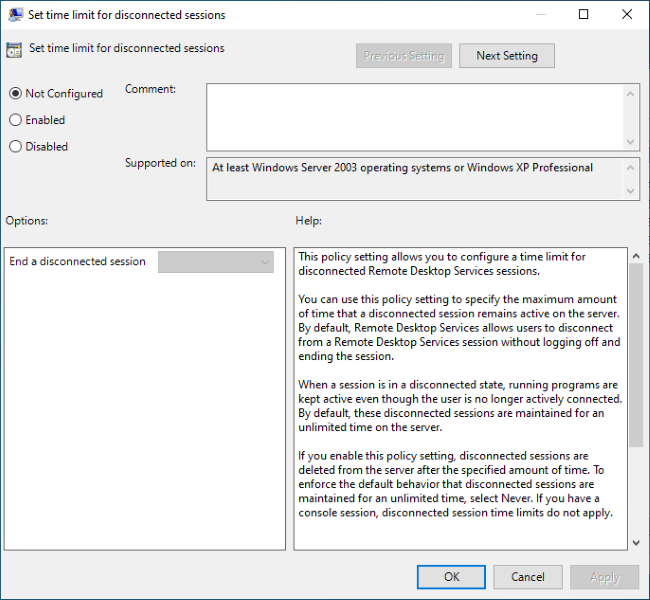
- Set time limit for disconnected sessions
- Set time limit for active but idle Remote Desktop Services sessions
- Set time limit for active Remote Desktop Services sessions
- End session when time limits are reached
Ensure they are all set to "Not Configured" or "Disabled". You can change the value by double-clicking the policy.
4. Do the same for the User Configuration, visiting "User Configuration > Administrative Templates > Windows Components > Remote Desktop Services > Remote Desktop Session Host > Session Time Limits".
Restart your server to apply any changes.
Keep your RDP session active by modifying your power plan
Another potential cause if you're using non-server hardware is that your power settings are putting your device to sleep after a certain time-period. You can check this by:
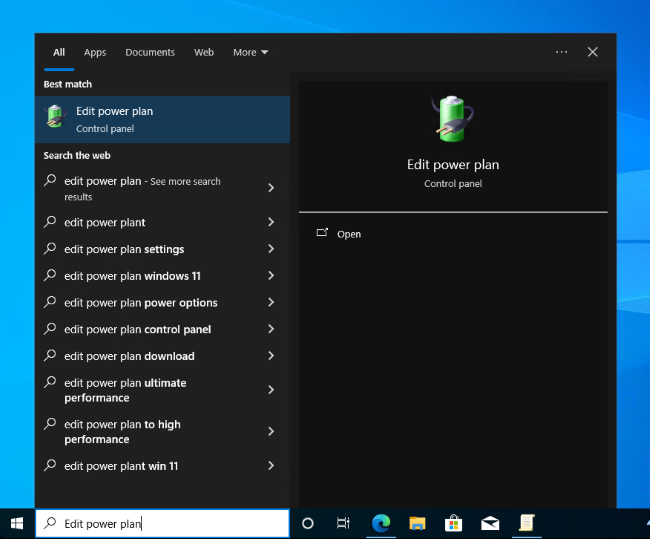
1. Opening the Start Menu and searching for "Edit power plan".
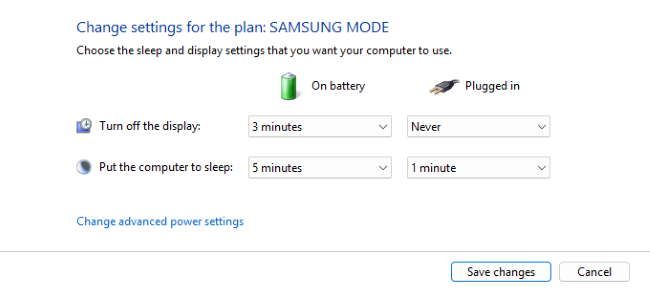
2. Ensuring "Put the computer to sleep" is set to "Never" and pressing "Save changes".
Keep applications alive by running them as a service
If you're still experiencing problems, consider running your application as a service instead. Unlike applications, services run continuously in the background even when a user logs off.
Running an application as a service is easy using Task Scheduler:
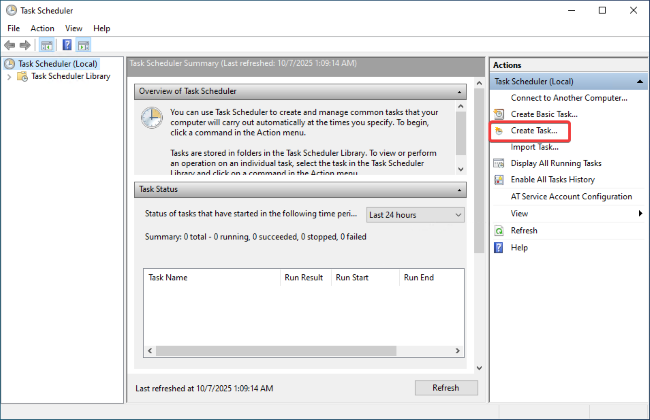
- Open Task Scheduler and press "Create Task..." in the sidebar.
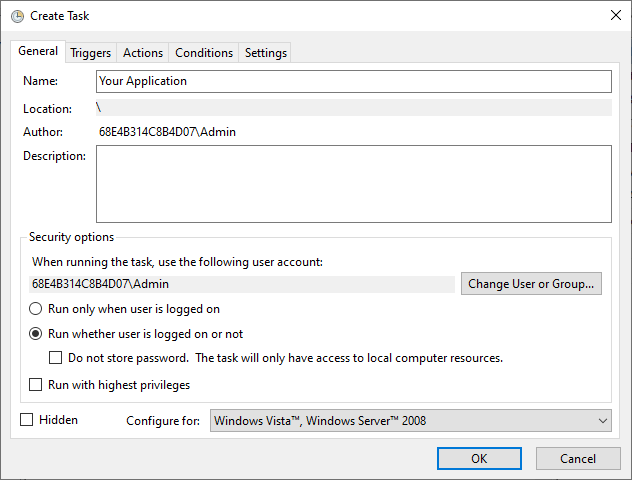
2. In the "General" tab, name your task and check the "Run whether user is logged on or not" box.
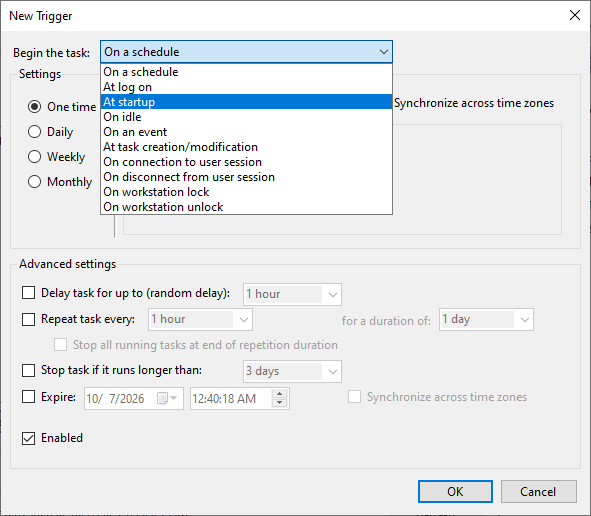
3. Open the "Triggers" tab and press the "+" icon to create a new one. In the "Begin the task" dropdown, choose "At startup (ot other relevant option)" and press "OK".
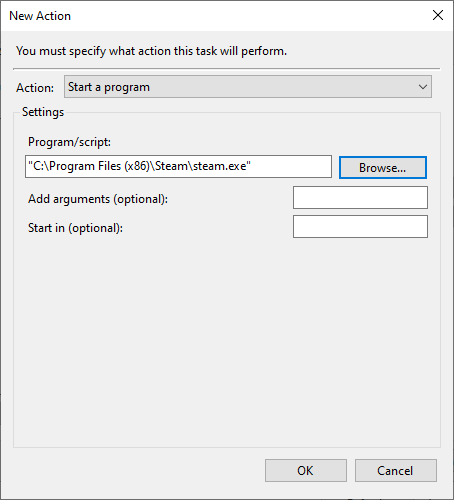
4. In the "Action" tab, press the "+" icon again and choose "Start a program" on the dropdown. Browse to the application you would like to launch and press "OK".
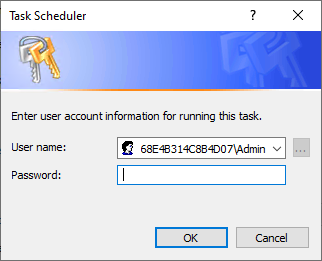
5. Press "OK" again to save the Task and enter your password if prompted. Restart your server to start the service.
Still need help?
If you're a BitLaunch customer and still experiencing issues, reach out to our support team via live chat. Our around-the-clock expert support team can help you get to the bottom of your issue.
Not a BitLaunch customer? Sign up today and talk to our support for some free credit.