

Sign up for a Windows VPS with Bitcoin here and be up and running in a matter of minutes.
As it becomes increasingly difficult to protect your identity online, many are looking to services designed with anonymity in mind to keep them safe from critics, governments, or rabid fans. Purchasing a Windows VPS with Bitcoin can be a great choice for this, allowing use of the world's most popular OS without having any traces back to you.
Though this can be intimidating, BitLaunch makes it quick and simple to buy RDP with Bitcoin, and we'll be walking you through the process today for even more peace of mind. Though the process will take around fifteen to twenty minutes in total, the benefits of an anonymous RDP are usually well worth it.
Signing Up
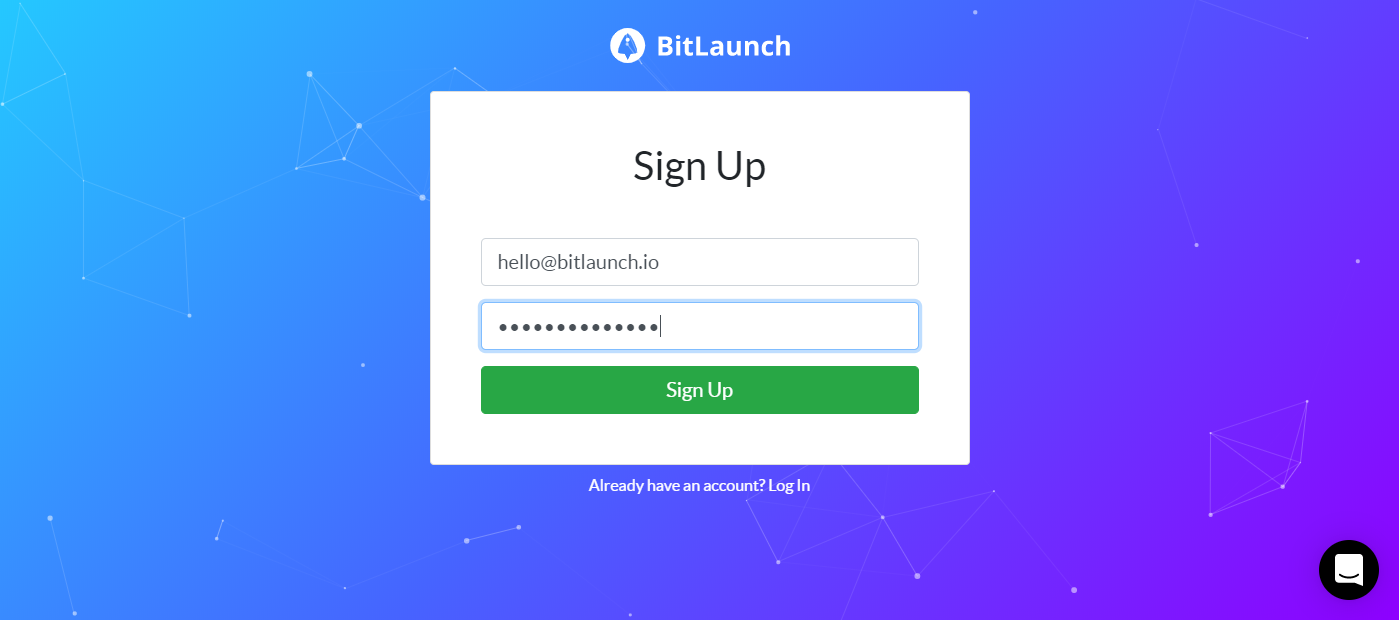
The first step, if you haven't already, is to create a BitLaunch account. This process only takes a minute and requires only an email and password to protect your privacy.
Visit the BitLaunch sign up page and enter your email and a unique, secure password that you haven't used anywhere else.
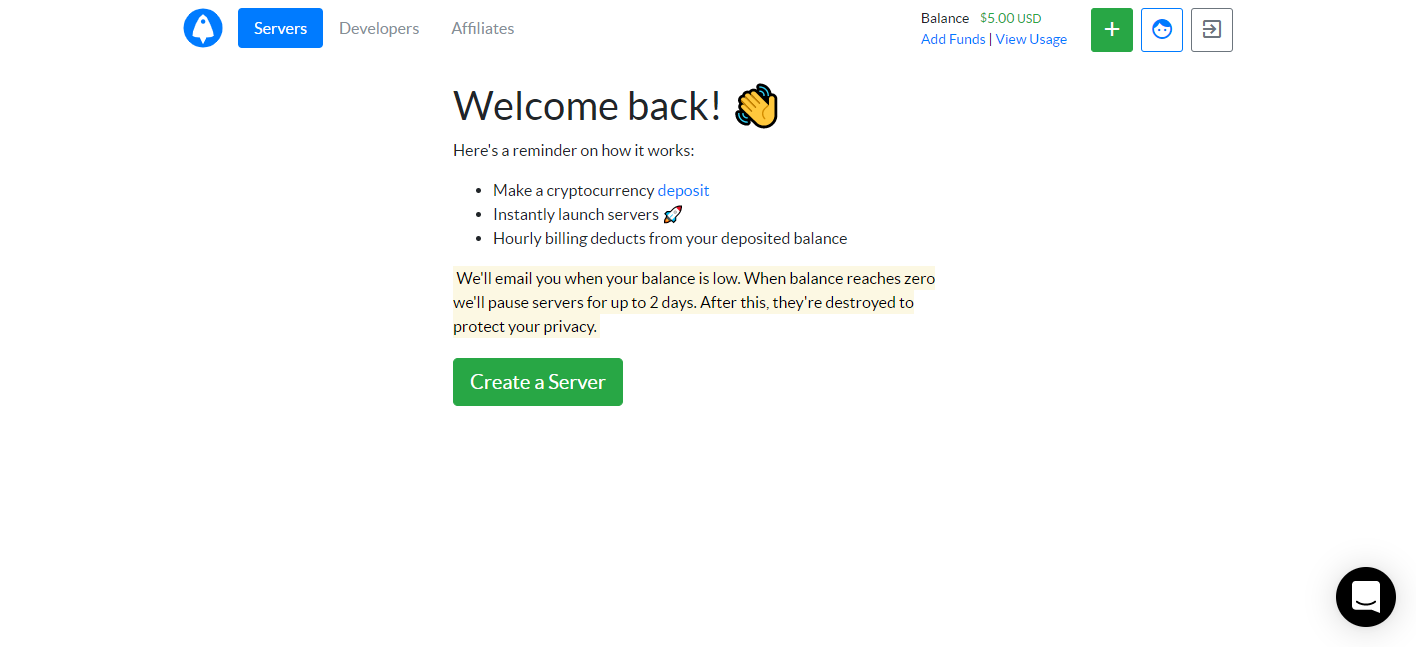
You'll be automatically logged into your BitLaunch sever dashboard and presented with this interface:
Adding Funds
To buy a Windows VPS with Bitcoin, we first need to transfer some Bitcoin to our wallet. To do so, press Add Funds in the top-right corner.
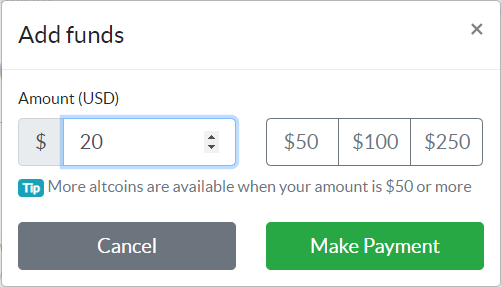
Enter an amount that's greater or equal to $20 and click Make Payment. Remember that once add the balance, there are no refunds.
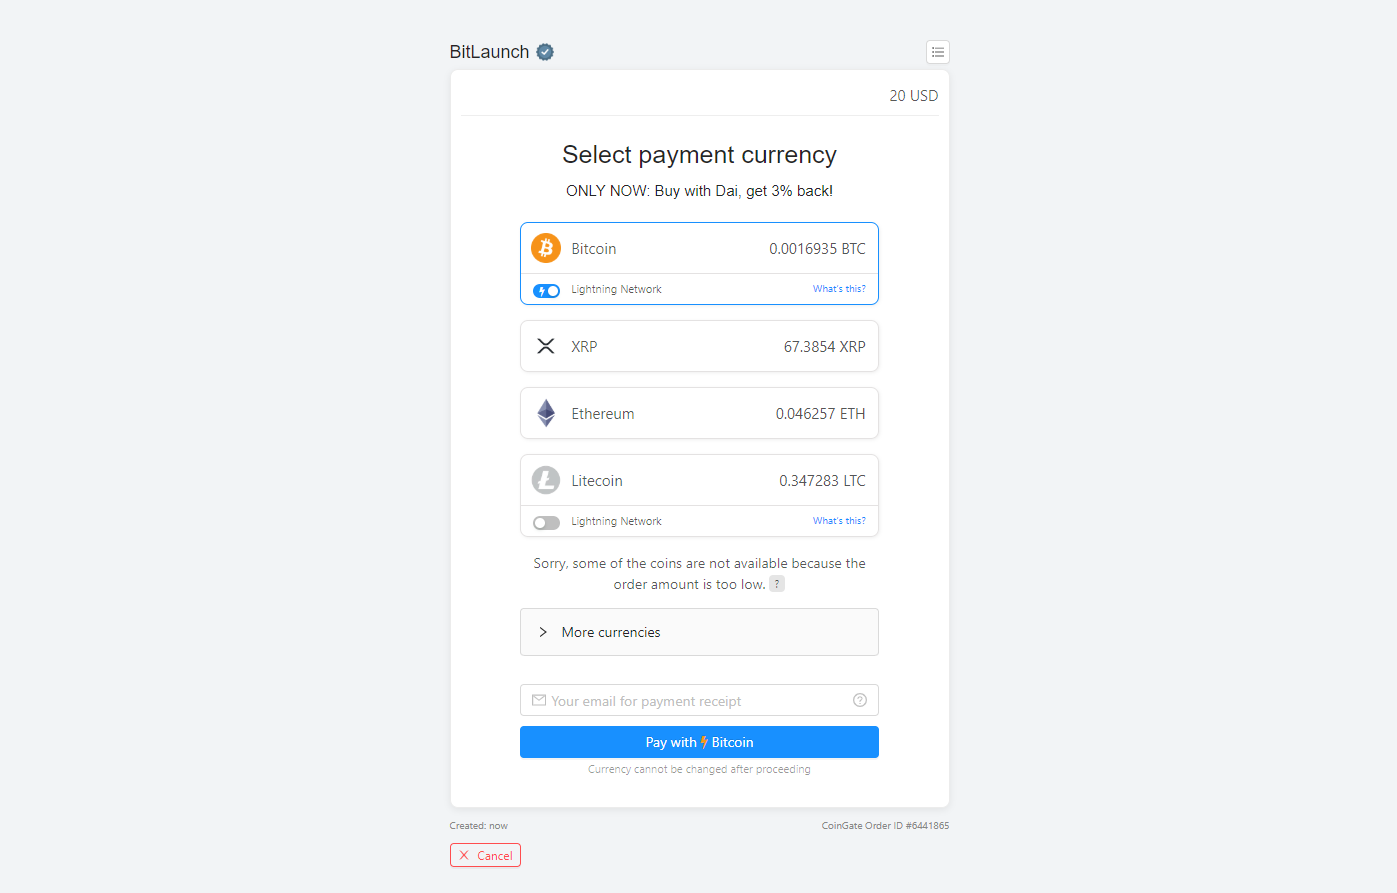
Select Bitcoin from the list of currencies and optionally toggle Lightning Network for a faster transfer. Then click Pay with Bitcoin.
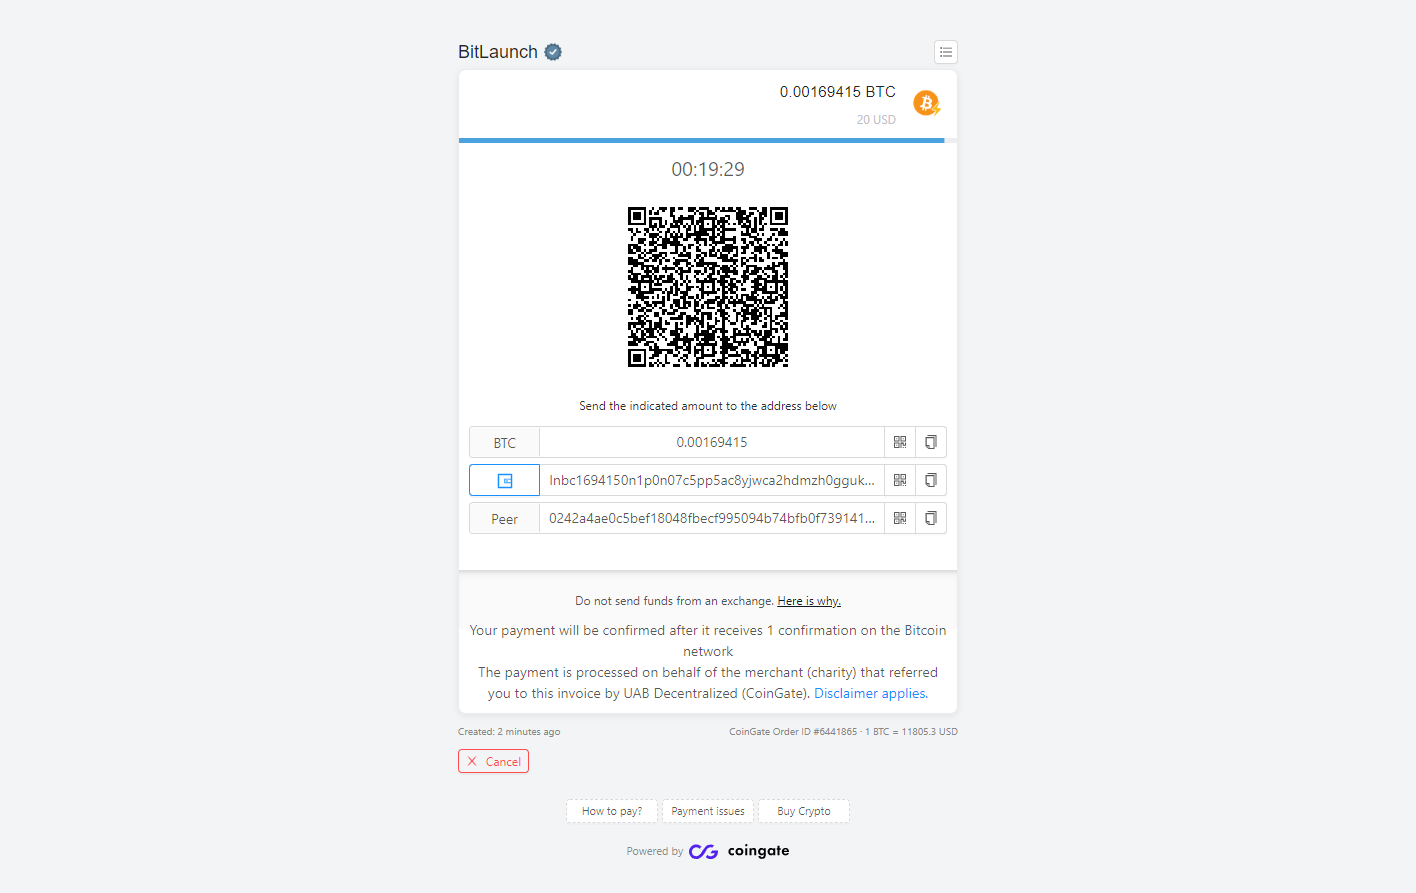
You'll be presented with this screen, which will show a QR code, the amount of BTC you need to transfer, and the address to send it to. Your payment will be confirmed after it receives one confirmation on the blockchain network. Be aware that you shouldn't send it straight from an exchange or web wallet as you may be hit with a fee and slow transfers.
Setting Up Your Anonymous RDP Server
On BitLaunch's end, you're now ready to set up your Windows VPS with Bitcoin, but it's worth getting everything ready on your local PC first. If you're using a Windows PC currently, you'll want to open the "Remote Desktop Connection" app, while if you're on Ubuntu you can use the in-built Remmina Remote Desktop client. If you're on another OS, you can find a full list of clients you can install here.
With that done, you can click the big Create a Server button in your BitLaunch control to buy RDP with the Bitcoin in your wallet.
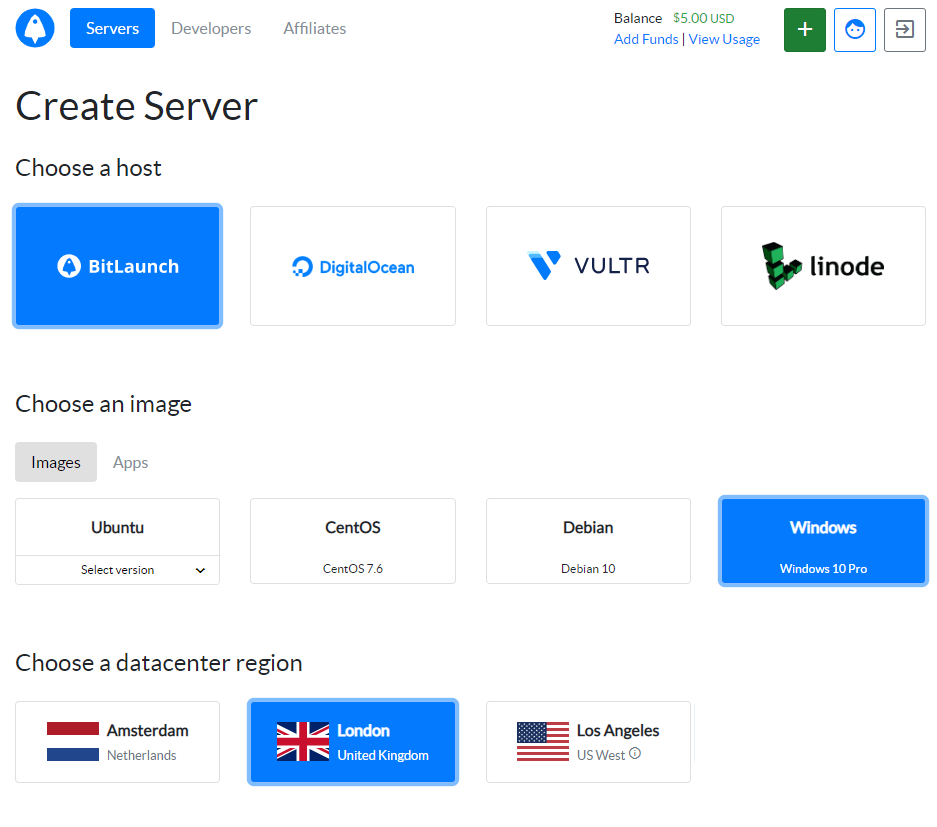
To gain access to the Windows VPS option on BitLaunch's infrastructure, you'll have to select London or Los Angeles as the location. You can then select Windows 10 Pro as your image. BitLaunch operates on a bring your own license basis.
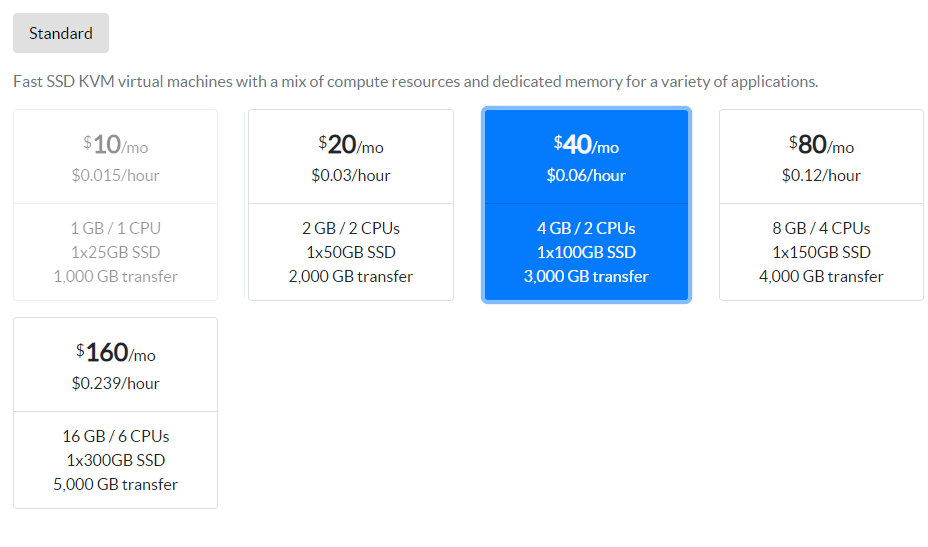
Choose the performance you want your VPS to have. The minimum spec VPS offered is a 2 GB RAM/2 CPU option with a 50 GB SSD and 2,000 GB transfer. This machine is intended as an affordable option and just about meets Microsoft's minimum requirements for Windows 10 to function. You'll see significantly better performance if you go up a tier to the 4 GB/2 CPU plan.
As BitLaunch offers hourly billing, you can test this for yourself without any firm commitments. The minimum spec machine will set you back just $0.03 for an hour and the 4 GB machine $0.06.
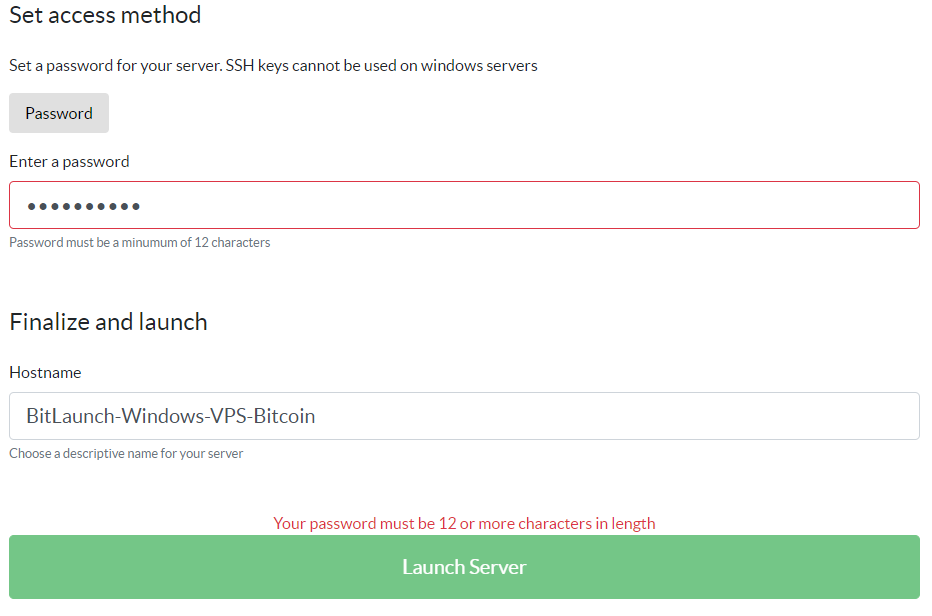
In the Enter password field, type a secure password, then input a memorable Hostname (in our case Windows VPS Bitcoin) and click Launch Server. We've put a lot of effort from here into an instant setup experience.
Your anonymous RDP will be created as soon as you click the button. It typically takes 10 – 15 minutes to complete the Windows 10 Pro installation process and boot for the first time, with no additional verification needed.
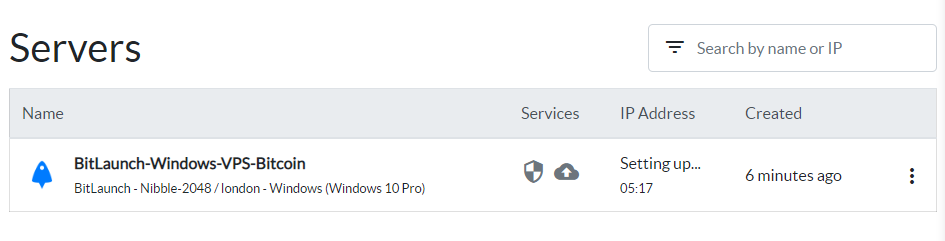
Once the process is complete, your Windows VPS' IP address and password will show in the IP Address column. You can see that the entire process took 11 minutes on this occasion.

You can now connect to your anonymous VPS from any location via your favorite RDP manager.
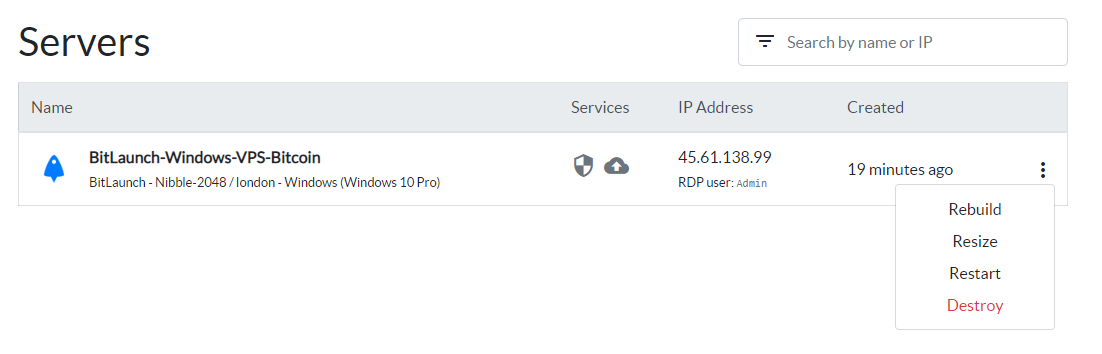
Remember that you can destroy, rebuild, upgrade, or restart your server at any point by pressing the three dots next to its run time. Feel free to reach out to our support at any point if you have a query.