
Cloud storage lets you access your files from any location and backup your most important documents in the case of hardware failure. However, it also requires a high degree of trust in the provider of the cloud service. You must be sure they're secure, won't cooperate with authorities, and don't run trackers or analytics.
As a result, self-hosting your cloud storage is becoming increasingly popular. Nextcloud is an open-source, free solution that you can easily set up on a VPS server and access via an intuitive, familiar interface.
While large amounts of VPS storage don't come cheap, a low-spec VPS server should be enough to hold your most important documents in a fast and secure environment.
Today we're going to be showing you how to install Nextcloud with Docker and Docker Compose. We'll be tying in an Nginx reverse proxy and Let's Encrypt SSL certificate as we do so for additional privacy and security. If you have a home server, you should also be able to follow this guide just fine. Here's what you'll need:
Pre-requisites
- A VPS or home server with an Ubuntu 20.04, CentOS 8, or Debian 10 install
- At least 512 MB of RAM
- A local PC or mobile device to access the storage from
Install Docker and Docker Compose
The first step in the process is naturally to install Docker Engine and Docker Compose. The exact commands will vary depending on your distro, but today we'll be focusing on Ubuntu.
First, let's make sure some pre-requisites are installed:
sudo apt-get install curl gnupg2 apt-transport-https ca-certificates software-properties-commonNow we need to add the Docker reposistory and install it:
curl -fsSL https://download.docker.com/linux/ubuntu/gpg | sudo apt-key add - && sudo add-apt-repository "deb [arch=amd64] https://download.docker.com/linux/ubuntu $(lsb_release -cs) stable"
sudo apt update
sudo apt install docker-ce
It's time to install Docker Compose. You can follow our quick start guide here to ensure a proper set up with the latest version, or simply run:
sudo apt install docker-composeCheck that Docker installed correctly by entering:
docker-compose --versionInstall Nextcloud
With Docker set up, we can move on to showing you how to install Nextcloud with Docker. The first step is to create a network so that our containers can communicate with each other.
You can call this whatever you like, but bear in mind that your config file will need to match in the next steps:
docker network create cloudstorage_networkNow, let's create our docker-compose config to define how our Nextcloud container will interact with Nginx, Let's Encrypt, and MariaDB. The full config will look something like this:
version: '3'

services:

  proxy:
    image: jwilder/nginx-proxy:alpine
    labels:
      - "com.github.jrcs.letsencrypt_nginx_proxy_companion.nginx_proxy=true"
    container_name: nextcloud-proxy
    networks:
      - nextcloud
    ports:
      - 80:80
      - 443:443
    volumes:
      - ./proxy/conf.d:/etc/nginx/conf.d:rw
      - ./proxy/vhost.d:/etc/nginx/vhost.d:rw
      - ./proxy/html:/usr/share/nginx/html:rw
      - ./proxy/certs:/etc/nginx/certs:ro
      - /etc/localtime:/etc/localtime:ro
      - /var/run/docker.sock:/tmp/docker.sock:ro
    restart: unless-stopped

  letsencrypt:
    image: jrcs/letsencrypt-nginx-proxy-companion
    container_name: nextcloud-letsencrypt
    depends_on:
      - proxy
    networks:
      - nextcloud
    volumes:
      - ./proxy/certs:/etc/nginx/certs:rw
      - ./proxy/vhost.d:/etc/nginx/vhost.d:rw
      - ./proxy/html:/usr/share/nginx/html:rw
      - /etc/localtime:/etc/localtime:ro
      - /var/run/docker.sock:/var/run/docker.sock:ro
    restart: unless-stopped

  db:
    image: mariadb
    container_name: nextcloud-mariadb
    networks:
      - nextcloud
    volumes:
      - db:/var/lib/mysql
      - /etc/localtime:/etc/localtime:ro
    environment:
      - MYSQL_ROOT_PASSWORD=toor
      - MYSQL_PASSWORD=mysql
      - MYSQL_DATABASE=nextcloud
      - MYSQL_USER=nextcloud
    restart: unless-stopped

  app:
    image: nextcloud:latest
    container_name: nextcloud-app
    networks:
      - nextcloud
    depends_on:
      - letsencrypt
      - proxy
      - db
    volumes:
      - nextcloud:/var/www/html
      - ./app/config:/var/www/html/config
      - ./app/custom_apps:/var/www/html/custom_apps
      - ./app/data:/var/www/html/data
      - ./app/themes:/var/www/html/themes
      - /etc/localtime:/etc/localtime:ro
    environment:
      - VIRTUAL_HOST=YOUR.SERVER.IP (or nextcloud.domain)
      - LETSENCRYPT_HOST=YOUR.SERVER.IP (or nextcloud.domain)
      - LETSENCRYPT_EMAIL=YOUR-EMAIL
    restart: unless-stopped

volumes:
  nextcloud:
  db:

networks:
  nextcloud:
Create it with sudo nano docker-compose.yml, then make sure you change the following lines:
db:
MYSQL_ROOT_PASSWORD=changethis
MYSQL_PASSWORD=changethistoo
MYSQL_DATABASE=nextcloud
MYSQL_USER=yourusername
app:
VIRTUAL_HOST=YOUR.IP.OR.DOMAIN
LETSENCRYPT_HOST=YOUR.IP.OR.DOMAIN
LETSENCRYPT_EMAIL=YOUR-EMAIL
Run your Nextcloud Docker
With that done, it's finally time to start our Nexcloud Docker and log into our cloud storage solution from our local PC. You can create the containers using:
docker-compose up -dIf you run into an error, it's likely one of two things: your config has a mistake in it or you don't have the pre-requisites. Run through the steps again to ensure everything is correct.
To check all of the containers are working, run:
docker ps -aYou should now be able to access your Nextcloud by entering your server's IP address (or associated domain) in the address bar of your local browser. Those with a domain should notice that SSL is enabled for the site after a minute or two.
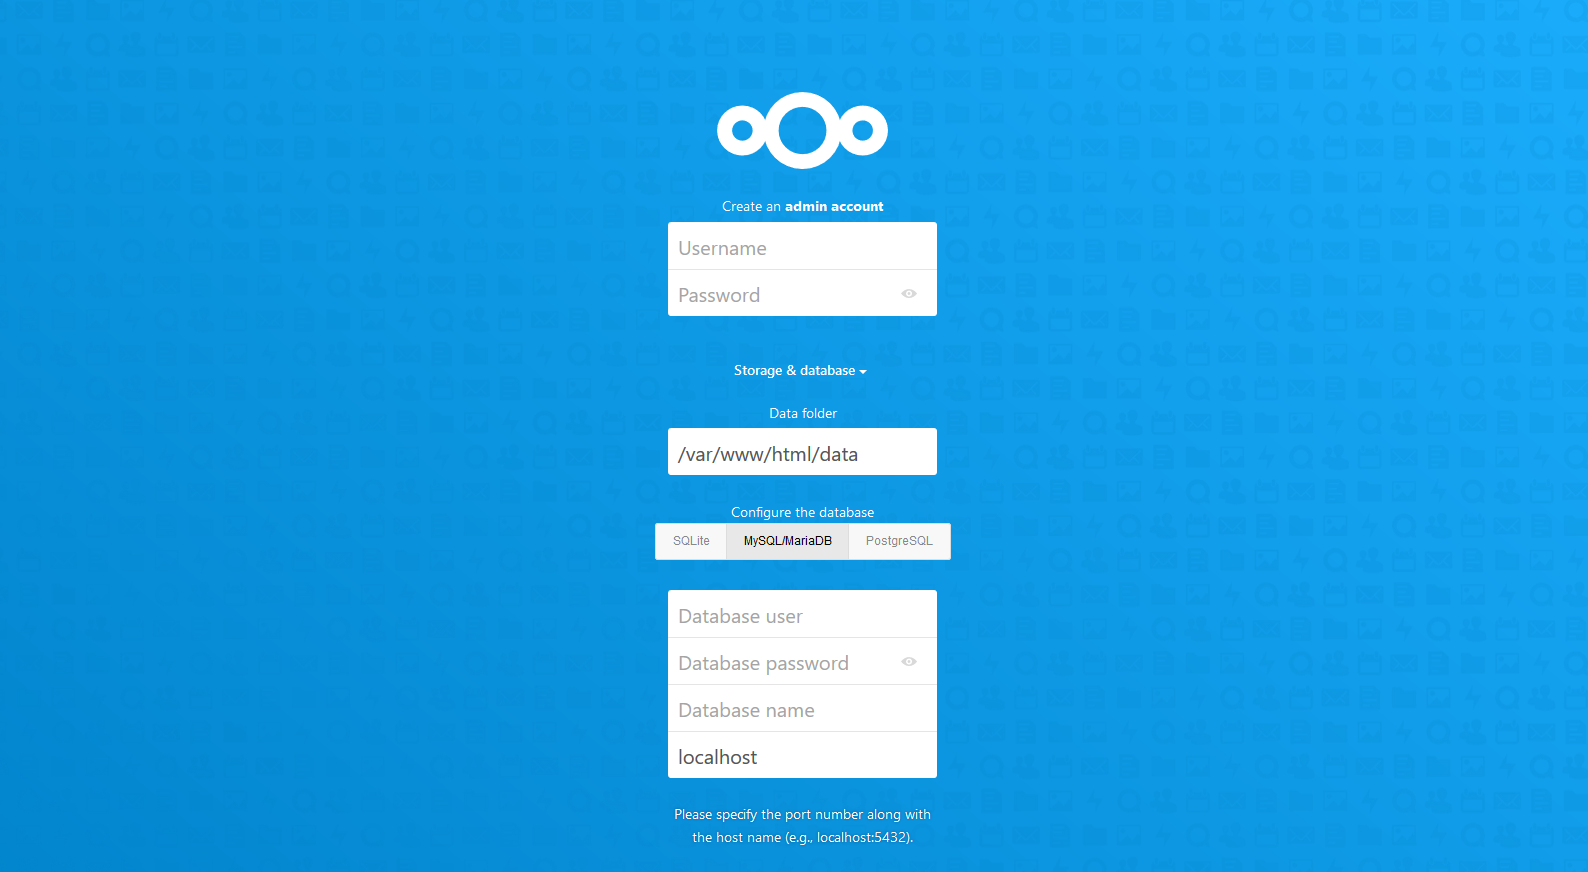
In the username and password field, enter the MySQL username and password you defined in your config file earlier.
Then, under the "Storage & database" dropdown click MySQL/MariaDB. Type your database user, password, and name, changing the "localhost" field to "db". Once you've double-checked them, click Finish setup.
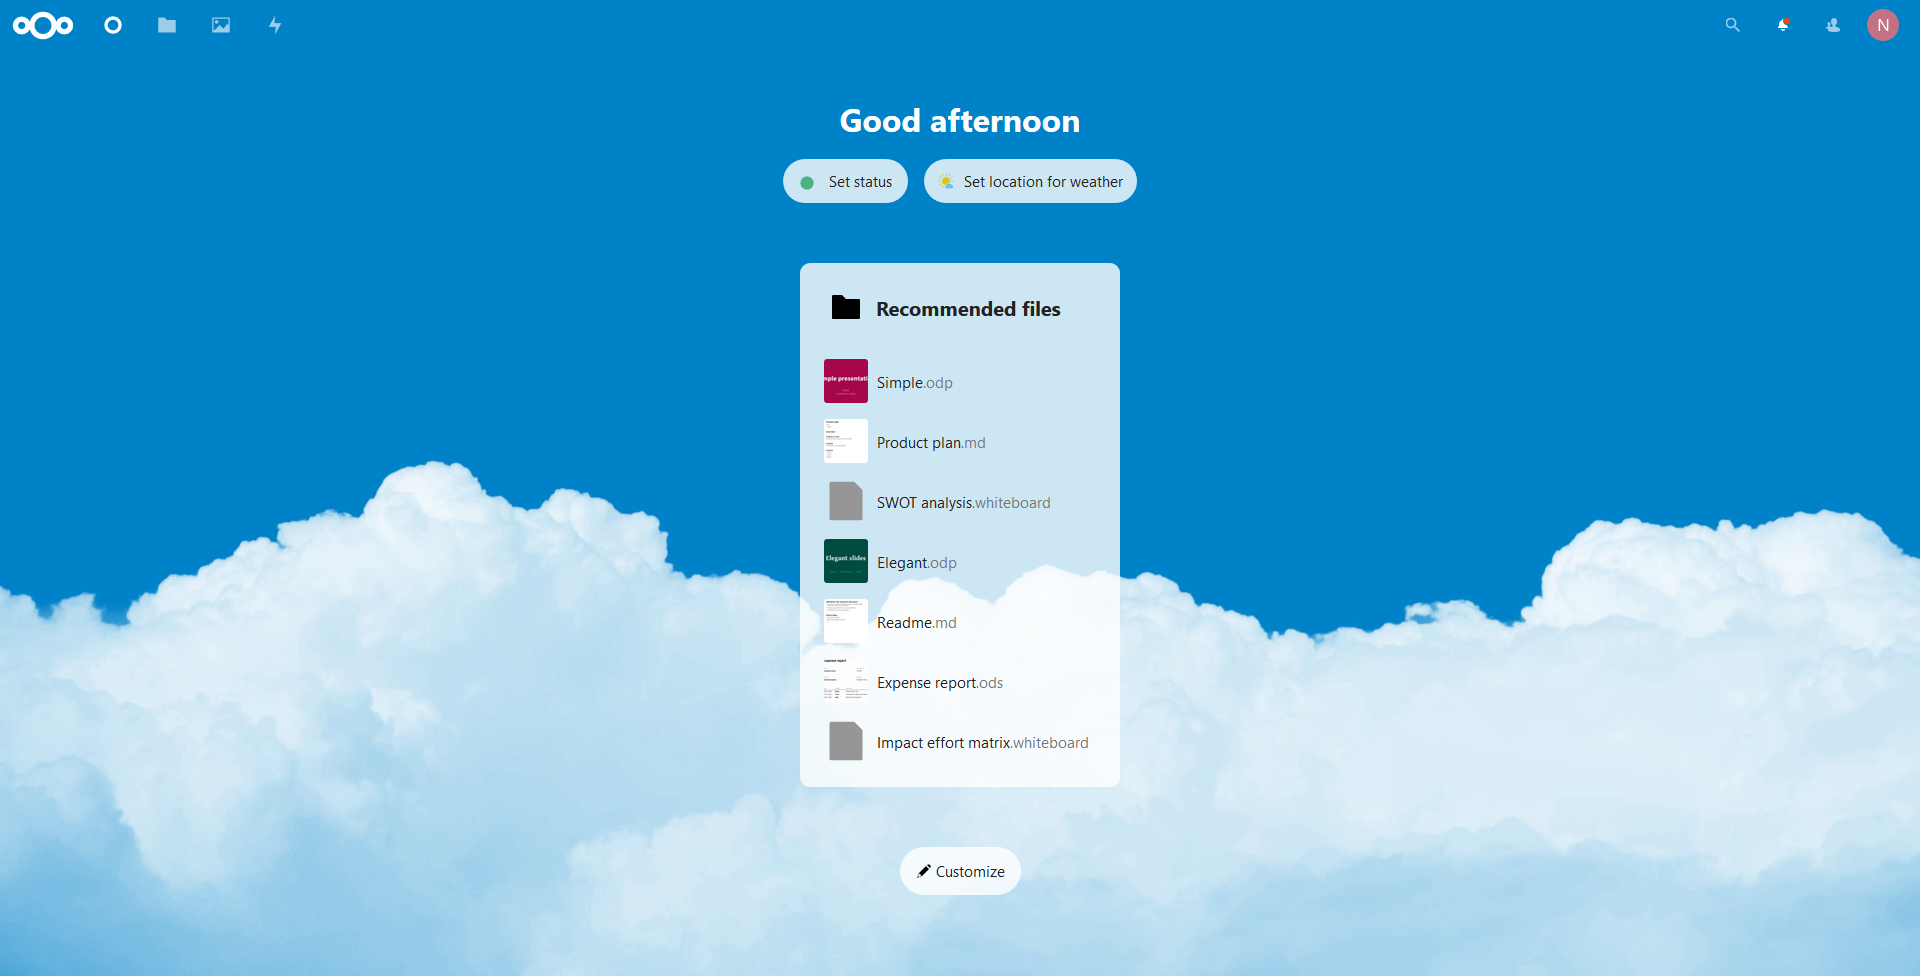
You should be greeted by your beautiful new Nextcloud dashboard, from which you can start using it as you would any other cloud storage service. For additional security and privacy settings, you can enable two-factor authentication and server-side encryption in your settings. Just bear in mind that server-side encryption will come with a performance penalty.