

Python forms a core part of modern Ubuntu. Its command line, GUI, and various system utilities rely on it for proper functioning. As a result, while Ubuntu comes with Python pre-installed, managing it without proper knowledge can be a high-stakes game.
This guide will cover every reliable method to install Python on Ubuntu, from the standard apt to deadsnakes and compiling from source. We'll also show you how to use tools such as pyenv, venv, and conda to safely manage your Python versions without affecting your system functions.
- A warning: Don't break your system
- How to install Python on Ubuntu using apt (fastest)
- How to install a specific Python version
- How to build Python from source
- How to safely manage multiple python versions with pyenv
- How to install Anaconda (conda) on Ubuntu
- How to create virtual environments (venv, pip, pipx)
- Troubleshooting (common errors)
- FAQs
A warning: Don't break your system
The version of Python that comes pre-installed with Ubuntu is a specific version locked to your OS release. While as a developer you'll want the latest version for your projects, it's important that you are careful when changing the default Python version in /usr/bin/python3, or you could break your terminal, GUI elements, firewall, and more.
A safer way of experimenting with Python version is to spin up a VPS server on BitLaunch. You can use your server as a safe development sandbox that won't brick your main operating system. Brick your server, and you can create a new one in seconds. Just make sure you regularly back up ongoing projects.
How to install Python on Ubuntu using apt (fastest)
Unsurprisingly, the easiest and fastest way to install Python on Ubuntu is using its default package manager, apt. You can use apt on Ubuntu to install both Python and Python3:
sudo apt update
sudo apt-get install python3-venv
Note that to install Python on Ubuntu via the package manager, you must use python3. Canonical has decided to redirect the old python to python3 to avoid breaking some older scripts.
Update and install Python, pip, venv
In all likelihood, you'll want to install tools like pip and venv alongside Python to help manage and your versions and virtual environments. To update and install Python, pip, and venv, you can run these commands instead:
sudo apt update
sudo apt install python3 python3-pip python3-venv
Verify installation
You can verify Python installed correctly and check your Python version by typing:
python3 -VOutput:
Python 3.12.3You can do the same for pip and venv:
pip -V
venv -V
Set Python 3 as default command (optional)
If you don't want to have add a 3 whenever you invoke Python or modify old scripts before they'll work, you can create a python>python3 symlink yourself. However, be aware that changing the default Python can break system scripts. For project work, using python3 explicitly or a virtual environment is safer.
That said, by using the python3-is-python package, we can easily create the symlink while ensuring that it keeps pace with future updates.
sudo apt install python3-is-pythonHow to install a specific Python version
If you need a newer Python than your Ubuntu default, the deadsnakes PPA is the way to go. Just bear in mind that changing your Python version globally isn't the best idea in a production setting. Instead, you should consider using it in venv, conda, etc.
First, install software-properties-common. This will give us access to the command we need to install the PPA:
sudo apt install software-properties-commonWe can now add the deadsnakes PPA and update our packages:
sudo add-apt-repository ppa:deadsnakes/ppa
sudo apt update
With that, you can install any Python version you like via apt by specifying the version number. For example:
sudo apt install python3.12 python3.12-venv
It's worth keeping in mind that installing Python via deadsnakes will not overwrite your system one. Rather than replacing the version in /usr/bin/python3, it will be installed alongside it. You can switch between versions using update-alternatives like so:
sudo update-alternatives --install /usr/bin/python3 python3 /usr/bin/python3.12 1
sudo update-alternatives --config python3
How to build Python from source
If you need the very latest Python version, compiling it from its source code may be necessary. Doing so requires a few more steps, but it's still easy enough that pretty much anyone can follow along:
- Update your local repositories and install dependencies.
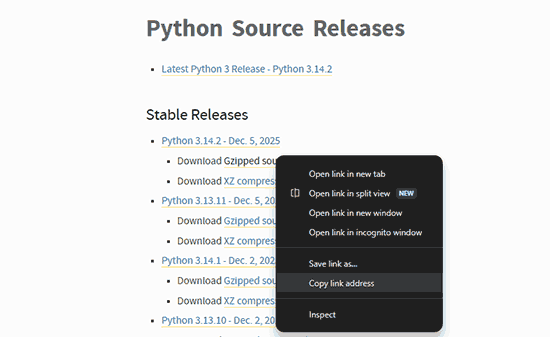
sudo apt install build-essential zlib1g-dev libncurses5-dev libgdbm-dev libnss3-dev libssl-dev libreadline-dev libffi-dev wget build-essential2. Go to the Python source code page, right-click the version you want, and choose "Copy link address".
3. Download the Python version with wget:
wget https://www.python.org/ftp/python/3.14.2/Python-3.14.2.tgz4. Unzip the file using tar -xf followed by your file name.
tar -xf Python-3.14.2.tgz5. Switch to the directory of your Python and test your system for compatibility and optimizations.
ls
cd Python-3.14.2
./configure --enable-optimizations
6. Build and install Python using make:
sudo apt get install make
sudo make install
Wait for the process to complete it could take some time, depending on your system hardware.
How to safely manage multiple python versions with Pyenv
Most of the time, you'll want to use different Python versions on a per-project basis rather than globally. Pyenv is designed for exactly that. It allows you to install any Python version locally without affecting your system Python and any scripts dependent on it. Even better, it enables quick switching between them for testing purposes.
- To install pyenv, you'll first need to ensure you have some dependencies:
sudo apt update
sudo apt install make build-essential libssl-dev zlib1g-dev \
     libbz2-dev libreadline-dev libsqlite3-dev curl git \
     libncursesw5-dev xz-utils tk-dev libxml2-dev libxmlsec1-dev \
     libffi-dev liblzma-dev
2. You can then install pyenv by fetching the automatic installer with curl:
curl https://pyenv.run | bash3. Next, add these lines to your shell and restart it:
export PYENV_ROOT="$HOME/.pyenv"
export PATH="$PYENV_ROOT/bin:$PATH"
eval "$(pyenv init -)"
exec "$SHELL"4. Finally, install your desired python in your project directory version with pyenv. For example:
pyenv install 3.12.9
pyenv local 3.12.9
Alternatively, you can use pyenv global <version> install Python system-wide. However, this comes with the same potential issues as any system-wide Python change (system scripts breaking, etc.).
Developers needing to test libraries against the absolute latest (or unreleased) versions of Python can use an Amsterdam VPS as a dedicated Build/Test Server to save resources and time.
How to install Anaconda (conda) on Ubuntu
Anaconda is another popular way to manage Python versions and packages. It's more complicated and bloated than venv or pip, but it's useful for scientists since its base Python install ships with over 300 data science, machine learning, data processing, and predictive analytics packages.
Data science isn't just for local research. You can use Anaconda on a BitLaunch GPU VPS to gain access to powerful hardware and ensure trading bots or predictive algorithms run 24/7.
You can install Anaconda on Ubuntu by following these steps:
- Grab the installer with curl:
Loading latest installer link…Note: This is the latest version at the time of writing, but it may not be when you read this. Check the download page or update Anaconda after installation to ensure you're up to date.
2. Install Anaconda on Ubuntu by running the downloaded script:
bash Anaconda3-2025.12-1-Linux-x86_64.sh3. If you decide to activate the base environment in the installer, restart your shell to initialize conda:
source ~/.bashrc4. Check your conda version with the command below to verify that the installation completed correctly.
conda infoCreating and activating environments with Anaconda
To create an isolated Python environment with conda, we can do something like this:
conda create -n myenv python=3.12This will instruct conda to create an environment with the -name "myenv" and a Python version of 3.12.
You can activate the environment with:
conda activate <environment name>In this case it would be, conda activate myenv.
 BitLaunch
Ready to run AI workloads? Follow the guide above to install PyTorch.
How to create virtual environments (venv, pip, pipx)
There are several ways to create virtual environments in Python, a couple of which we've covered already. The most popular way, however, is using venv or pip/pipx.
How to install pip on Ubuntu
pip is automatically installed with the latest Python versions, so check that you don't have it already before following the installation process:
pip --versionIf your system has pip installed, it will return a version number. If it doesn't, you can use the following command to install pip on Ubuntu:
sudo apt install python3-pippip vs pipx
Global Python command-line applications, such as AWS CLI can use pipx instead. You can install pipx on Ubuntu using:
sudo apt install pipx
pipx ensurepath
Creating a virtual environment with venv and pip
To create a virtual environment that contains its own Python interpreter as well as pip/pix, run the following commands:
mdkir projectname
cd projectname
python3 -m venv myenv
source myenv/bin/activate
You can then use pip to install packages, for example:
pip3 install camelcaseMaking a Python bot? BitLaunch's affordable anonymous VPSs are the perfect place to keep Python-based Telegram or Discord bots without exposing your home IP.
Troubleshooting (common errors)
Most of the time, you won't have any issues installing and managing Python versions on Ubuntu. However, there are a few common errors users run into as a result of their system environment or incorrect command usage. We'll quickly cover how to resolve them below.
Fixing "ModuleNotFoundError" after installing Python
ModuleNotFound errors frequently occur when users try to import a "built-in" module but find it missing. Some examples include venv, tkinter, pip, and distutils. The easy fix is to install that module:
- No module named 'venv': Run
sudo apt install python3-venv - No module named 'tkinter': Run
sudo apt install python3-tk - No module named 'pip': Run
sudo apt install python3-pip - No module named 'distutils': Run
sudo apt install python3-distutils
Fixing "E: Unable to locate package python3-x.x"
This error usually occurs for one of two reasons:
- You mispelled the package name. It happens — package names are case-sensitive and it's easy to make a typo.
- You're trying to install a Python version that is not included in the default Ubuntu repositories. Typically, the respositories only include the Python version that was stable when your Ubuntu version was released, and do not recieve major Python updates. You can use
sudo apt updateto update your package list or try installing using the deadsnakes PPA as outlined above.
How to fix "error: externally-managed-environment"
Newer Ubuntu versions (23.04+) stop you from overwriting your system Python with pip install and throw up the "externally managed environment" error. Though there are ways to force the installation, we don't reccommend it as replacing your global Python could break system scripts. Instead, install Python in a virtual environment (python 3 -m venv myenv) or use apt for system tools (e.g. sudo apt install python3-requests).
"command not found" error when adding the deadsnakes PPA
If you cannot add the deadsnakes PPA due to a 'command not found' error, this is usually because you are running a minimal or dockerized version of Ubuntu that does not com,e with the software properties package pre-installed. You can resolve this with the command:
sudo apt-get install software-properties-commonFAQs
What's the difference between pip and pip3?
The main difference between pip and pip3 is the version of Python they're associated with. pip3, as you might imagine, points to Python 3, while pip usually points to python 2.
Aside from that, because pip3 is continually updated, it tends to support newer standards, has faster dependency resolution, and support the latest security patches.
Is it safe to change my /usr/bin/python symlink?
No. You should avoid changing /usr/bin/python or /usr/bin/python3 as it will likely break system functionality, On a desktop, it can break UI elements, terminal, WiFi menus, etc. On a VPS server, it may "lock" you out, preventing you from updating software, configuring firewalls, or restarting services
Is Python preinstalled on Ubuntu?
Yes, Python3 is included in all modern Ubuntu versions. You can check if it's installed on yours using python3 --version. The default Python versions for Ubuntu include:
- Ubuntu 24.04 (Noble): Python 3.12
- Ubuntu 22.04 (Jammy): Python 3.10, 3.11/3.12 via PPA or pyenv
- Ubuntu 20.03 (Focal): Python 3.8, pyenv or PPA for newer versions
How do I set python3 as the default python command?
On Ubuntu, the easiest and officially recommended way is to install the python-is-python3 package. After opening the terminal, run the following command:
sudo apt install python-is-python3Should I use apt, pyenv, or anaconda to install Python?
It depends on your use case. If you're a system or sever admin just looking to use Python for siple scripts or general tasks, installing Python via apt will work just fine. If you're doing development work, Pyenv is a better choice because it safely installs Python within a directory and allows you to easily switch between version. Anaconda, meanwhile, is good for data scientists, machine learning engineers and researchers due the tools it comes pre-packaged with.
How do I uninstall a python version installed via PPA or pyenv?
Since pyenv usually installs python to the ~/.pyenv/versions directory, uninstalling Python versions is safe and easy. List installed versions with pyenv versions, then uninstall your target using pyenv uninstall 3.10.4. You can then optionally refresh pyenv shims using pyenv rehash.
Uninstalling Python versions installed via PPA can be a bit more hazardous because there's the risk that you accidentally uninstall your system Python. As a result, you should first run python3 --version. If it matches the version you want to uninstall, you should not proceed. You can find the exact name of the python package you want to remove using dpkg --list | grep python3 and then remove it with sudo apt remove python3.x. Finally, clean up dependencies with sudo apt autoremove.