
Quick Start: TeamSpeak 3 Linux Server
Guide last updated: March 2026
- Create User — Add a dedicated
teamspeakuser withadduser teamspeak. - Download & Extract — Grab the latest server
.tar.bz2from the TeamSpeak site and extract it. - Accept License — Run
touch .ts3server_license_acceptedin the install directory. - First Boot — Start the server and save the admin password and privilege key from the output.
- Open Ports — Allow
30033/tcp,9987/udp, and10011/tcpthrough your firewall. - Enable on Boot — Create a
systemctlservice so TeamSpeak starts automatically. - Connect — Enter your server IP in the TeamSpeak 3 client and use your privilege key.
- Prerequisites
- Why choose a VPS for your TeamSpeak server?
- Choosing your TeamSpeak server specs
- How to set up a TeamSpeak 3 server on Linux
- How to set up a TeamSpeak 6 server on Linux
- Troubleshooting: Can't connect, missing keys, and more
Though Discord has become the popular choice for voice chat for gamers, TeamSpeak has been around for longer and is still utilized by many. While we'll leave the in-depth discussion of their pros and cons to our TeamSpeak v Discord blog, the bottom line is as follows. Discord is feature-rich, but the TeamSpeak VoIP software uses a proprietary protocol that requires fewer resources. Ultimately, that translates to better performance in whatever title you're playing, better voice quality, and lower latency.
This guide walks you through creating a TeamSpeak 3 server on Linux in under 5 minutes. For a Windows install, you can see our previous guide.
Run a gaming community? Check out our gaming VPSs and host your server with BitLaunch too.
Prerequisites
For this tutorial, you'll need:
- A local device (Windows, Linux, Android, or iOS) machine for the TeamSpeak client
- A Linux VPS with at least 1GB RAM/1CPU and root access for opening firewall ports. If you're new to VPS servers see our guide on how to connect to your VPS.
While you can host a TeamSpeak server at home, many residential IPs use carrier grade NAT (CGNAT), which blocks inbound sessions and makes networking a bit of a headache unless your carrier agrees to assign you a static IP (unlikely).
TeamSpeak firewall ports cheat sheet
You'll need to open ports 9987, 30033 and 10011 to get TeamSpeak's basic functionality working and 10022, 41144, and 2010 for optional features. We'll show you how later, but advanced users can get ahead by referencing the table below.
| Port | Protocol | Service |
|---|---|---|
| 9987 | UDP | Voice |
| 30033 | TCP | File transfer |
| 10011 | TCP | ServerQuery (raw) |
| 10022 | TCP | ServerQuery (SSH) optional |
| 41144 | TCP | TSDNS optional |
| 2010 | UDP | Weblist optional · outbound only |
Why choose a VPS for your TeamSpeak server?
The minimum requirements for a TeamSpeak server are tiny: it can function on as little as 1 GB of RAM, a low spec CPU, and 15 MB of storage. It's therefore entirely possible to run a server for a small group from your home network, but we generally don't recommend this for a few reasons:
- Opening incoming ports exposes your home network to the internet. Since TeamSpeak does not hide your IP from connected users, this could be exploited to perform a DDoS attack to take down your home network. Additionally, unless you set it up on a separate VLAN or DMZ, other computers on your WiFi could be impacted if your server gets compromised. For more on locking down your server, see how to secure your anonymous VPS.
- CGNAT and dynamic DNS can be a massive pain point. Many consumer ISPs, especially in the EU, enable these, leading to issues connecting to the server or frequent IP address changes that you have to communicate to users unless you pay for a static IP or buy a domain/DDNS service.
- Uptime will be impacted. VPS servers run in datacenters that do everything they can to prevent their servers from going down. Your home server is subject to power cuts, network/ISP outages and so on.
To be clear, unless your ISP is very strict, these can usually be worked around — they just introduce additional friction and frustration. If you're just running a server for a group of friends who don't have 24/7 uptime requirements, running a server on a Raspberry Pi on its own VLAN with security mitigations in place is perfectly acceptable. It's likely, however, that paying $5-10 a month for a VPS server will save you a lot of headaches down the line.
Need a reliable, private VPS server for TeamSpeak on Linux? Sign up for BitLaunch here. New customers can request a free trial!
Choosing your TeamSpeak server specs
As we mentioned earlier, TeamSpeak requires very modest specs, but those specs do scale depending on factors such as your concurrent users, how frequently users share files/images, and so on.
Here are some very general guidelines based on concurrent user count:
| Use case | CPU / RAM | Storage | Network |
|---|---|---|---|
|
Small Friends / squad 5–10 concurrent · 32 slots
|
1 vCPU / 512 MB–1 GB | 10 GB SSD | ~1 Mbps up 500 GB/mo transfer |
|
Medium Guild / clan 30–50 concurrent · 64 slots
|
1 vCPU / 1–2 GB | 20 GB SSD | ~3–5 Mbps up 1 TB/mo transfer |
|
Large Community server 100–150 concurrent · 256 slots
|
2 vCPU / 2–4 GB | 40 GB SSD | ~8–12 Mbps up 2–3 TB/mo transfer |
|
Enterprise Multi-server / esports 250–500 concurrent · 512+ slots
|
4 vCPU / 4–8 GB | 80 GB+ SSD | ~20–40 Mbps up 5+ TB/mo transfer |
Sources: TeamSpeak official minimum requirements (1 GB RAM, 15 MB disk, SSE2 CPU). Community benchmarks: 150 users on 512 MB / 1 vCPU at ~8 Kbit/s per user, ~300 GB/mo. Official bandwidth formula: speakers × (listeners in channel − 1) × codec bitrate. TS6 Docker baseline ~50 MB RAM. Large deployments recommend MariaDB over SQLite.
Keep in mind that these configurations assume that you aren't using TeamSpeak as a file sharing server or something similar. If users are regularly sharing large files, you'll need more storage.
European gaming groups looking for low latency can consider our Amsterdam VPSs.
How to set up a TeamSpeak 3 server on Linux
TeamSpeak 3 is the old reliable of voice applications. It's been battle tested for 15 years and is secure and very stable. If you value a lightweight server and client over pretty visuals and additional social features, this is the obvious pick. Here's how you set up its server step-by-step:
Step 1 – Create a new TeamSpeak user
Once you're connected, the first step is to update your server to ensure it has the latest security packages:
sudo apt-get update && sudo apt-get -y upgrade
It's then a good practice to create a new user specifically for our TeamSpeak server. This will ensure it doesn't have more privileges than it needs to and is separated from the rest of the OS:
sudo adduser teamspeak
su teamspeak
Step 2 – Download and Extract TeamSpeak server packages
Now we can download the latest version of TeamSpeak server from the official website.
Note that the TeamSpeak 3 URL below links to the latest version at the time of writing. The link may not be up to date by the time you read this. Check the site to make sure it is. You'll have to modify the wget and tar commands below to match your file name if it's different.
To download TeamSpeak 3
wget https://files.teamspeak-services.com/releases/server/3.13.7/teamspeak3-server_linux_amd64-3.13.7.tar.bz2
tar xvfj teamspeak3-server_linux_amd64-3.13.7.tar.bz2
Step 3 – Accept the license agreement
Before we can run TeamSpeak, we need to create a file indicating that we accept the license agreement. To do so, type:
touch .ts3server_license_accepted
Though this file is empty, it's enough to indicate that we accept the terms of the software use.
Step 4 – Retrieve your privileged key
When connecting to a TeamSpeak 3 server for the first time, you'll need a privileged key to verify that you are indeed the owner. You can retrieve this by starting your server via the provided script:
./ts3server_startscript.sh start
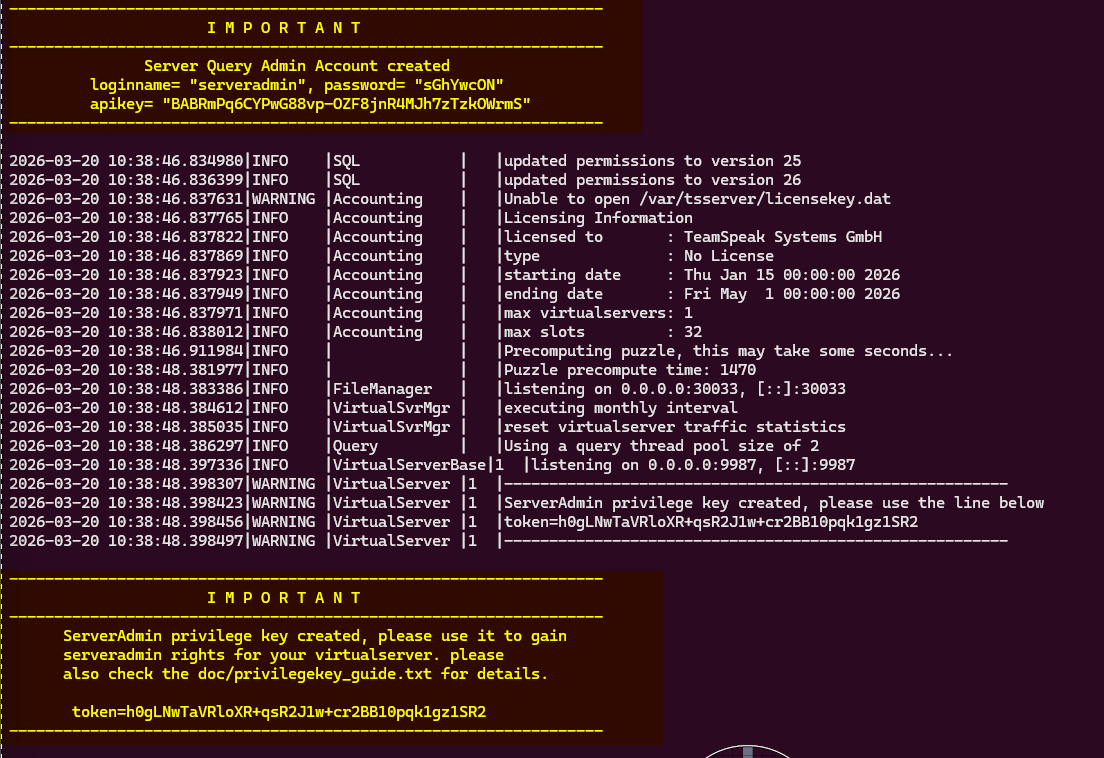
On first boot, you'll get an output like this:
------------------------------------------------------------------
                      I M P O R T A N T
------------------------------------------------------------------
               Server Query Admin Account created
         loginname= "serveradmin", password= "Y15pbQv0"
         apikey= "BACCgVsVx9C2bxrmFjjGgUU9jQXhH6wmVre1TI_"
------------------------------------------------------------------


------------------------------------------------------------------
                      I M P O R T A N T
------------------------------------------------------------------
      ServerAdmin privilege key created, please use it to gain
      serveradmin rights for your virtualserver. please
      also check the doc/privilegekey_guide.txt for details.

       token=5JzgJCw5gdPEPmEwAVjb0xHIPVmOrFx8NThBvHwh
------------------------------------------------------------------
Copy this information to a safe location, taking particular note of the privilege key token, as you'll need that in a bit.
Step 5 – Open the TeamSpeak firewall ports
By default, your server may not have the correct ports opened to allow TeamSpeak on Linux traffic in and out. To remedy this we can run the following commands:
sudo ufw allow 30033/tcp
sudo ufw allow 9987/udp
sudo ufw allow 10011/tcp
Step 6 – Create a startup script
Now that we've set up our TeamSpeak server on Linux, it's beneficial to create a script to make it start every time the VPS is booted. This can aid in resilience if there's any temporary downtime and get everything up and running automatically after an update.
There are various ways to make a program run on start up, but in this case systemctl makes the most sense.
First, log back in on your root user with su and then enter your password. Now create a text file in /lib/systemd/system/teamspeak.service by typing nano /lib/systemd/system/teamspeak.service and pasting the following into the document:
[Unit]
Description=Teamspeak Server Service
Wants=network.target

[Service]
WorkingDirectory=/home/teamspeak
User=teamspeak
ExecStart=/home/teamspeak/ts3server_minimal_runscript.sh
ExecStop=/home/teamspeak/ts3server_startscript.sh stop
ExecReload=/home/teamspeak/ts3server_startscript.sh restart
Restart=always
RestartSec=15

[Install]
WantedBy=multi-user.target
Press Ctrl + O and Ctrl + X, then activate the service via:
systemctl enable teamspeak.service
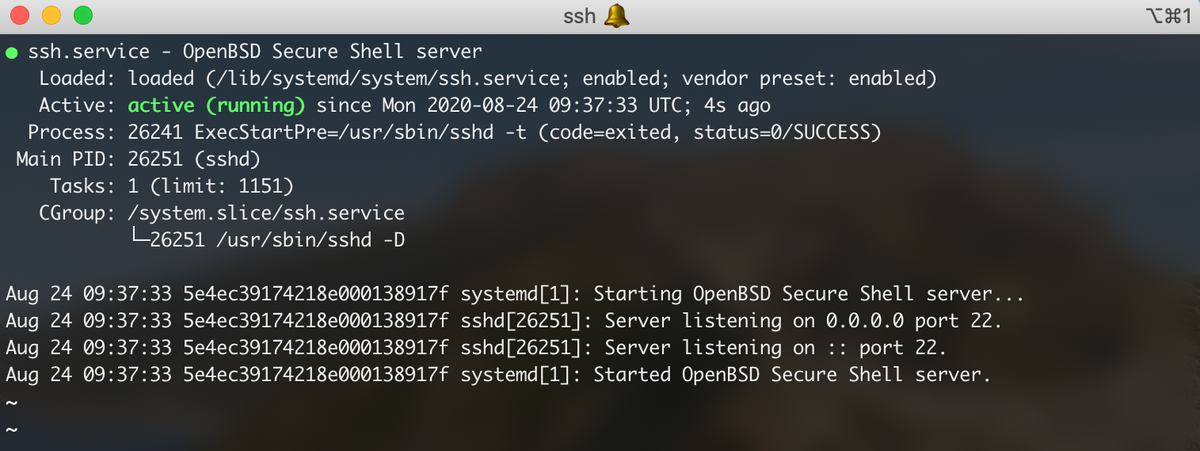
Reboot your server ( reboot ), and type systemctl status teamspeak to make sure it's running. The output should look something like this:
 teamspeak.service - Teamspeak Service
     Loaded: loaded (/lib/systemd/system/teamspeak.service; enabled; vendor pre>
     Active: active (running) since Tue 2020-11-17 15:30:40 UTC; 2min 55s ago
   Main PID: 671 (ts3server)
      Tasks: 21 (limit: 614)
     Memory: 18.5M
     CGroup: /system.slice/teamspeak.service
             └─671 ./ts3server
Step 7 – Connect a TeamSpeak 3 client
On your local PC, download and install the TeamSpeak 3 client from the official webpage or your software center.
Enter your server IP address in the "Nickname or address" field, and give it a name.
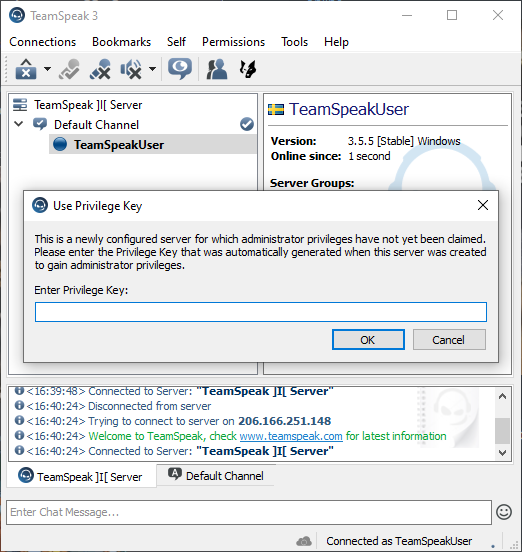
Click Connect and enter the privileged key you copied earlier. Press OK to connect to the server.
How to set up a TeamSpeak 6 server on Linux
The set up process for TeamSpeak 6 is very similar to TS3, but some adjustments must be made due to its beta status, which means it's being hosted on GitHub, and its use of Docker.
Step 1 – Create a new TeamSpeak user
First we want to update our server's security packages and create a new, non-root user to install TeamSpeak on.
sudo apt-get update && sudo apt-get -y upgrade
sudo adduser teamspeak
Run su teamspeak to log in.
Step 2 - Clone the TS6 GitHub repo
Rather than fetching TeamSpeak 6 from the official website, we need to clone its GitHub repo. We can do so using the git command:
git clone https://github.com/teamspeak/teamspeak6-server.git
cd teamspeak6-server
If you don't have git installed, the command is sudo apt install git if you're on Ubuntu. Other distributions will use yum install or snap install.
Step 3 - Running your TS6 server with Docker Compose
Docker is the easiest way to run the TeamSpeak 6 server at the moment. If you plan to run a TeamSpeak server long term, we recommend using Docker Compose instead of the Docker run. This will allow you to launch your server without running that long command we pasted in the previous step, makes updates easier, and allows you to auto-restart on downtime.
Thankfully, the TeamSpeak6 team has included a ready-made template that we can just run to get started:
sudo apt install docker compose
cd compose
docker compose -f example-compose-sqlite.yaml up -d
Finally, run docker compose -f example-compose-sqlite.yaml logs -f and note down your server query admin details and your server admin privilege key. You'll need these for your client later.
Step 4 – Open the TeamSpeak firewall ports
Your server either won't have a firewall enabled at all or won't have the right ports open to allow TeamSpeak 6 to function correctly. We'll use ufw to remedy this, but if you're not on Ubuntu or Debian you'll want to use iptables.
sudo ufw allow 30033/tcp
sudo ufw allow 9987/udp
sudo ufw allow 10011/tcp
sudo ufw allow 22/tcp
If you have any other services running on your server, make sure you forward those before you enable your firewall, too. Or, if you changed your SSH port previously, ensure you forward that instead of port 22. Once that's done, you can enable the firewall using:
sudo ufw enableStep 5 – Connect a TeamSpeak 6 client
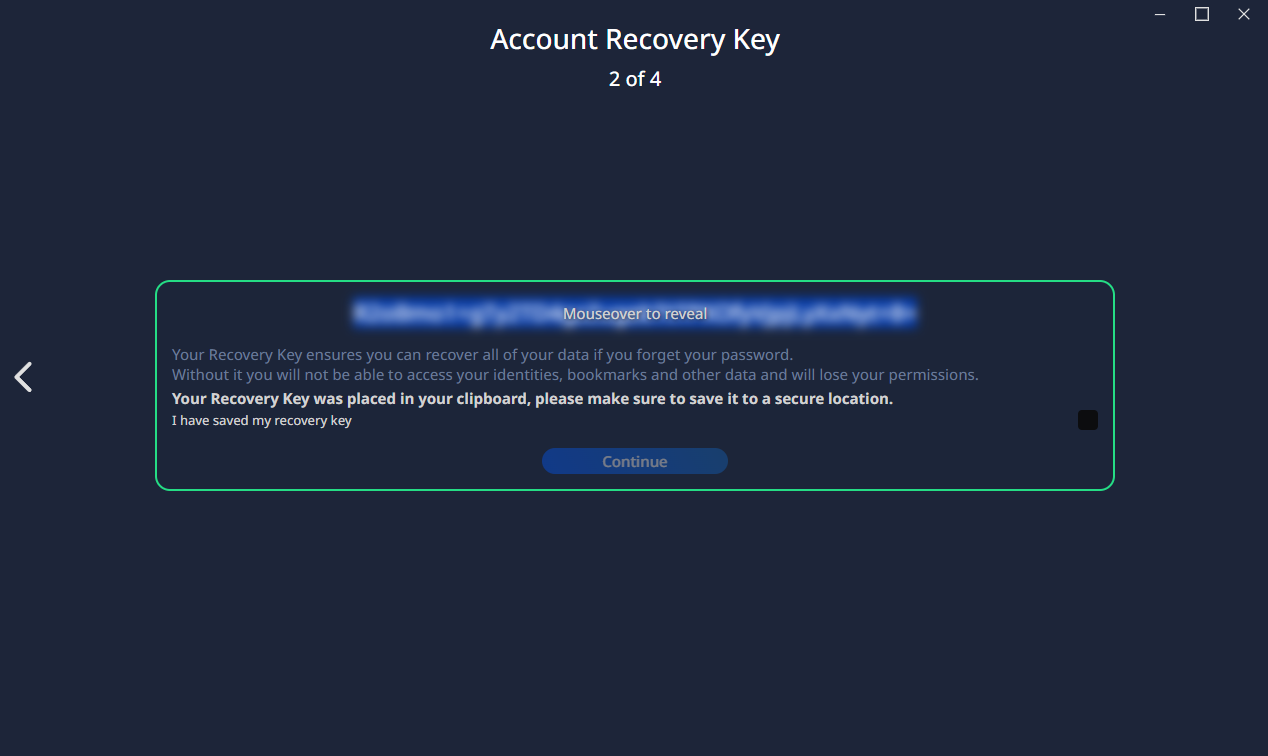
On your local PC, download and install the TeamSpeak 6 client from the official webpage or your software center. You'll need to create an account and log in to use TeamSpeak 6.
Make sure you save your recovery key on first login so you don't lose access to your admin account in the future.
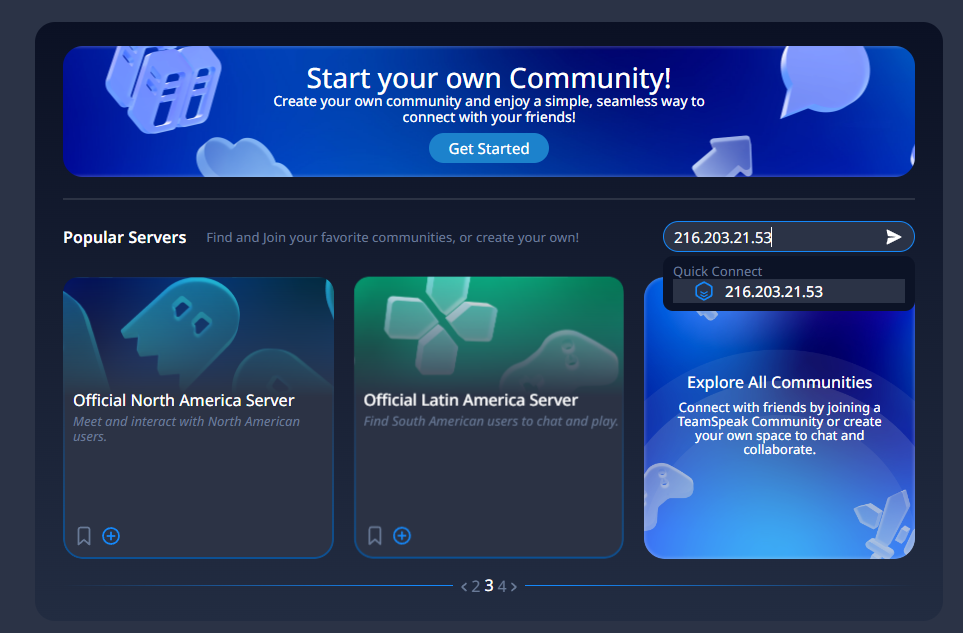
In the main pane of TS6, paste your server's IP address into the "Quick Connect" field and press Enter.
Finally, at the top of your screen, click the dropdown arrow next to "Is this your TeamSpeak Server?" and paste your privilege key.
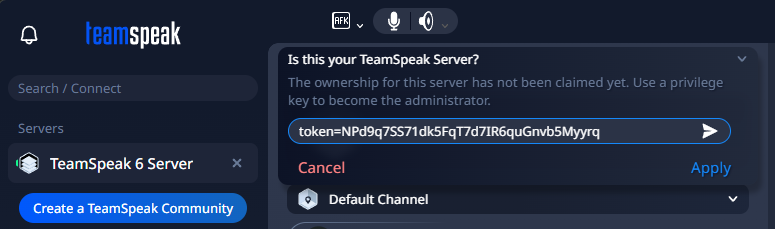
That's it! You're ready to start inviting people to your server.
Troubleshooting: Can't connect, missing keys, and more
In the vast majority of cases, following the steps above will get you a fully functional TeamSpeak server that you'll only have to touch when you need to update or want to make configuration changes. In rare cases, however, errors can surface. We'll cover some of the most common below.
What to do if you lose your privilege key
If you accidentally overwrite your clipboard or lost the note you had with your privilege key, it's not a big deal. You can either read your service logs (search for "token"), or restart the server once and generate a fresh key. Make sure you save it in a password manager or cloud lockbox for the future.
Local LAN works, but outside users time out or can't connect
This typically comes down to one of two issues:
- Your firewall or router doesn't have the right ports open. Make sure UDP 9987 is open. Also check your logs and configs to make sure you aren't using different ports to the defaults.
- Your ISP is using CGNAT. If the right ports are forwarded and you're running on a home server, the culprit is probably CGNAT, especially if your ISP assigns a 100.64.0.0/10 address to your WAN. Talk to your ISP and see what you can arrange or use a VPS server.
Users can't upload files
You probably don't have TCP 30033 open on your firewall/router. Double check, as well as your server configs to make sure you aren't using a non-traditional port for file sharing.
Incorrectly running system clock error
This warning means your server's system time jumped forward or backward by more than a few seconds, which can cause connection instability and database issues. This usually happens on VPS instances where the hypervisor drifts or after a suspend/resume cycle.
To fix it, install ntp or chrony to keep the clock synced — on Ubuntu/Debian run sudo apt install chrony and it will start automatically. You can verify the clock is synced by running timedatectl and checking that "System clock synchronized" reads "yes".
Unable to bind network port
This error means TeamSpeak can't claim one of the ports it needs on startup — usually because another process is already using it, or a previous TeamSpeak instance didn't shut down cleanly and left a stale PID file. First, check if something else is occupying the default voice port by running sudo ss -ulnp | grep 9987 (and sudo ss -tlnp | grep 30033 for file transfer). If you see another process listed, stop it or configure TeamSpeak to use a different port via the ts3server.ini file.
For more VPS configuration and set up guides visit our blog.