MetaTrader 4 is a versatile software that can be utilized to trade anything from forex to cryptocurrencies, commodities, indices, and more. If you read our MetaTrader installation guide, you’ll know that having good hardware on a fast, stable connection is essential if you want to have any success with trading. Even more important, though, is knowing how to actually use the software safely and effectively.
This follow-up tutorial will show you how to use MetaTrader 4 on your Windows or Linux forex VPS. We’ll be covering aspects such as account creation, opening and closing positions, chart customization, price alerts, and more.
What we won’t cover is trading strategy – we’re tech and software experts, not finance professionals. Any trades depicted in this guide are purely for demonstration purposes and are not intended as advice. You should use a demo account to familiarize yourself with the software before making any trades.
With that said, let’s get started. Here’s how to use Meta Trader 4:
Setting up your account
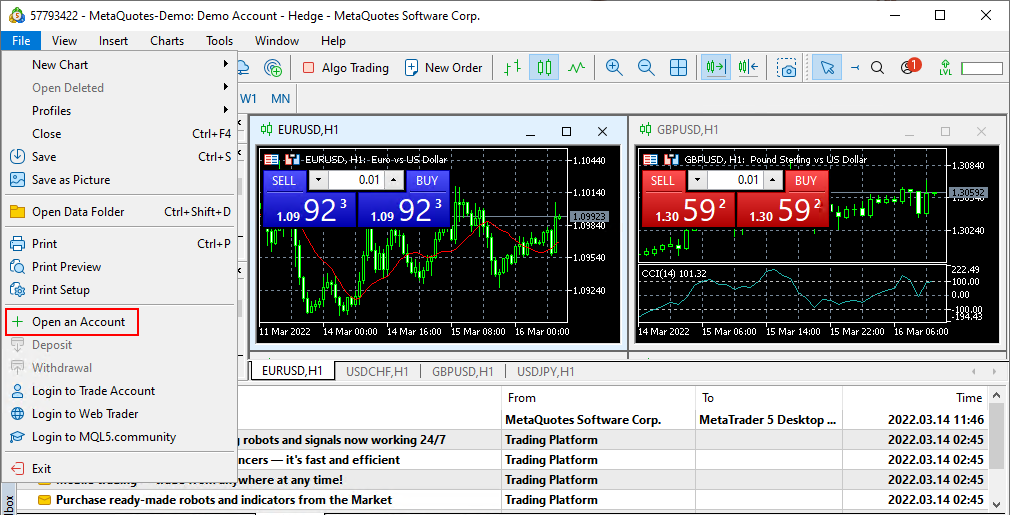
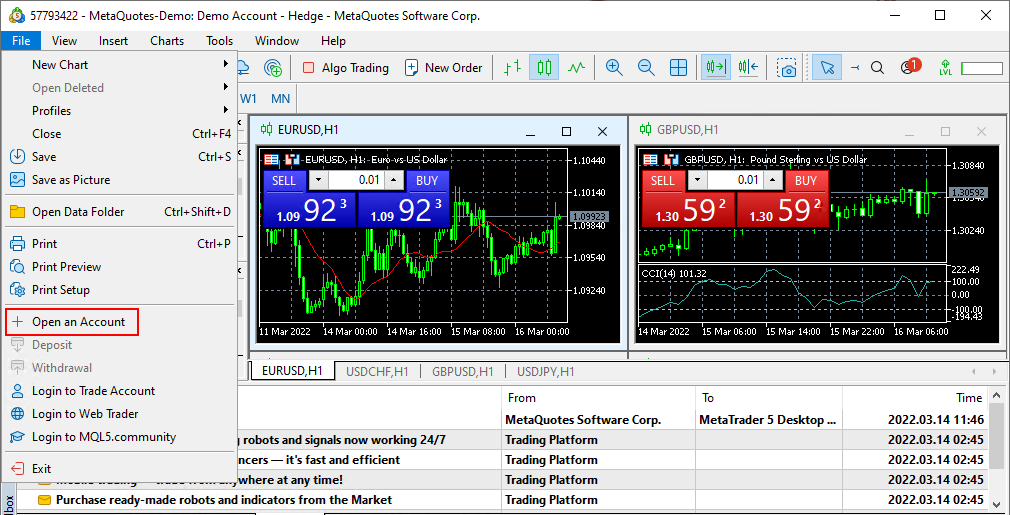
Before you do anything, you’ll likely want to set up a demo account with MetaTrader. This will allow you to use a demo account, open an account for live trading, or connect with an existing trade account. We’ll be showing you how to setup up a MetaTrader demo account so you can follow along with this guide without risk. To start this process, press File > + Open an Account in the MetaTrader app.
In the resulting account creation wizard, select MetaQuotes as the company, then on the next screen choose Open a demo account to trade virtual money without risk. Enter your name, email, phone number and other details, then proceed to select your starting money and finalize your account.
MetaTrader will display your generated account login, password, and investor password.
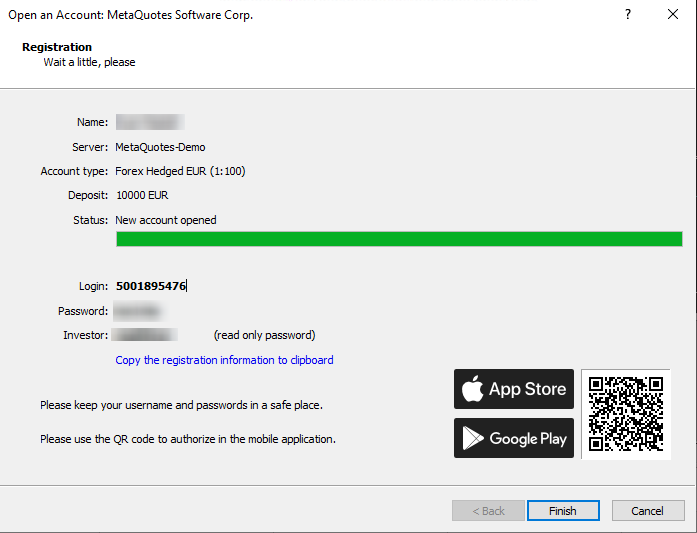
You can use this information to log in to your MetaTrader account via the File > Log in to Trade Account menu if you aren’t logged in automatically.
Opening positions
With your account open, it’s time to open your first position. You can do so by pressing Tools > New Order or the F9 key on your keyboard.
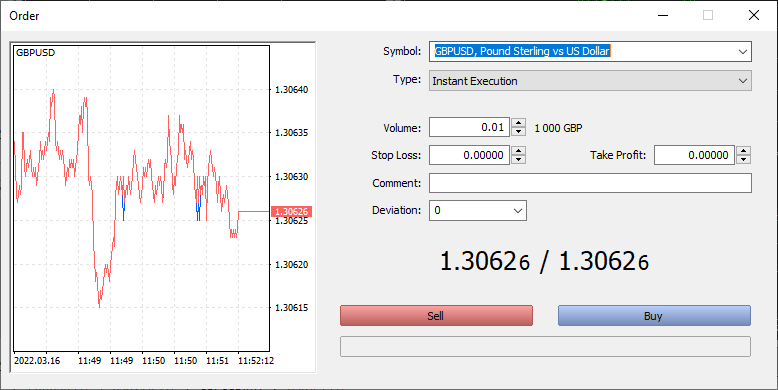
Your order window will look something like this. There are a lot of options packed into a small area, but here are the basics of what you need to know:
The graph: As you’d expect, it shows the price of your currently selected currency on the y-axis and the time on the x-axis. The red line represents the ask line, and the blue the bid line.
Symbol: The market you’re trading on. By default, these will be Forex currency pairs.
Type: Instant execution will place the trade as soon as you press “buy”, while pending order will allow you to pick the price at which your trade opens.
Volume: The number of whatever you’re trading you’d like to trade.
Stop loss: This allows you to define a point at which the trade will automatically close if the market moves against you.
Take profit: A type of pending order that will close a profitable position at a defined price.
Comment: A note added to a trade – either for yourself or somebody else.
If you choose instant execution, you only have to worry about one additional option – maximum deviation from the quoted price. This allows you to reject a trade if prices deviate by more than a defined amount as you place the order.
When you place a pending order you’ll need to choose the type of pending order (Buy Limit, Sell Limit, Buy Stop, or Sell Stop), as well as the price and expiry date/time.
Monitoring positions
With your orders placed, you’ll want to keep an eye on them so you know when to sell or close your positions. You can do so via the Trade tab at the bottom of your MetaTrader window. If you don’t see this, it’s likely because you’ve closed your toolbox, which you can open again with Ctrl + T.

As well as the time, volume and price you bought/sold at, you can see the profit on the right-hand side. When you want to close a position, you can simply press the x in the profit column or right-click the order and choose Close Position.
Modifying positions
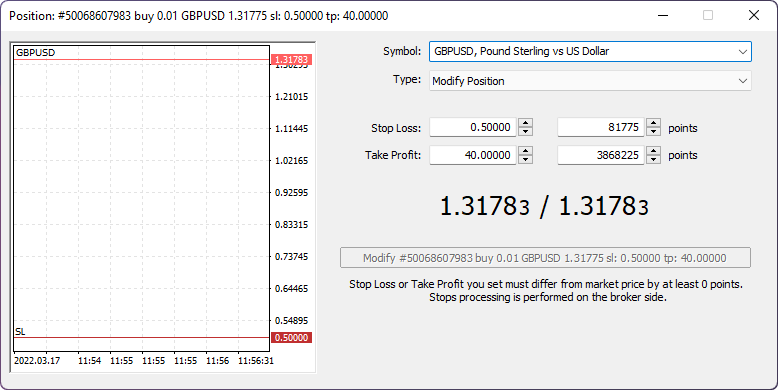
You can also modify the stops and limits of positions by right-clicking, selecting Modify or Delete, then pressing Modify to save the changes.
Viewing trade history
Once you have completed trades, you can view them in your trade history which is accessed by opening the History tab at the bottom of your Toolbox window.

If you right-click this window you can choose whether you want to see positions, deals and orders, as well as customize the symbols, volumes, and history period. You can also export the entries as a trade report.
Adding price alerts
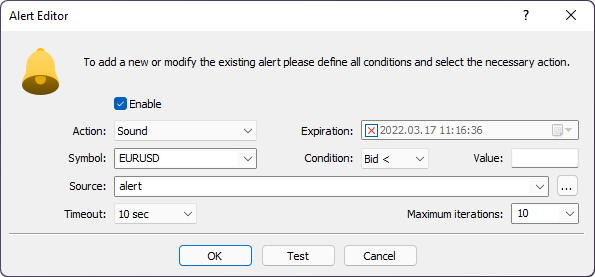
As you won’t be around to keep an eye on your charts and positions 24/7, setting up price alerts is a good idea. You can do so by opening the Alerts tab in your toolbox, right-clicking, and pressing Create.
You’ll see a variety of options to customize your alert, including whether it’s delivered as a sound, notification, or email, which symbol it’s for, and the condition that triggers it.

Customizing MetaTrader charts
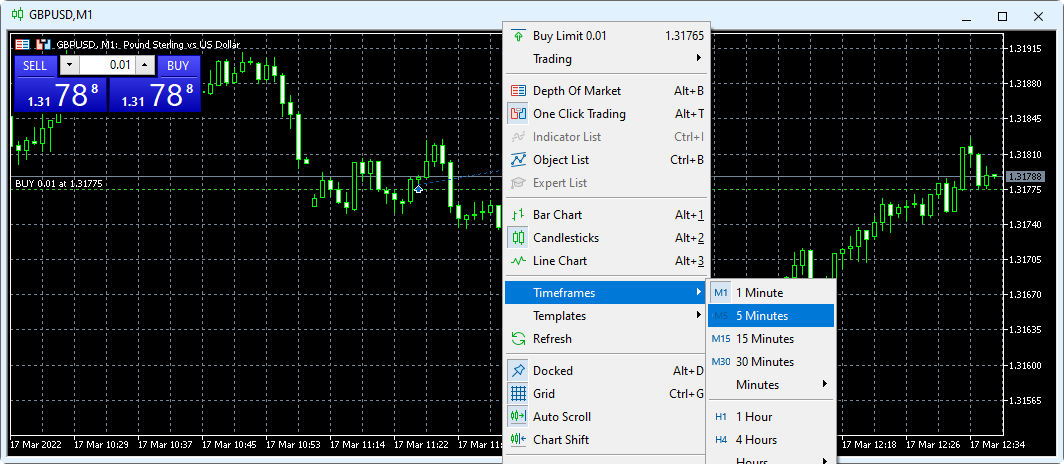
Now that you’re familiarized with the basics, you may want to modify your charts to better suit your needs. Perhaps the most vital is the ability to change the timeframe by right-clicking a chart and choosing an option from the list. Here you can also change the chart type and other options.
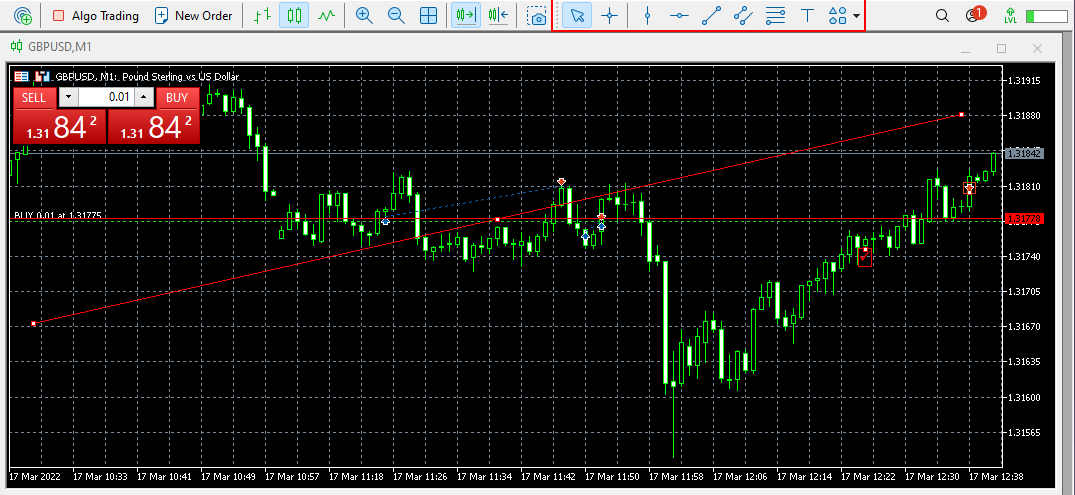
MetaTrader also allows you to annotate using the tools in the toolbar above your chart. These include options such as vertical lines, horizontal lines, trendlines, equidistant channels, text, arrows, labels, and more.
Adding indicators
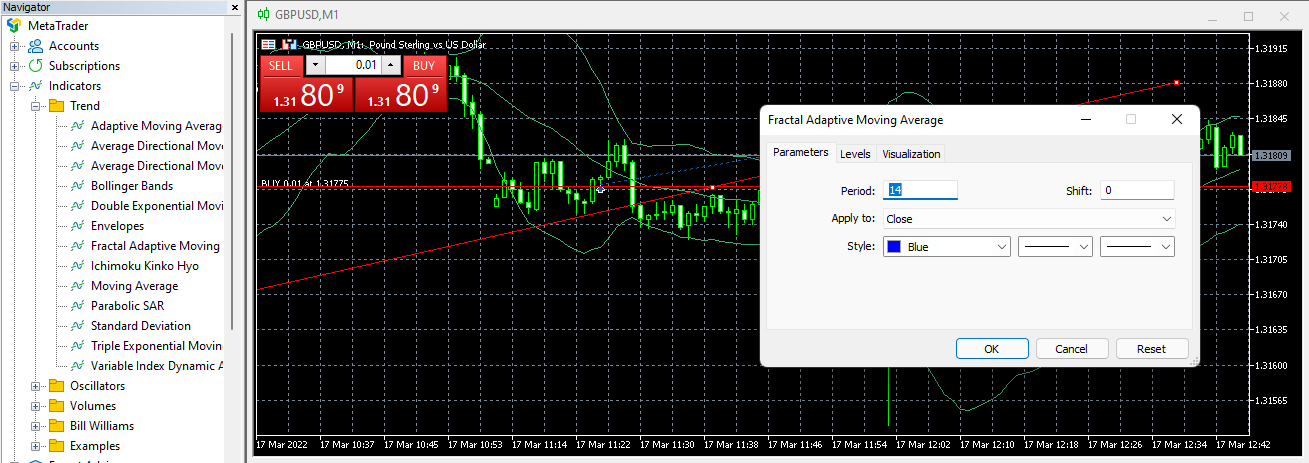
For more advanced additions, you can make use of the indicators in the navigator on the left. To add one, simply expand the Indicators heading and drag one from the sidebar onto your chart. You can then define parameters, colors and other options.
Additional resources
Though it seems like a lot, this just scratches the surface of what’s possible with MetaTrader. As well as its built-in functionality, it benefits from dozens of add-ons and additional indicators developed by third parties. There are also aspects like scripts, signals, and utilities that we haven’t even touched on today.
MetaTrader 4’s help page is a good place to get more information, as well as the Bullion HK user guide. For more detailed guidance, you can also check out the fxpro beginner's guide.
Finally, if you found this guide helpful, we’d appreciate it if you would consider signing up to BitLaunch and giving our Forex VPS’ a go. You can say hello in the live chat after signup for some free test credit.

