
Hosting a website from on a VPS can seem intimidating. Unlike shared hosting, the core setup must be performed by you, primarily in the command line. It's very likely, however, that it's nowhere near as difficult as you expect.
Today we're going to try to demystify the website hosting process on a VPS so that you can feel confident with whatever business, blog, or service you're creating.
Step 1 – Launching your VPS server
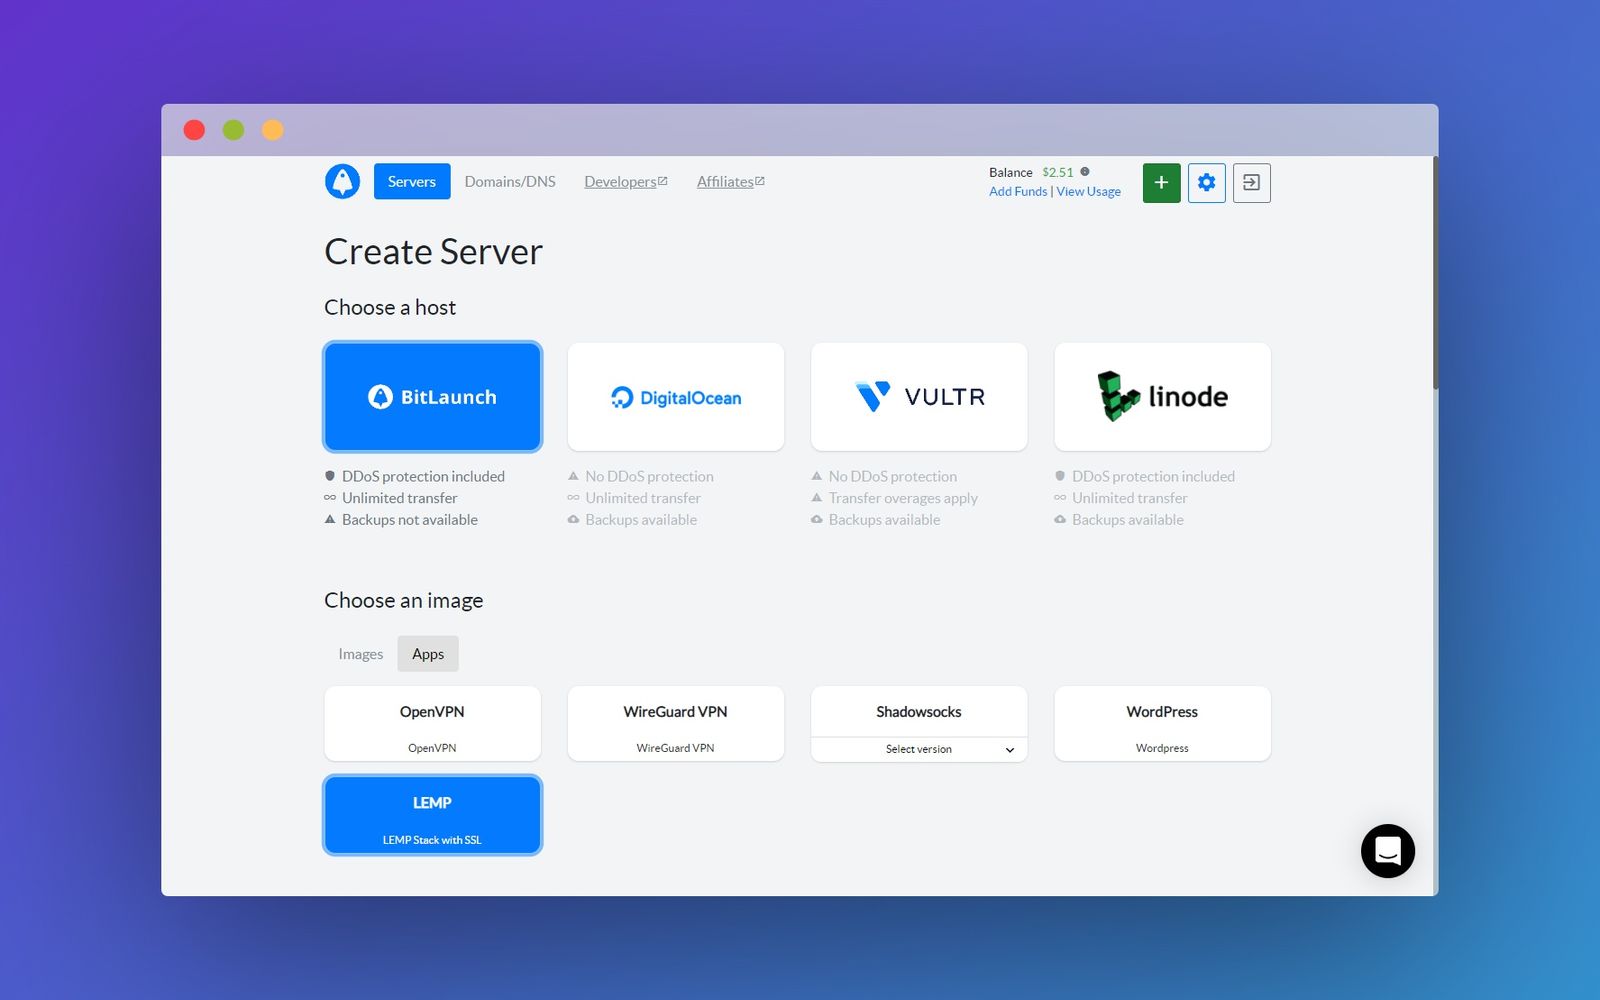
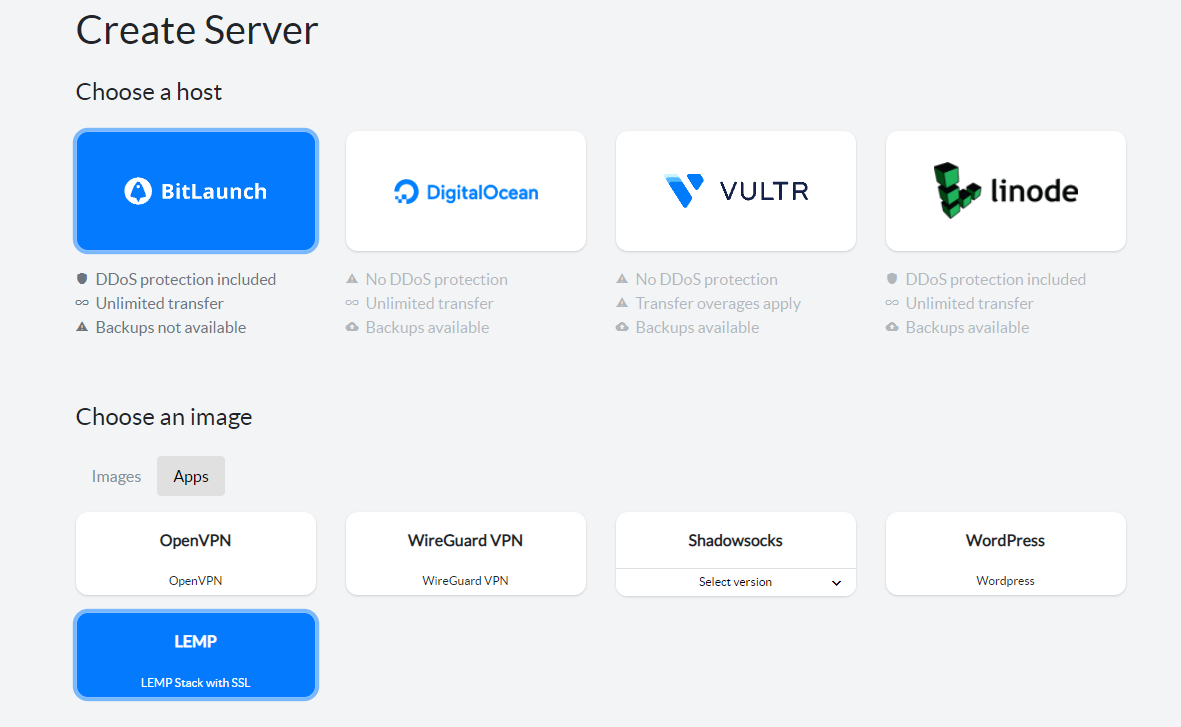
Launching your VPS server should be similar regardless of the provider you choose, but we'll of course be covering the process from a BitLaunch perspective. There are two routes you can take:
- Launch a BitLaunch server with LEMP stack and SSL
- Launch a BitLaunch server and install LEMP/SSL yourself
We'll cover the setup for both use cases below, but first, you'll need to decide what Linux distribution (Image) you're going to use. The main options for web hosting are Ubuntu and CentOS.
 BitLaunch
Once you have chosen, you can either select "LEMP with SSL" in the Apps tab for option one or launch the server directly for option two.
If you already have a domain, enter it as the server name for easier setup later.
Step 2 – Securing your server
Before you launch your website, it's a good idea to make sure that your server is as secure as possible. Doing so from the outset will reduce the chance that your website can be hacked and compromised once it's up and running.
The first step in this process is to update your server. It's always a good idea to keep your server up to date to ensure you have the latest security patches. You can update using:
sudo apt update
sudo apt upgrade
You should also ensure you're not running the service from its default, root account, as this has the privileges to do whatever it likes on the server. Instead, you should create a limited account that has to ask for permission to perform tasks. This way, the damage is limited should the account be compromised. You can do so with:
adduser username
add user username sudo
In CentOS, the commands are instead:
useradd limited_user && passwd limited_user
usermod -aG wheel example_user
Use this account from now on to perform any actions on your server.
For additional security, we then recommend you follow our dedicated VPS security guide.
Step 3 – Creating your website
If you used the BitLaunch LEMP app to launch your server, getting a website up and running shouldn't take long at all. In fact, if you paste your server IP address into your browser, you'll already see the default BitLaunch LEMP webpage. All you have to do is replace it with your actual index page.
The default index page is located at /var/www/html if you used the BitLaunch LEMP app. You can edit it using:
sudo nano /var/www/html/index.htmlWe won't go into depth on how HTML, CCS, and JavaScript work today as there are plenty of resources out there that do it better than we could. If you're just getting into web dev, we recommend:
Of course, you can also upload a complete website to the /html folder via FTP if you have already created one or had one created for you.
Creating your website without the LEMP app
If you didn't use the LEMP app, install LEMP manually by following our dedicated guide, and then set up your nginx virtual hosts.
You can then place your website files in the relevant /html folder and carry on below.
Step 4 – Managing your DNS records
Now you have set up your website and can access it by pasting your IP address in your browser's address bar. However, your users probably won't remember a random jumble of numbers and letters if they want to visit in the future. As a result, you'll want to purchase a domain name from a registrar like Namecheap, GoDaddy, or Hover.
Point the nameservers of your domain to:
- ns1.blnwx.com
- ns2.blnwx.com
- ns3.blnwx.com
- ns4.blnwx.com
You may have to wait 24-48 hours for them to update. Replicate any existing records while you wait for them to complete.
If you named your server after your domain name, your domain should automatically point to your site. If you didn't, you can add an A record that looks something like this:
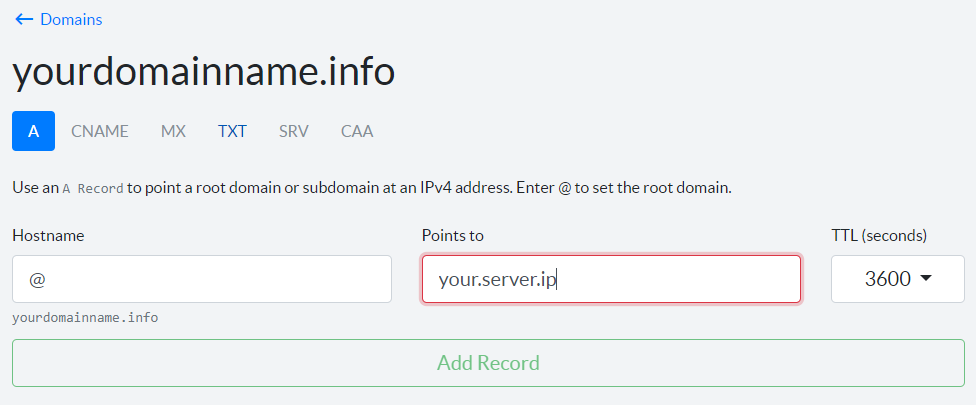
Visit your domain in your browser to check that it is working. If you're still seeing your old website, you may have to wait longer for the nameservers to update. If you're running into Nginx 504 errors, the issue could also be nameserver propagation.
Step 5 – SSL Setup
Now that your domain is pointing to your server, you can set up SSL on it. While technically this step is optional, we highly recommend it for the security of your users and the SEO benefits.
SSL setup with the BitLaunch LEMP app
If you launched your server using the BitLaunch LEMP + SSL app, enabling SSL on your server takes a single command:
install-sslVisit your site and check for the padlock in your browser to see if SSL is enabled.
SSL setup on other hosts
If you're not using the BitLaunch LEMP app, you can follow one of the methods in our dedicated SSL guide or perform the certbot process below:
Install snap
sudo apt install snapdIf you're on a distribution other than Ubuntu, you'll want to use your relevant package manager (yum for centos etc.).
Make sure you have the latest snapd version:
sudo snap install core; sudo snap refresh coreInstall Certbot
We can install Certbot now with the following command:
sudo snap install --classic certbotFor the final step of the installation process, create a symlink to ensure Certbot runs when we type its command:
sudo ln -s /snap/bin/certbot /usr/bin/certbotCreate and install your SSL certificate
From here, we can run a single command to create our certificate and edit the nginx config to automatically serve it:
sudo certbot --nginx -d yourdomainname.info -d www.yourdomainname.infoThat's it. Visit your domain in your local browser to check whether SSL is enabled. You can optionally do a test run of certbot's automatic certificate renewal to make sure that works:
sudo certbot renew --dry-runYou're done!
Your setup is complete and it's time to get on with the core of your work. You can customize your website to your heart's content. Sell products, write a blog, or just create a fun little project. Drop us a line in the live chat if you need any help.