

PyTorch has experienced explosive growth since its initial release in 2016. Though its first year was somewhat uneventful, Meta's decision to open source it in 2017 led to its use in a flurry of deep learning, AI image generation, and computer vision research papers. Today, PyTorch is the dominant library in the model training space and accounts for 70% of AI research implementations.
For the average user, the installation of PyTorch is a key prerequisite when locally hosting many AI image generation, LLM, and vision tools. It comes in CPU and GPU variants, with the GPU variant usually offering better performance for users who have one.
We'll cover the following in this guide:
How to install PyTorch with Docker
Docker is a user-friendly way to install PyTorch that allows you to run it in an isolated container. This can be very useful when using a VPS server or other non-local hosting, as it allows you to easily back up and move your install to other locations. It works on both Windows and Linux, with the same process for each:
Install Docker by following our guide or by running this installer on Windows.
- Open your command line and pull the latest official docker image:
docker pull pytorch/pytorch:latest2. To create a container with GPU acceleration, run:
docker run -it --rm --gpus all --ipc=host pytorch/pytorch:latest bashOr, to create a container without GPU acceleration (CPU), run:
docker run -it --rm pytorch/pytorch:latest bash3. Verify PyTorch installed correctly by running python or python3, followed by:
import torch print(torch.version)If it's working correctly, Python should return your PyTorch version. You can press Ctrl + D to exit Python.
How to install Pytorch in Linux
Pytorch on Linux officially supports most distributions, including Ubuntu, CentOS, Debian, Arch, Fedora, Mint, OpenSUSE, Slackware, and PCLinuxOS. We'll be using Ubuntu as an example below, but you should be able to use the same commands and just substitute apt for your package manager where necessary.
Need a powerful Linux system for PyTorch? Sign up to BitLaunch and gain access to Nvidia A40 servers with up to 48 GB of VRAM and 120 GB RAM.
Pre-requisites
You'll need a Python-specific package manager to install Torch on Linux. Usually, we would recommend Anaconda here, as it handles PyTorch dependencies better, but PyTorch has depreciated support for it. Instead, you can install pip using:
sudo apt install python3-pipNeed help installing Python? See our guide on how to install Python on Ubuntu.
Installing Pytorch with CUDA
If you have a CUDA-capable GPU (any modern Nvidia GPU), you should run the following command in your virtual environment to install Pytorch using the latest CUDA version (12.6 at the time of writing). This will generally offer the best performance for your Torch workloads:
/path/to/venv/bin/pip3 install torch torchvision torchaudio --index-url https://download.pytorch.org/whl/cu126Note that you should use the URL that matches your CUDA version. We recommend you upgrade it before installing PyTorch, but if that is not possible, you can substitute cu126 for cu124, cu118, etc. If you are not using a venv, you can of course run the command without providing a path (pip3 install torch...).
Verify your PyTorch installation is working
You can check your PyTorch installation by running:
/path/to/your/venv/bin/pythonimport torch
x = torch.rand(5, 3)
print(x)It should return tensor followed by a grid of random decimals. You can also list services to check.
Installing PyTorch for CPU
If your system does not support CUDA, you should run the following command instead:
/path/to/venv/bin/pip3 install torch torchvision torchaudio --index-url https://download.pytorch.org/whl/cpuYou can follow the verification steps in the CUDA section above to ensure that it installed correctly. Run the command with just pip3 and no path if you want to install PyTorch globally.
Installing PyTorch on Windows
Windows doesn't usually come with Python installed. So even if you're using a Linux RDP client, you will still have to do so before you can install PyTorch.
The most GUI-friendly way to install Python is to grab the latest release from the official downloads page. You can also use a package manager such as Chocolately if you already have it installed. Note that PyTorch on Windows only supports Python 3.9-3.12, so you should avoid any Python 2 version.
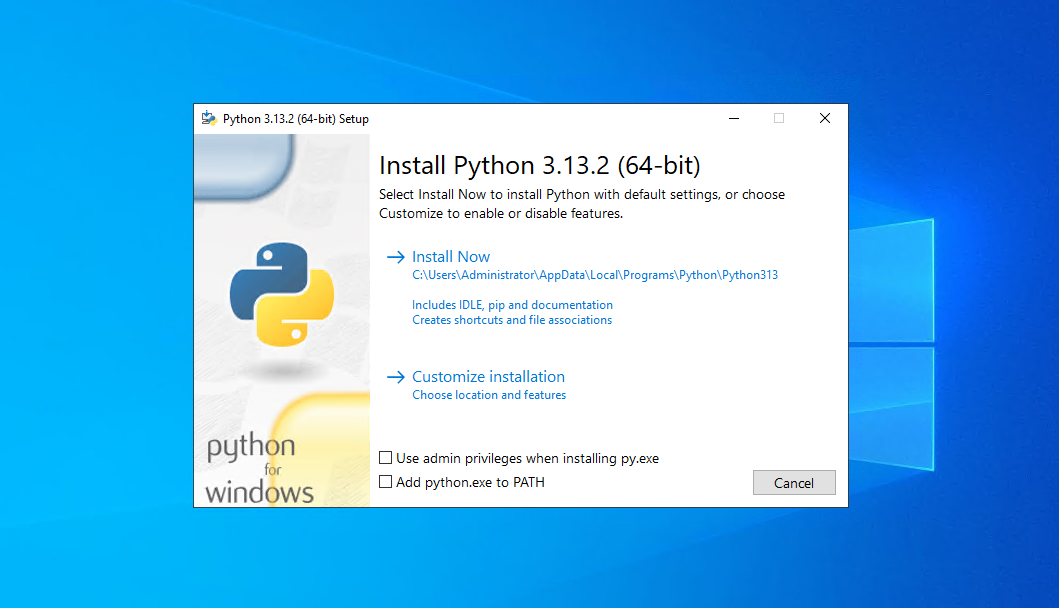
After running the installer, tick "Add python.exe to PATH" and press "Install Now".
Need a powerful Windows system for PyTorch? Sign up to BitLaunch and gain access to Nvidia A40 servers with up to 48 GB of VRAM and 120 GB RAM.
Installing PyTorch globally
The Python setup automatically installs pip, which we'll use to install PyTorch by opening an elevated command prompt and running:
For CUDA-supported devices:
pip3 install torch torchvision torchaudio --index-url https://download.pytorch.org/whl/cu126For CPU-only devices:
pip3 install torch torchvision torchaudioYou can check your PyTorch install by typing python, followed by:
import torch
x = torch.rand(5, 3)
print(x)
It should output a grid of decimal numbers.
Installing PyTorch in your venv
If you want to install PyTorch in an existing virtual environment instead navigate to the location of your Python.exe in the venv (often in the scripts or python_embedded folder), and open a command prompt or PowerShell at the location by pressing Shift + right-click.
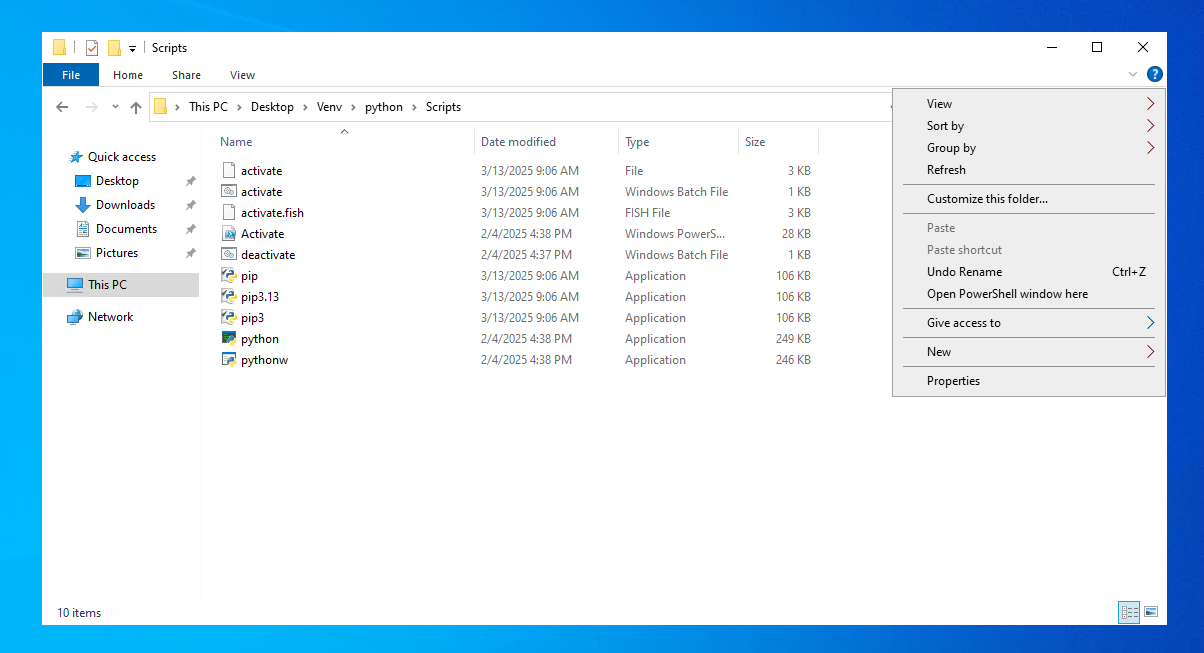
You should then reference the pip in the folder when running your Torch installation command. For example:
pip3.exe install torch torchvision torchaudioYou can run the test command above to make sure it installed successfully.